
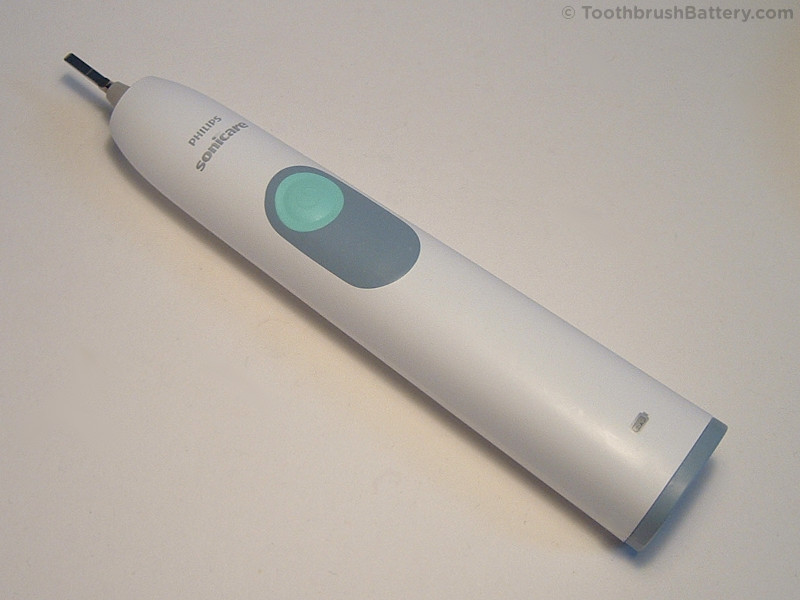
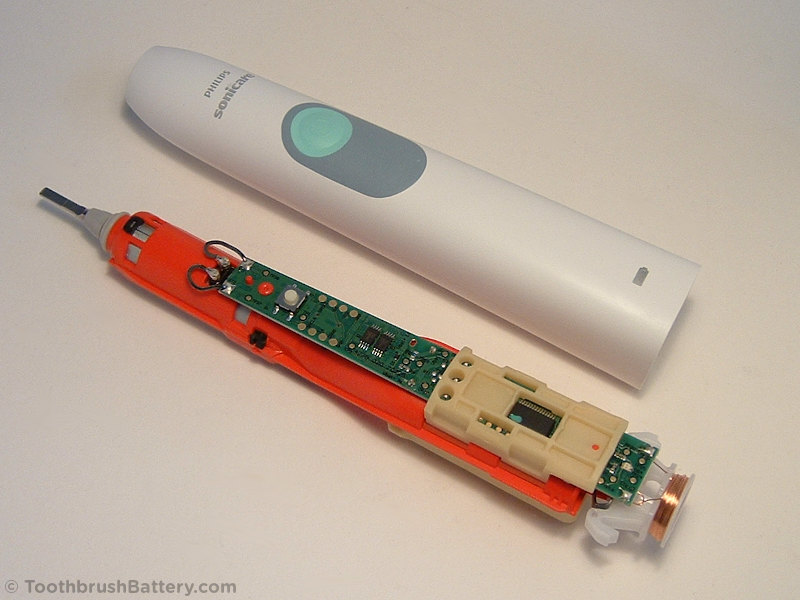
This guide will show you how to open up and dismantle the Philips Sonicare 2 Series electric toothbrush to repair it by replacing its internal rechargeable battery pack. These are great value toothbrushes so are well worth repairing.
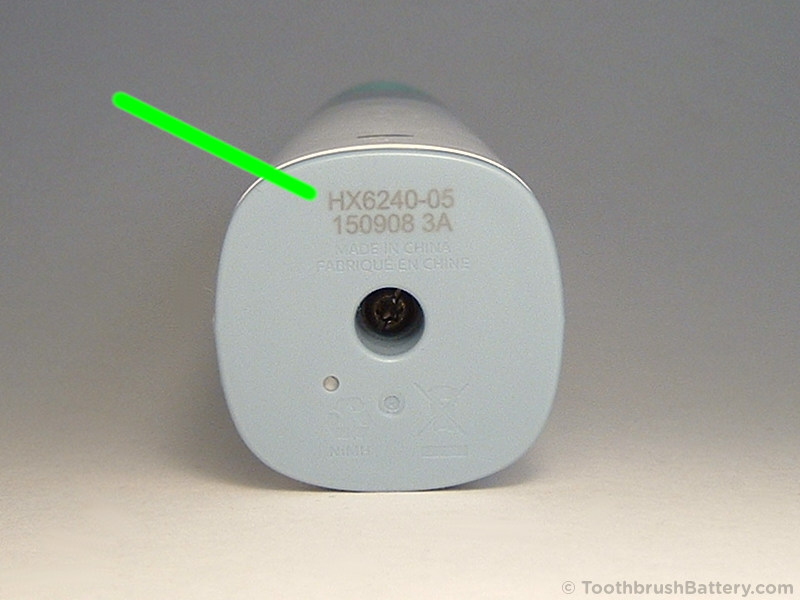
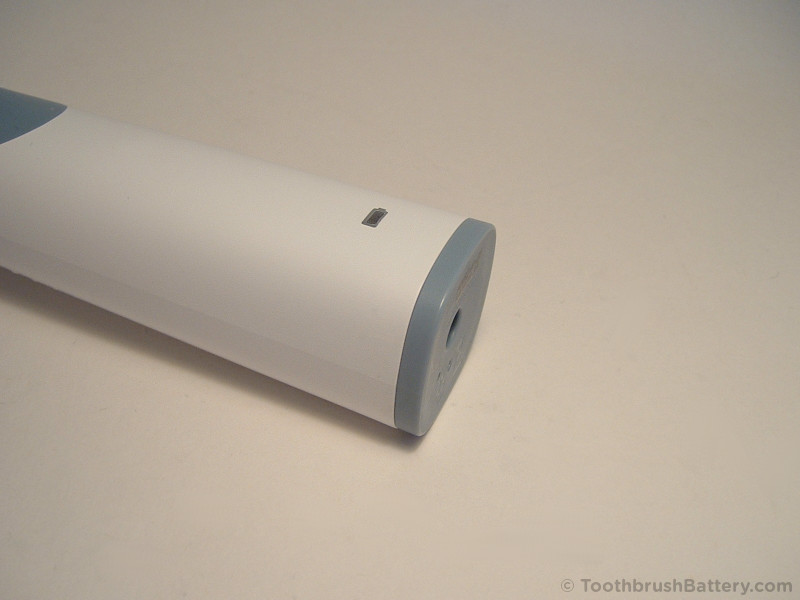
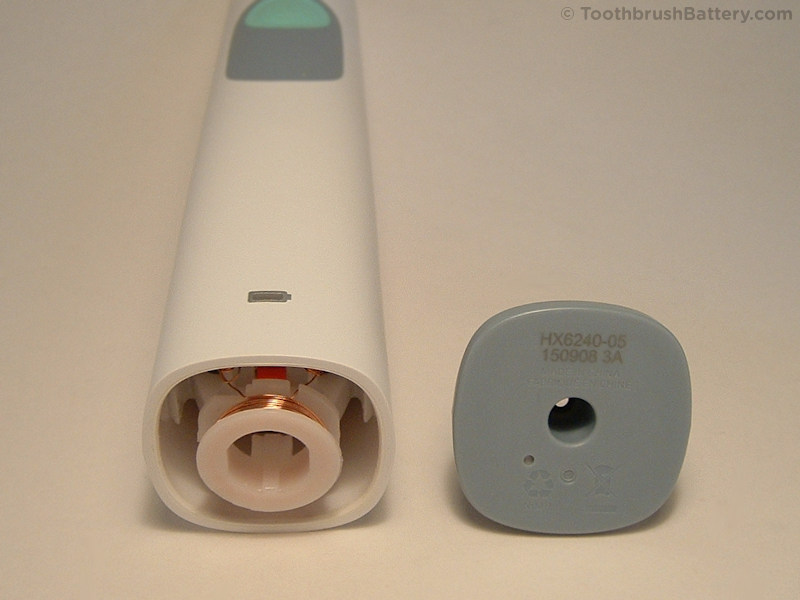
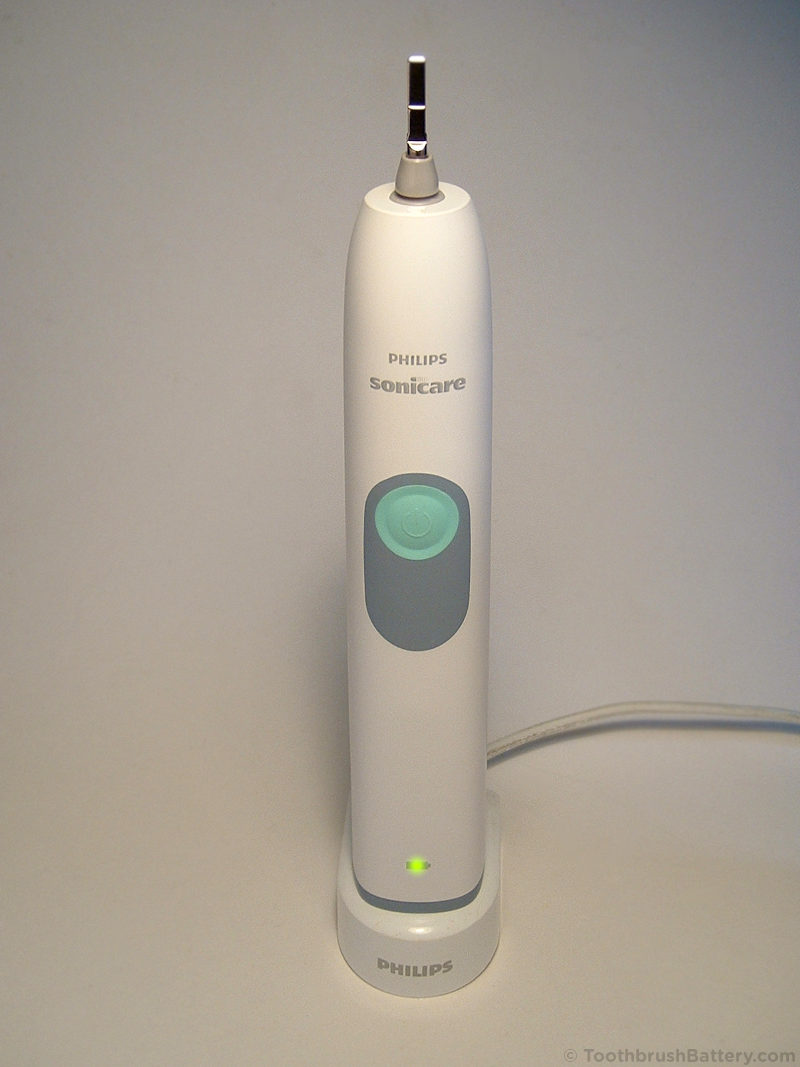
This battery replacement guide covers the Sonicare 2 Series models from Philips. These are marked with HX numbers starting HX62. This includes models marked as HX6210, HX6220, HX6230, HX6240 and HX6250 from the EssentialClean and DailyClean ranges. You can find the HX number of your toothbrush on the bottom of the handle as indicated in the photo below (click photo to enlarge).
For Sonicare toothbrushes with other HX numbers the battery replacement procedure is slightly different so please see our other toothbrush battery replacement guides for those.
The basic method is:
- Open and dismantle handle
- De-solder PCB connections for original battery
- Remove and replace battery
- Solder in new battery
- Reassemble handle
The HX6200 series battery replacement process is documented in detail below along with lots of photos. Click on any picture to enlarge it.
Disclaimer
Any damage or injury to yourself, your toothbrush or anything else is entirely your responsibility. This guide is for professional, educational usage only and is offered without guarantee or liability. Batteries can be dangerous if short-circuited or mis-handled, and can overheat if you do not observe all handling precautions. Always wear safety glasses when soldering and cutting.
Tools, Parts & Equipment
- Philips Sonicare 2 Series electric toothbrush
- Soldering iron with chisel tip: Electronics grade (about 18-25 watt)
- Solder: Lead-free silver solder with a flux core is recommended
- Solder sucker (also known as a desoldering pump) and/or desoldering braid/wick
- Small flat-bladed screwdriver: 2 to 4mm wide
- Torx T-9 size screwdriver: Support us by buying yours from ToothbrushBattery.com here
- Small sharp scissors
- Adhesive putty such as Blu Tack to hold the toothbrush to the work surface
- Replacement 2.4V Ni-MH battery pack: Support us by buying yours from ToothbrushBattery.com here
How-To
To start with, remove the brush head from the top of the handle by pulling it straight off.
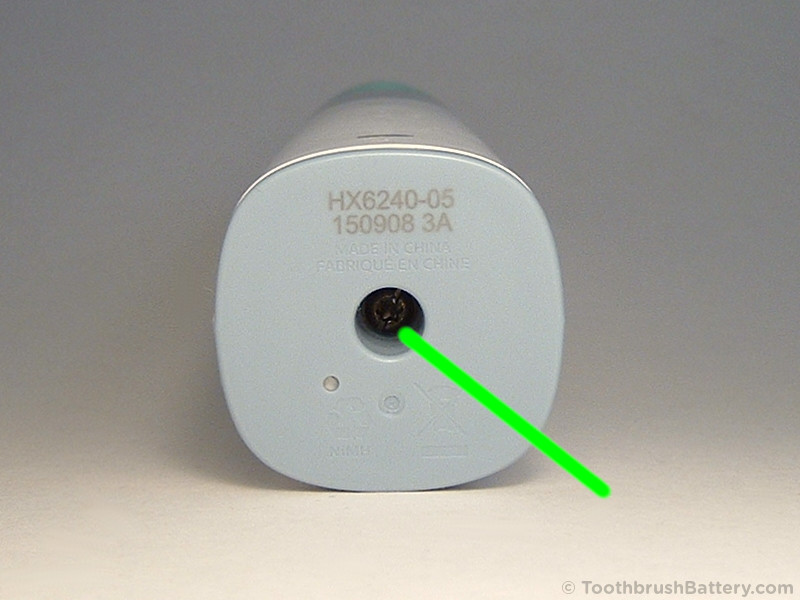
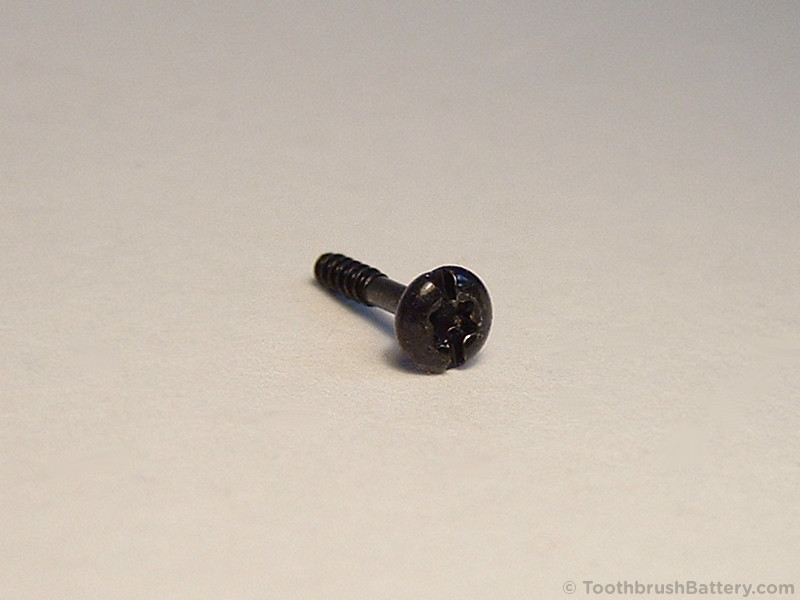
Remove the screw from inside the centre of the base cap (arrowed below) using a T-9 size torx screwdriver. If you don’t have one of these please support us in writing these repair guides by buying your screwdriver from us at ToothbrushBattery.com here. Some versions of the 2 series might not have a screw fitted.
With the screw removed you can now pull the base cap off. You might be able to do this by hand but if there is a build-up of dried toothpaste in the seam you might need to use a blunt metal or plastic spudger, or similar tool to start prying the cap off.
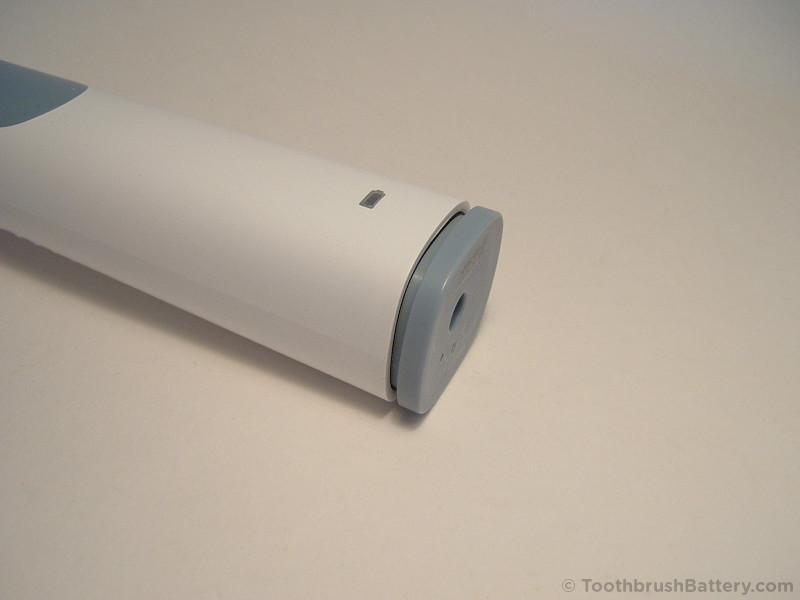

Store the cap and the screw safely.
Looking inside the bottom of the handle you can see the two white clips holding the internals in place (arrowed below).
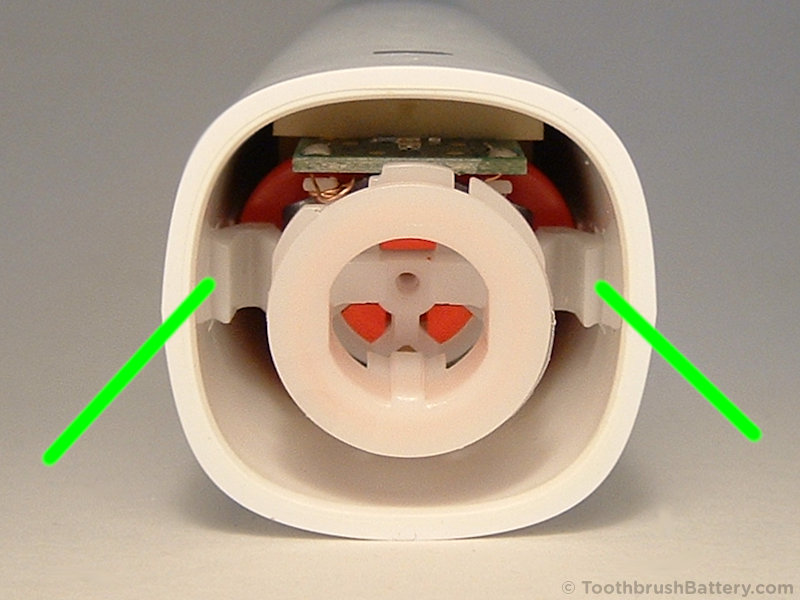
While applying light pressure to the metal shaft at the top of the toothbrush use a flat-bladed screwdriver to release each clip in turn by moving it away from the internal wall of the handle casing.

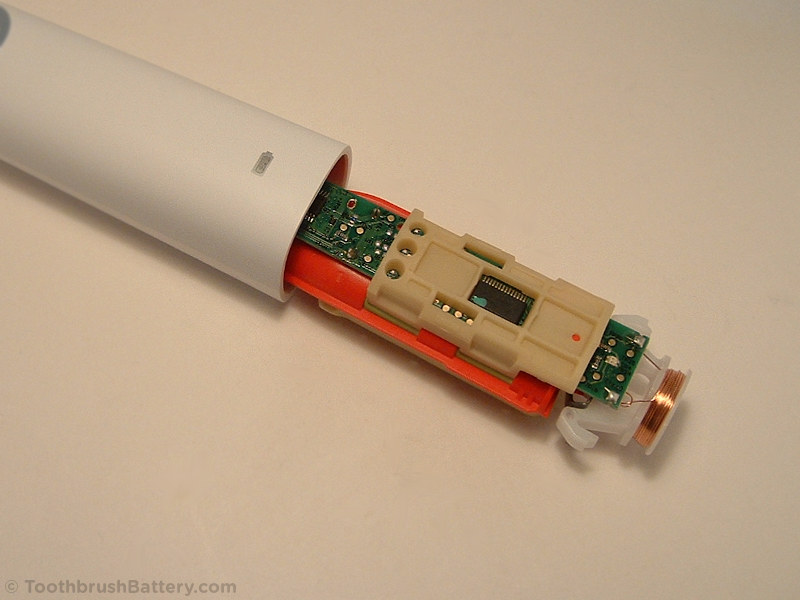
With both clips released you can start to push the internals of the toothbrush out from the top end.
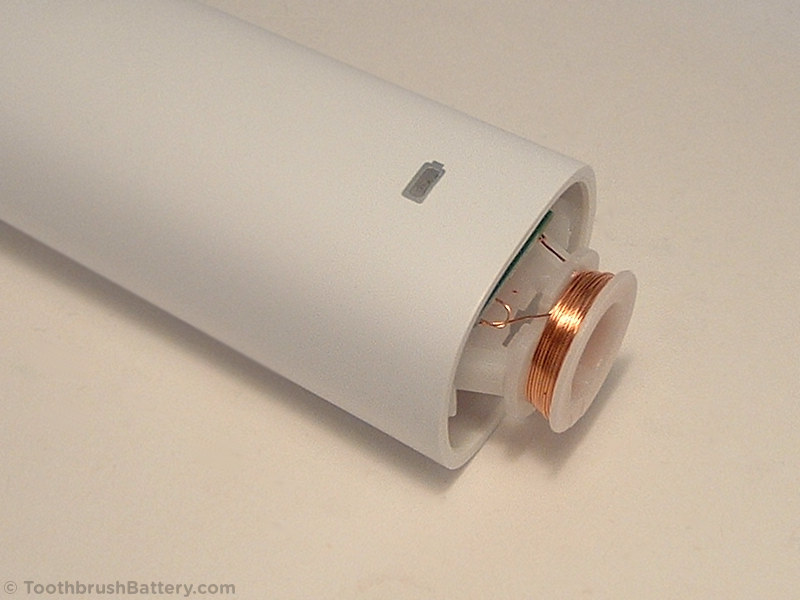
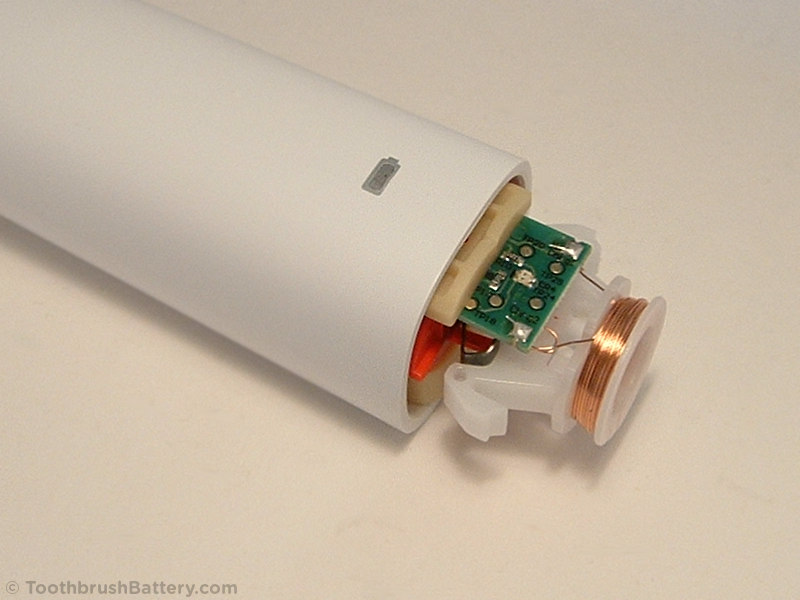
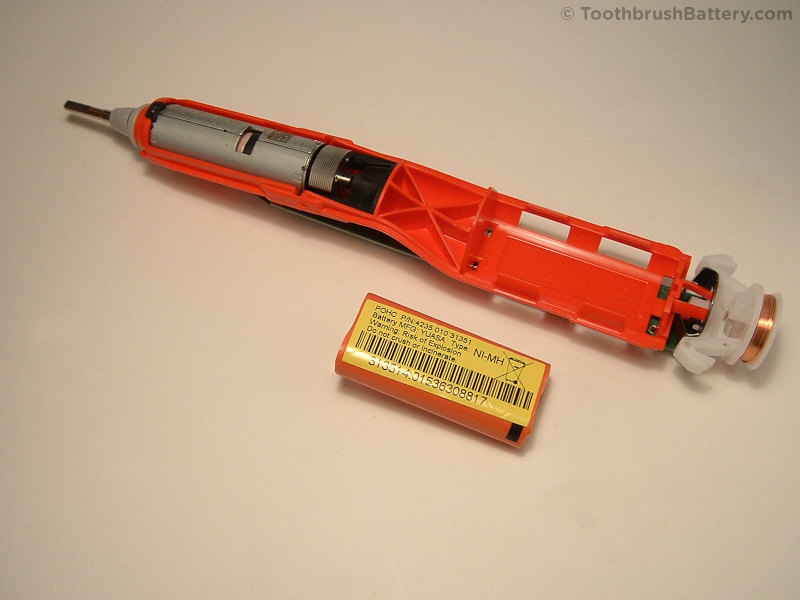
Fully remove the inner workings from the handle casing.
With the toothbrush open, take a look at the grey rubber seal around the metal shaft. There is a solid grey collar which retains the soft grey seal. If this seal is mouldy, hardened or split it can be replaced with one of our new Sonicare shaft seals to stop water getting past the shaft and into the motor and electronics.

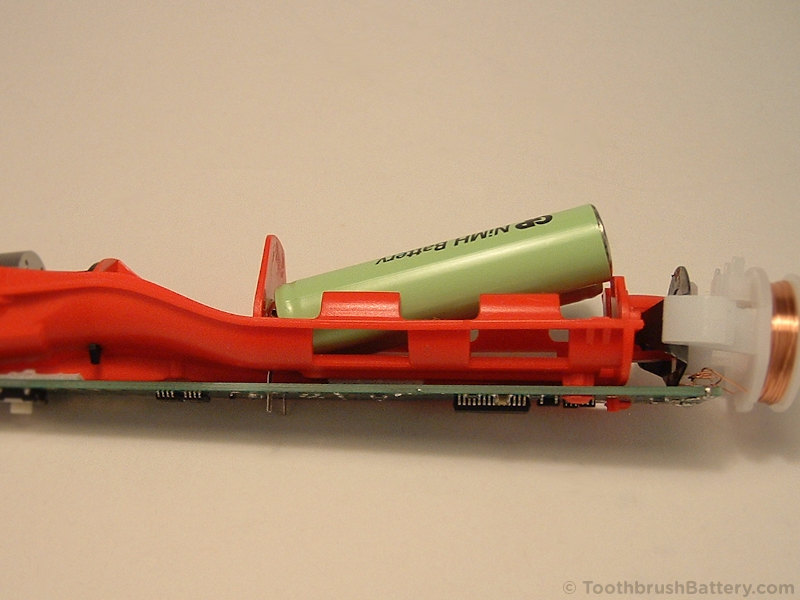
Unclip the beige rubber cover from the PCB.

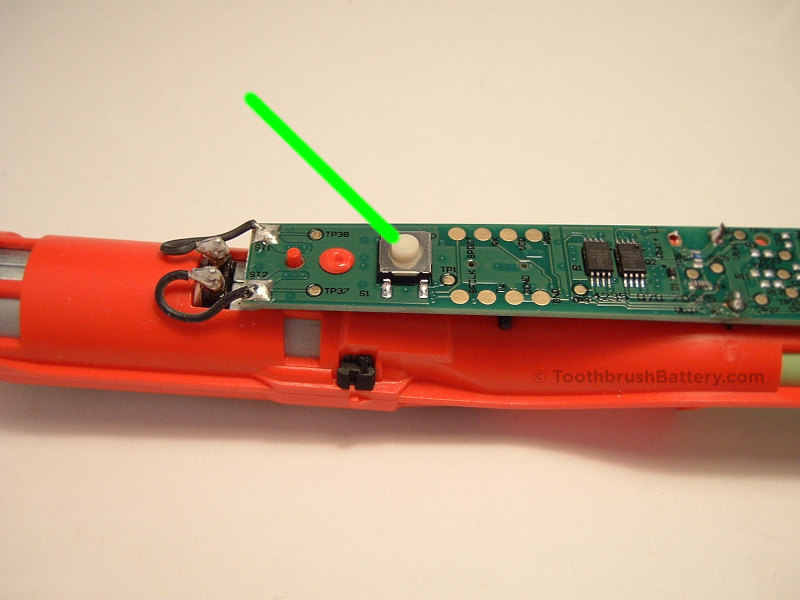
Turn the mechanism over, being careful not to press down on the power button.
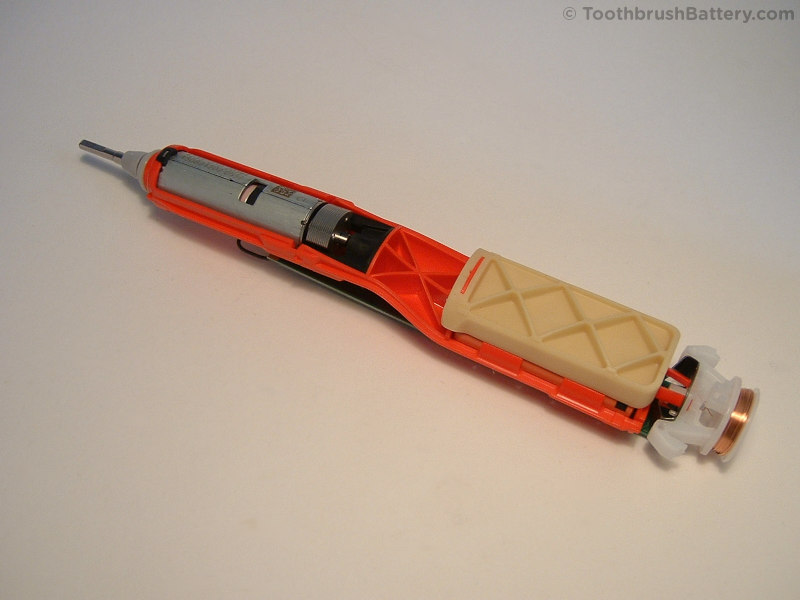
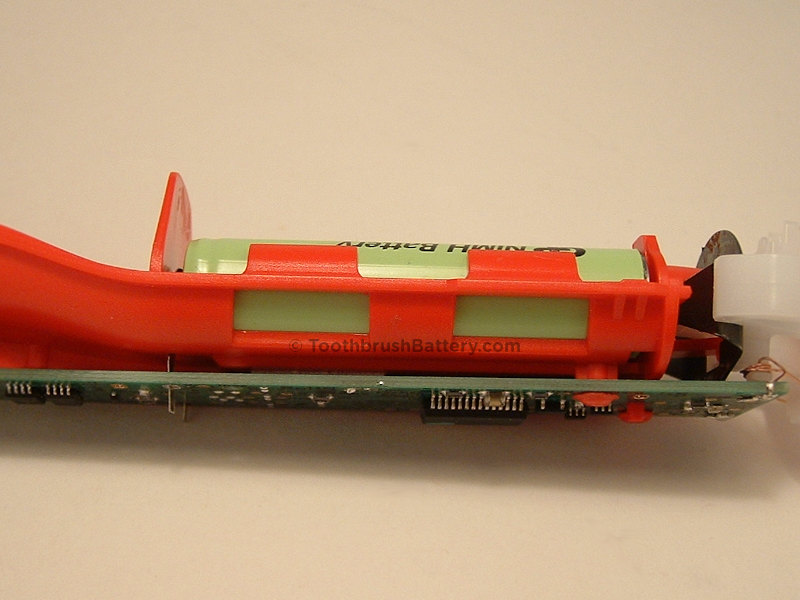
Remove the rubber cover from the battery.

Time to get your soldering iron warmed up now! We recommend using an electronics-grade iron of around 18 to 25W with a chisel tip.
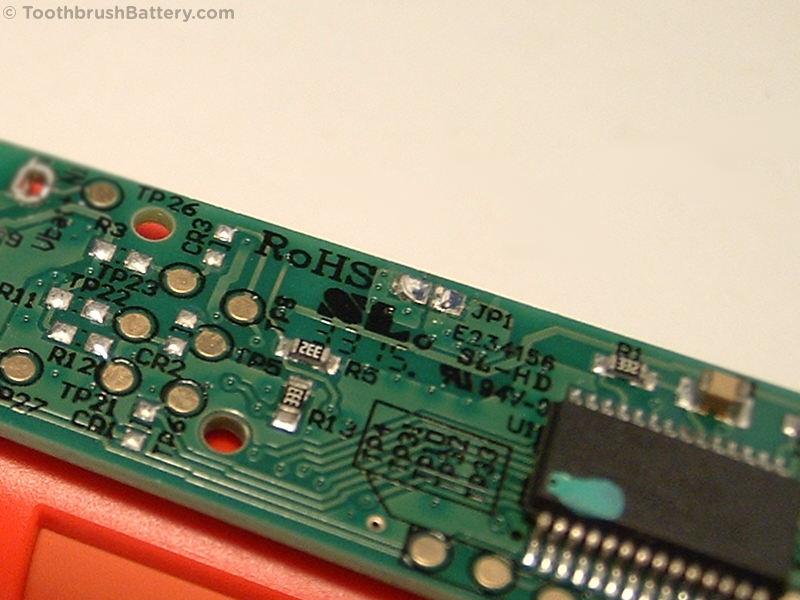
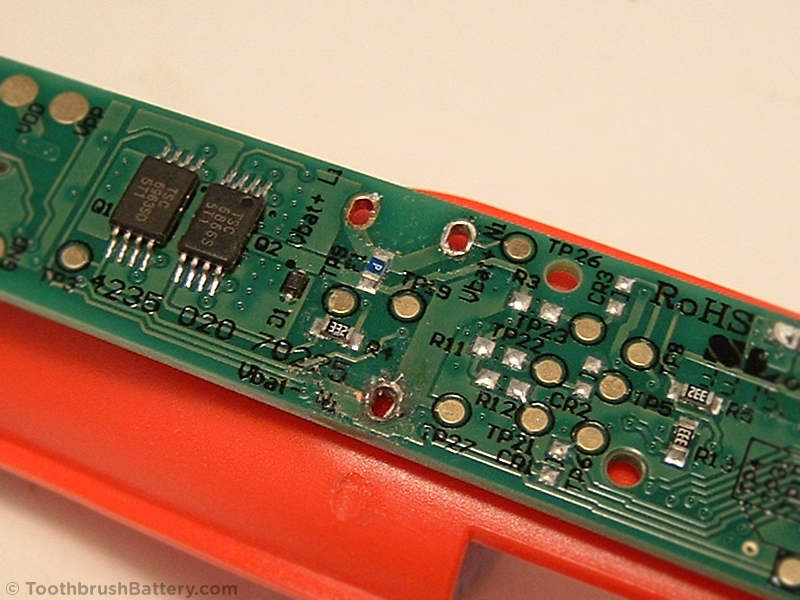
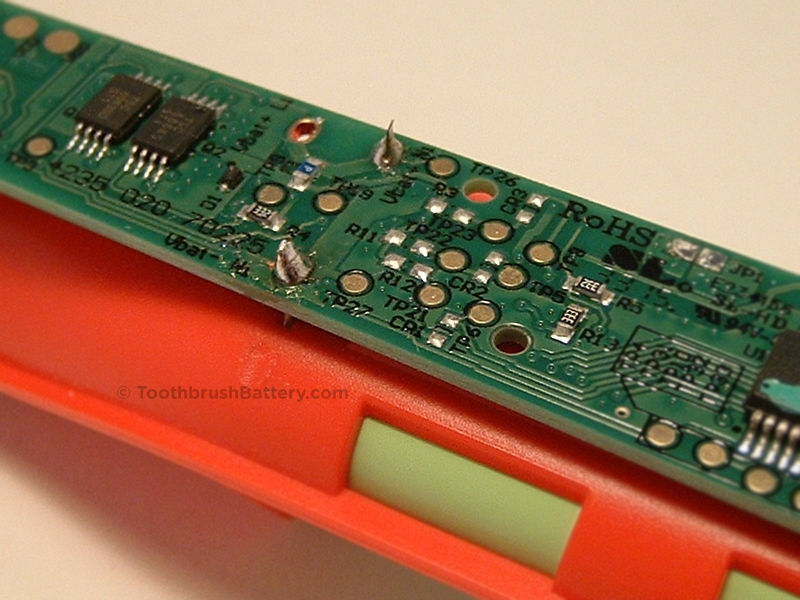
Locate the JP1 connection on the PCB (arrowed below).
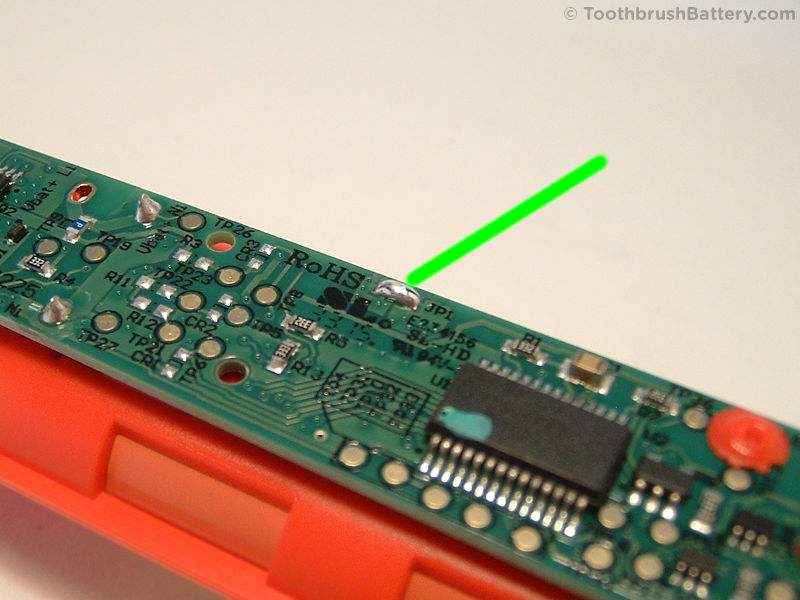
Use a solder sucker/desoldering braid to remove the solder from JP1 and break the connection. This will electrically disconnect the battery so if you slip on the next step you won’t cause a short-circuit and damage any components.
Locate the positive (Vbat+ Ni) and negative (Vbat- Ni) solder points for the battery connections.
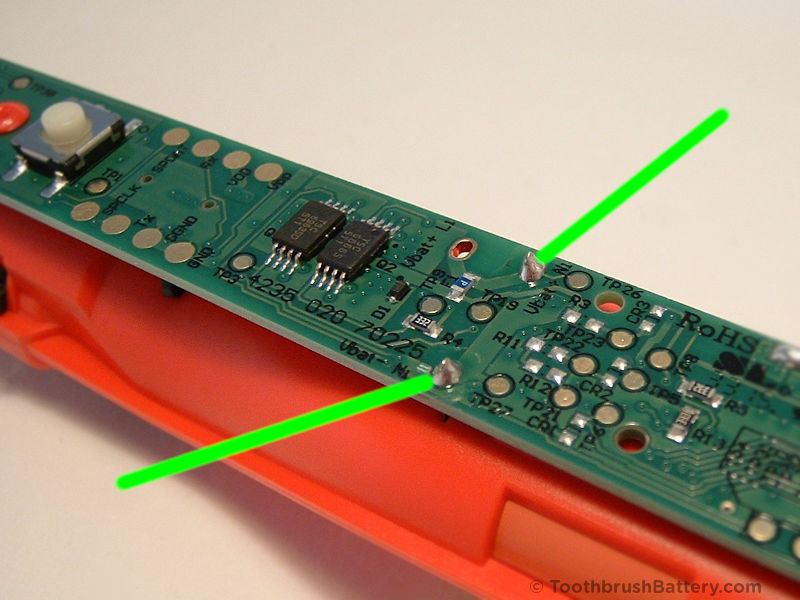
Remove as much solder from each connection as you can. If this goes well you will be able to see through the holes and the metal tags will be able to move within the holes, as seen on Vbat+ pictured below. If there is still a small amount of solder remaining in the hole as seen on Vbat- below, you will need to reheat that connection while you remove the battery.
You can push down on the battery through the slots in the red frame to start removing it, or use a screwdriver while reheating the solder connections.

Remove the battery from its holder.

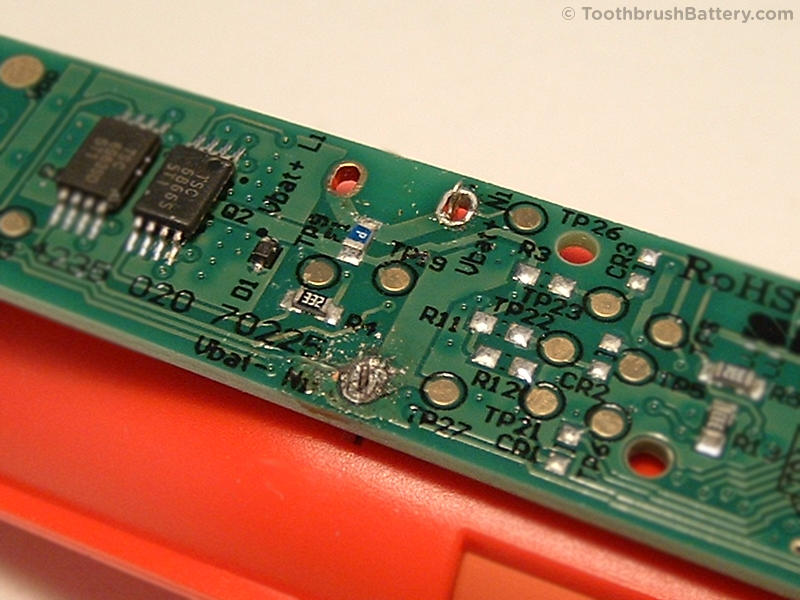
Go back and clean up the solder holes as best you can. Don’t worry if you can’t get all the solder out as you can reheat it during installation of the new pack.
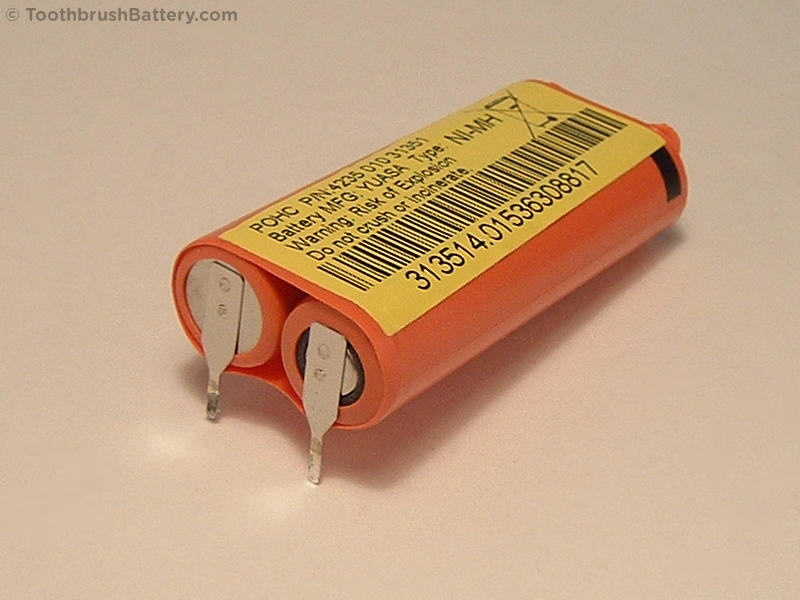
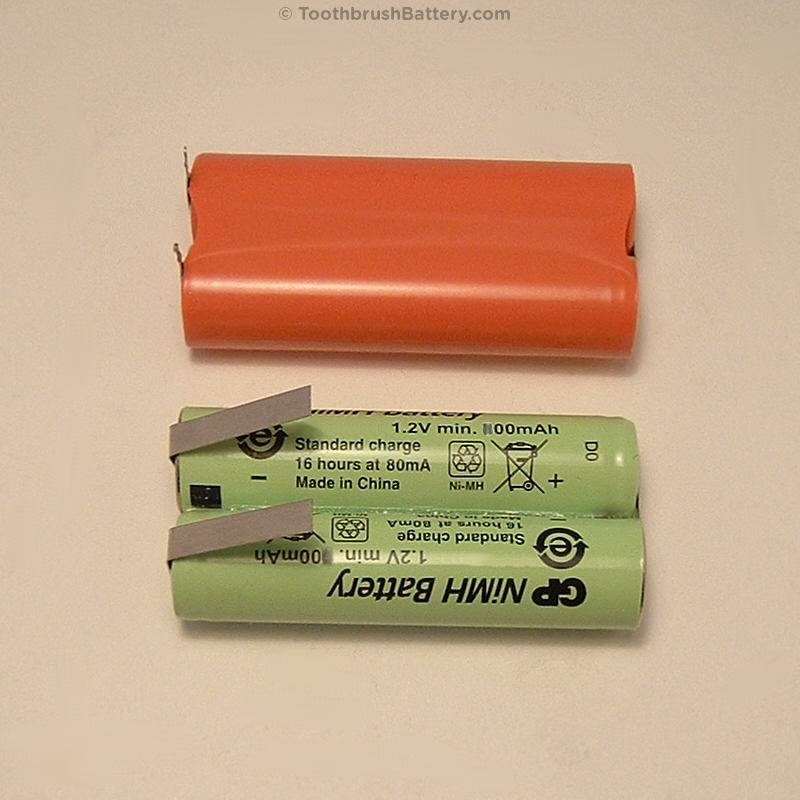
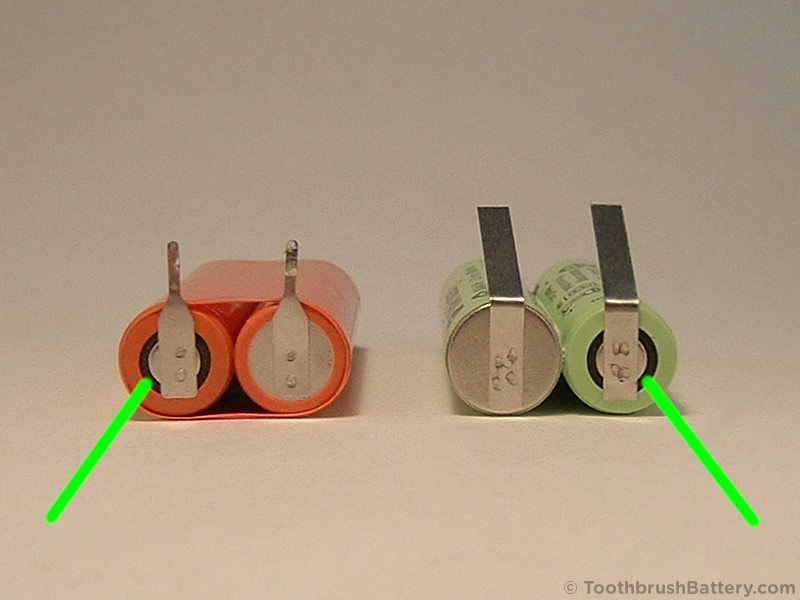
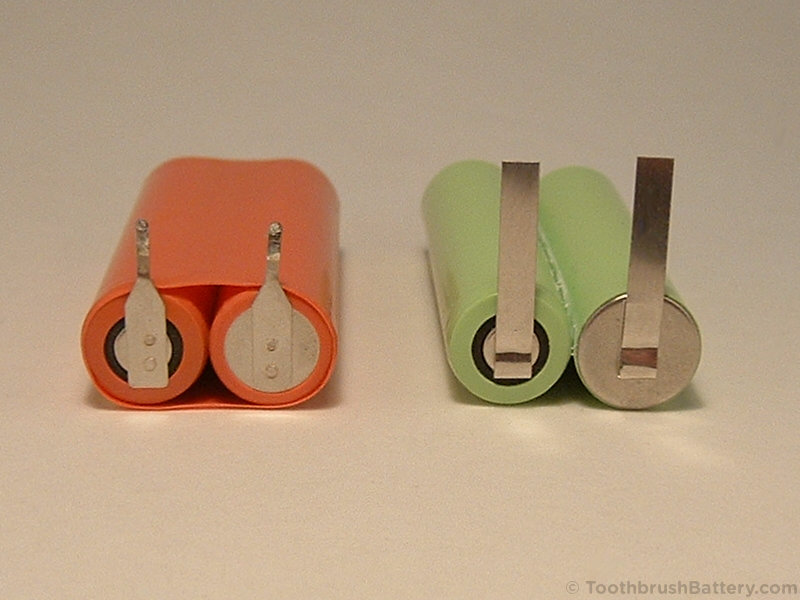
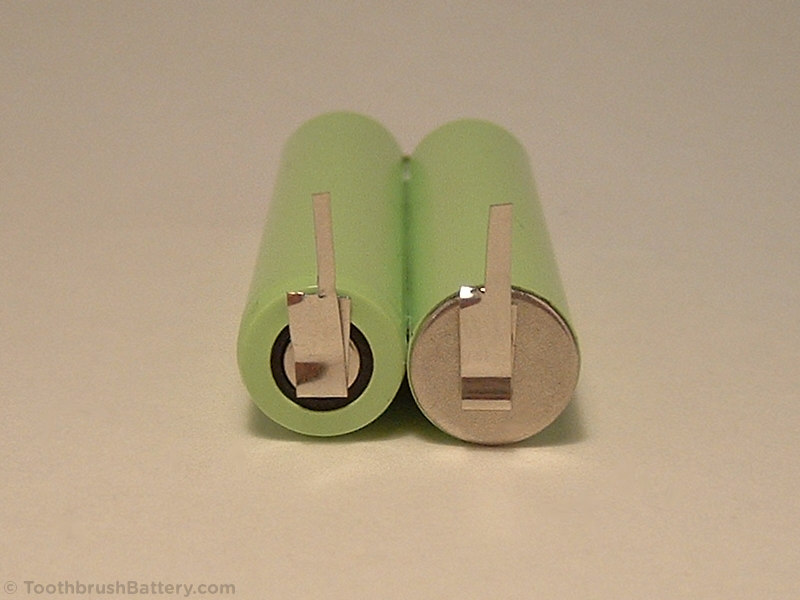
Compare the original battery to its replacement as shown below. Please support us in writing these repair guides by buying your new battery from us at ToothbrushBattery.com
Metal joining strip:

Solder tags:
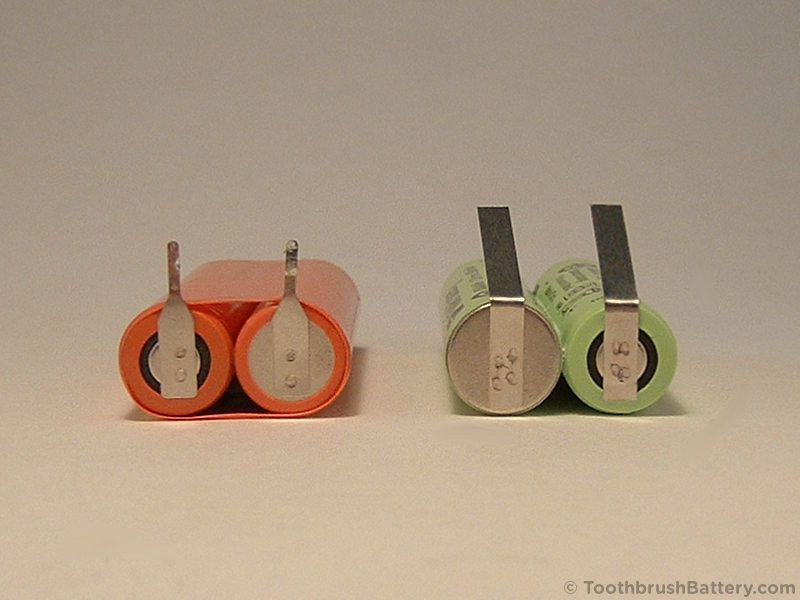
As indicated by the black plastic disc on the end of one cell, you can see that on the original orange battery back the positive terminal is on the left and on the new pack the positive terminal is on the right.
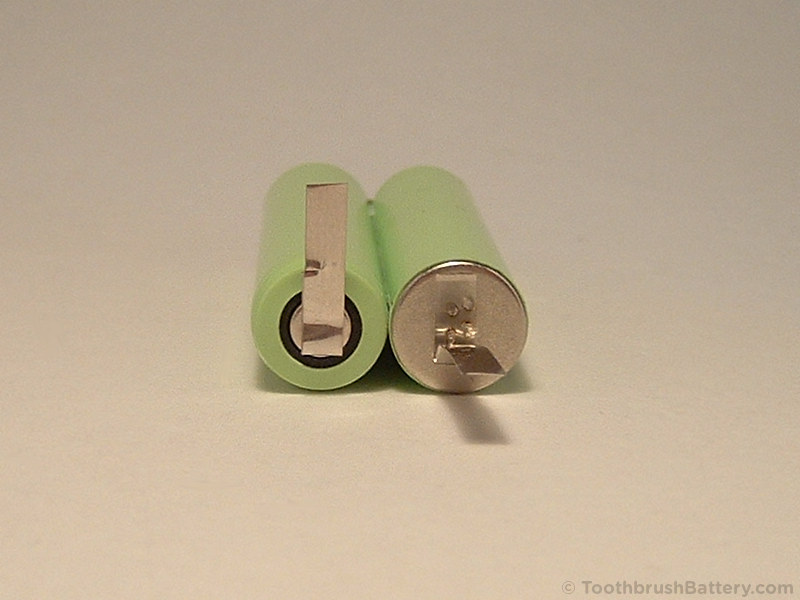
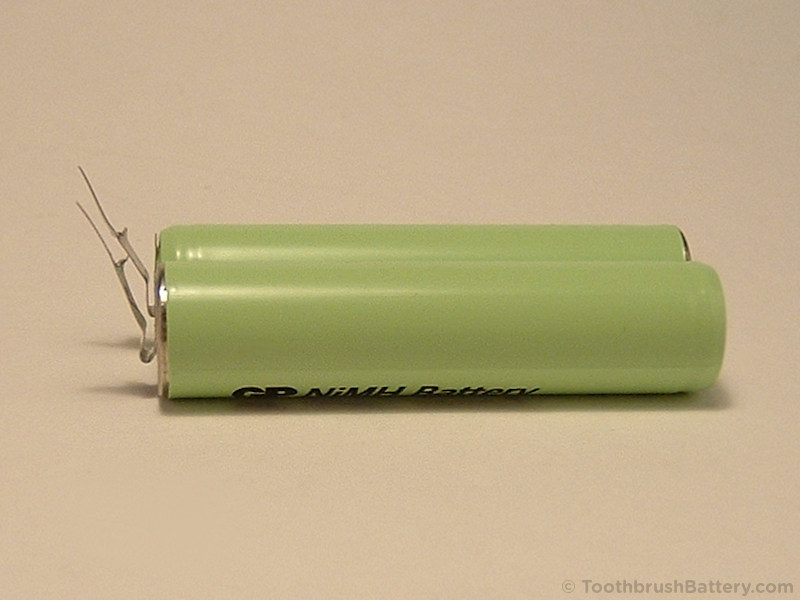
You can reverse the polarity of the new pack by first folding the metal tags out horizontally.
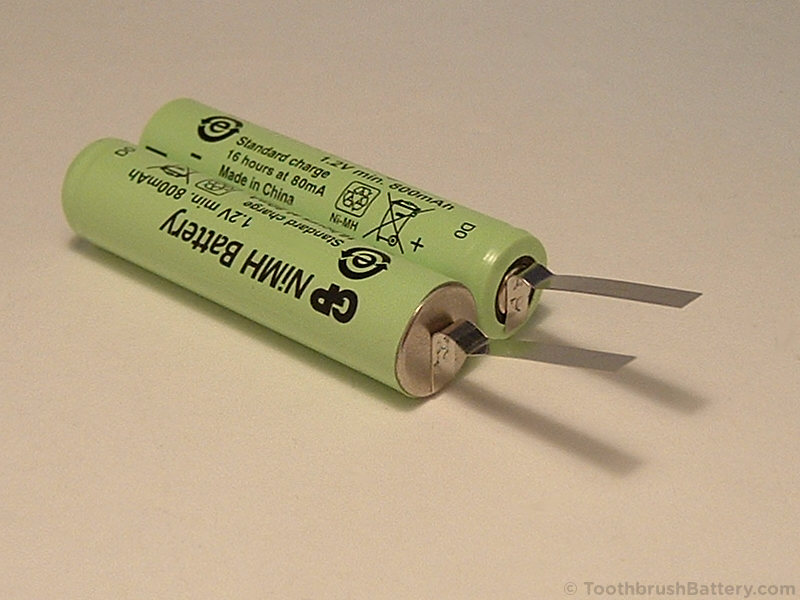
Turn the pack over.
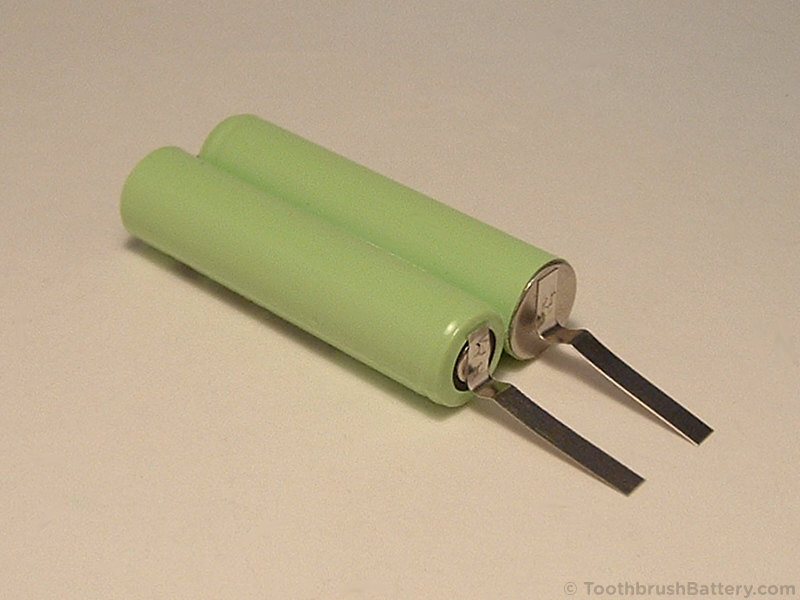
Fold the tags back on themselves so they are pointing upwards.
You can see that the positive terminals on both packs are now on the left.
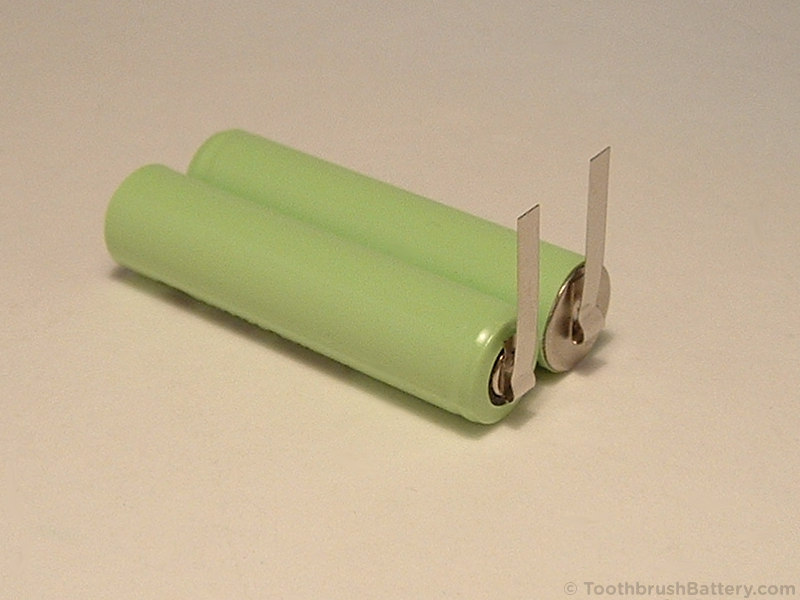
Using a small pair of sharp scissors trim down each solder tag so it is slightly longer than those on the original pack. Being slightly longer will make it easier when installing the new battery. Be careful not to short out the pack with the scissors. You might want to fold each tag down horizontally while you are cutting the other one to avoid accidental short-circuits.
Start very carefully cutting in from the side of one solder tag using the tip of your scissors. You might want to cut only one third of the way in to avoid accidentally cutting the tag right off.
Cut down from the top of the tag so that you are removing slightly more than half the material. Don’t worry if it is slightly too wide as you can trim more off the tip later.
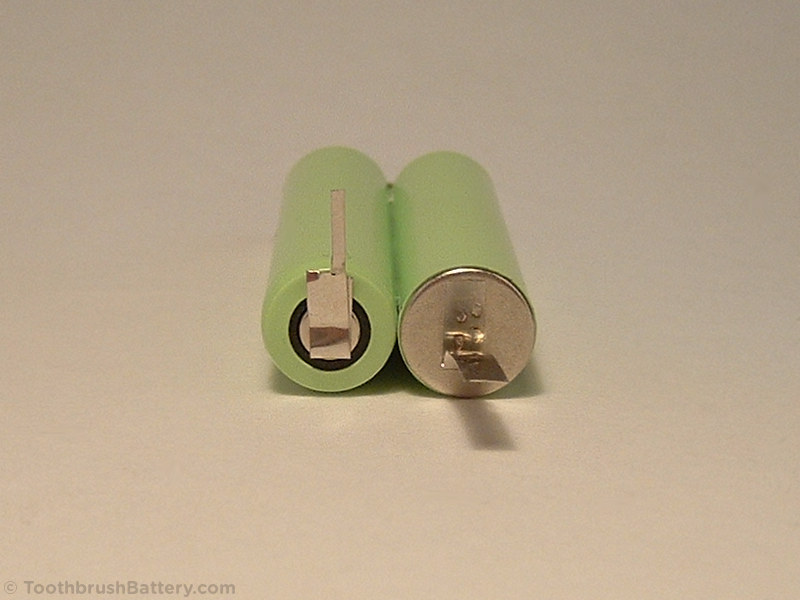
Trim the other tag in the same way.
The remaining tag material is slightly offset to the right, so you can adjust the whole tag where the folded crease is to point the tags slightly off to the left. This will mean that the tips of the tags are above the centre of the cells.
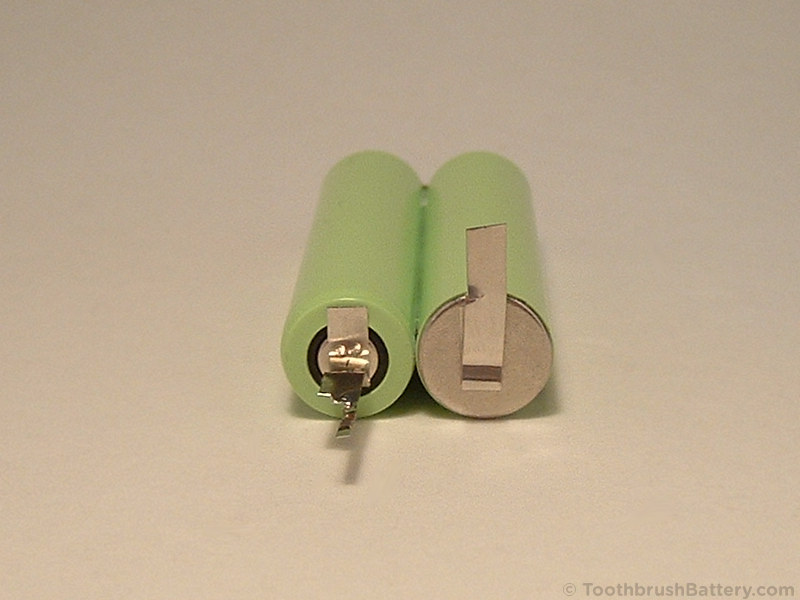
Fold the tags away from the battery slightly to help with pack insertion.
Lower the new pack into the battery holder tags first, so the tips of the tags go through the PCB holes.
Solder the battery tags to the PCB
Rejoin the two JP1 solder pads with solder.

You can now test the new battery by holding the toothbrush firmly and pressing the power button arrowed below. The motor should start running.
If the brush does not switch on you might need to hold the assembly on the charger for 10 seconds to reset the circuitry. Then remove the brush from the charger and switch it on again.
Fit the rubber cover back on the PCB.

Fit the rubber cover back over the battery.

Slide the assembly back inside the handle casing until the clips click ito place. With the button and battery symbol on the casing facing upwards the internals need to have the PCB on the upper side.
Fit the base cap back on the bottom of the handle. With the handle button upwards the text on the base cap needs to be upright.
Fit the screw back into the base cap using the T-9 screwdriver. To avoid cross-threading it gently wind the screw back anti-clockwise before tightening until you feel it drop into its groove.

You now have a fully reassembled Sonicare 2 Series electric toothbrush!
Put your toothbrush on for a full charge, then it is ready to use.
Please recycle your old battery. It is safest to cut off or fold over the solder tags then put sticky tape over the end to avoid short-circuits. You can then take it to your local supermarket battery collection point or civic recycling facility.
Please leave any questions, tips or suggestions about this Philips Sonicare HX6200 battery replacement guide below. Happy brushing!
This does not seem to work for the HX6210. The HX6210 which I own does not have a screw in the base. I can insert a spudger at the bottom seam and pry the cap out perhaps a couple mm, but something seems to be holding it in.
Hi Kelly, you should be able to continue prying the cap out if there is no screw fitted. There is a rubber seal to overcome which might create some resistance while prying the cap out.
I just replaced the battery on my HX6210-2, the bottom green cap was hard to remove because Phillips glued it to the bottom interior plastic part’s rim (piece with copper coil wound around it). Removing it broke some of the plastic on that copper coil part but the copper coil itself remained intact and functional and I was able to get inside and replace the battery. I actually had to break of the rest of the lip to get the cap back (glue inside cap which lip was underneath was now in the way) but the coil still stays in place and allows the toothbrush to charge.
Hi Tristan,
I have the same baseplate with the coil glued to the base plate. How did you manage to both re solder the copper wires to the PCB and re install the base plate? I tried boiling and H2O2 to detach the coil from the base with no luck. Fun design.
It would be good to include a description of the symptoms which suggest a new battery is needed. For instance, does reduced brush movement suggest the battery is bad?
Over the years the original battery will gradually lose capacity and will last for fewer and fewer days between recharges. This will usually be when the battery needs replacing. Sometimes corrosion can kill a battery more suddenly but the water ingress that causes this can damage other components too. Reduced brush movement can be due to the motor/solenoid and its linkage needing adjustment or lubrication.
great presentation! perhaps i’ll try doing this sometime.
i am wondering if there is an explanation for why one day my sonicare HX 6250 is working, full power green light on when charging then with in 24hrs. it is dead completely dead?
checked other charging stands other sonicare toothbrushes all those work and get charged.
the unit is from 12/2020 so not that old.
any thoughts?
This could be the battery failing but also check for moisture or signs of water damage on the PCB inside the brush.
I cannot find the Sonicare 6200 series replacement batteries on your website. I suggest making battery purchase easy to find to increase your sales.
Hi Sylvan, there is a link to the correct batteries in the list of tools, parts & equipment near the start of the article. You can also use this direct link for Sonicare HX 6200 series batteries.
thank you for this step by step guide! this is the only guide that has safety in mind and requests you to desolder the JP1 jumper.
in the event you get into the same situation as me – if you have a 2-series (eg. HX6220) that **doesn’t** have a screw at it’s base, I used a monkey wrench around the base and metal crowbar spudgers to pry it out.
Awesome walk through. My brush had a permanent yellow light on. I hoped disconnecting and reconnecting battery would fix. Went perfectly until I stupidly tried to check the battery on the contacts after removal and inadvertently rotated it in my hand and thus reversed the polarity frying d1. It glowed nicely for a second 🤔😂🙄. Thanks for your great step by step. Keep up the good work.
Everthing went fine following all described steps of this tutorial. Put it on the charger. After a while on the charger the LED began to flash green and yellow alternating while vibrating (one short, one long) on the charger every few seconds. Any ideas? Thank you a lot in advance
The flashing LEDs and vibrations are the toothbrush giving an error status. This could be a circuitry fault due to moisture damage, stray solder or component damage, or it could be a bad solder connection to the battery. Have a look through our troubleshooting tips too.
Is there a sonicare toothbrush available where I don’t have to go through such a lengthy process if the battery should run out?
Not any more. Philips had the Sonicare PowerUp HX3631 which took 2 x AA batteries but it is now discontinued. Oral-B still sell their Advance Power brush (also called Pro Battery or Pro Health) which takes 2 x AA batteries. Of course you can use AA size Ni-MH rechargeables in these to save you from throwing away the Alkaline batteries all the time. Suitable rechargeable AA batteries would be the Recyko 1300 batteries from GP with the matching charger.
thank you for the disassembly information.
I replaced battery successfully
How do I replace the motor?
I just found a new 6240 in storage but it will not charge. Any way to get the original new battery to start charging?
Have you left your HX6240 on charge for 24 hours? If it won’t switch on after 24 hours on charge then it will likely need a replacement battery. Open the toothbrush handle up before ordering one in case there is corrosion damage on the PCB from the old battery.
Thank you for the write up. I followed all the steps and got the sonicare working again. However the brush seems to be flashing green for over 24 hrs while on the charger. Do you know what the issue might be?
It might need more than 24 hours for the battery to charge fully from empty. After 48 hours it should be finished charging. If the green flashing light hasn’t stopped after 48 hours check your solder connections.
HX6610-01 1530321-3A can this model have its battery changed and if so which one do I buy?
It looks like the Sonicare HX6610 and other HX6600 handles from the 3 Series open up in the same way as shown in this guide. However, they are fitted with a Li-ion battery which is likely to be the same as one of our Sonicare Li-ion replacement batteries.
Your instructions were most helpful. Exactly how my toothbrush came apart. Thank you!
I see “Vbat+ L1” above “Vbat+ N1.” Does that mean this board supports both NiMH and Li-ion?
If so I have a li-po cell that can fit in place of the two NiMH cells and can wire directly to the Vbat+ L1 and Vbat- L1 points.
It is likely that the board is designed to be used in two different toothbrush models, one with Ni-MH battery and circuitry, and one with Li-ion battery and circuitry. You cannot change the battery type without also changing the battery management circuitry including the control chip and passive components. A differently rated motor will also be needed.