
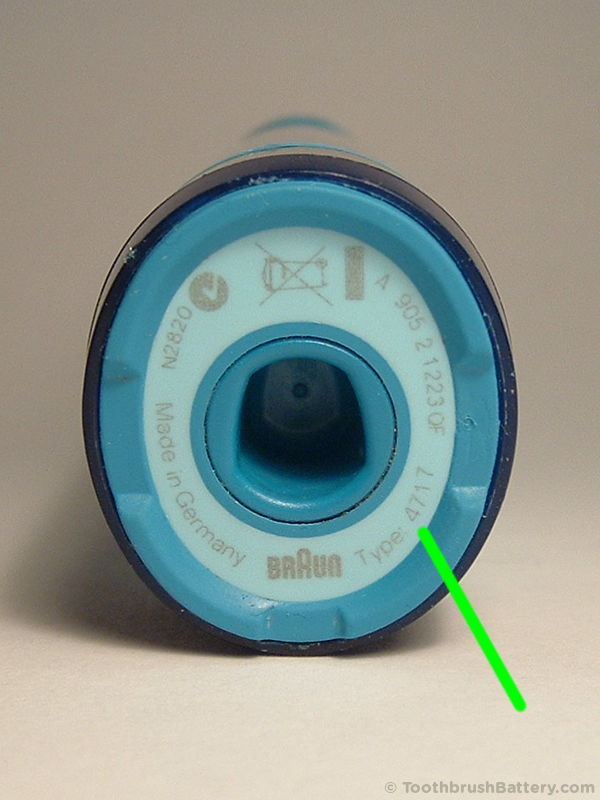
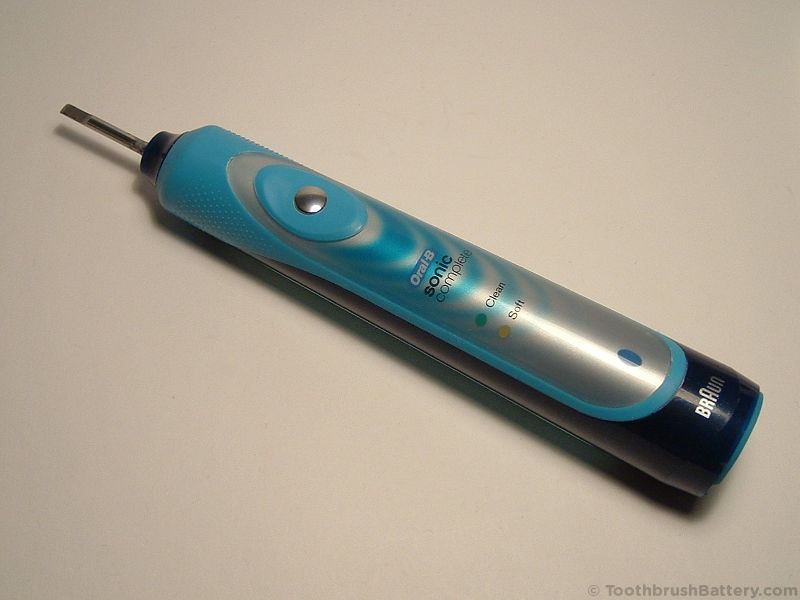
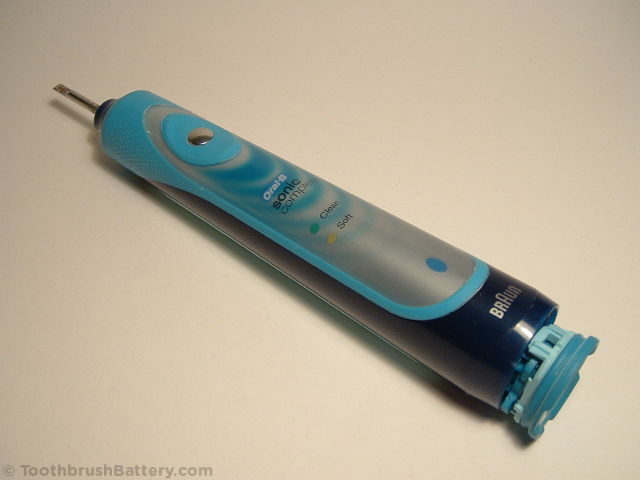
This guide will take you step by step through how to open and dismantle the Braun Oral-B Sonic Complete electric toothbrush and then repair it by replacing the internal rechargeable battery. The tutorial is based on the Type 4717 Sonic Complete model which is available in either 2-mode or 3-mode variants and in both blue and white. The type number of your toothbrush is marked on the bottom of the handle.
For other toothbrush models and type numbers the battery replacement procedure is slightly different so please see our other guides to toothbrush battery replacement instead.
The basic battery replacement method is:
- Open and dismantle the toothbrush handle using our photographic guide
- De-solder the old battery
- Solder in the new battery (part number 0602589723938)
- Reassemble the handle
This is documented in detail below along with lots of photos. Click on any photo to enlarge it.
Video
We have also created a short video from this guide to Braun Oral-B Sonic Complete battery replacement on our YouTube channel, which you can also watch below.
Disclaimer
Any damage to yourself, your toothbrush or anything else is entirely your responsibility. This guide is for professional, educational use only and is offered without guarantee or liability.
Tools / Parts / Equipment
- Braun Oral-B Sonic Complete toothbrush
- Original recharging base
- Soldering iron: Electronics grade (about 18-25 watt)
- Solder: Lead-free silver solder is great for this
- Solder sucker (also known as a desoldering pump) and/or desoldering braid/wick
- Scissors
- Craft knife e.g. scalpel, snap-off, retractable or Stanley type
- Small flat-bladed screwdriver: 2 to 4mm wide
- Replacement specialist 56mm x 17mm 2.4V NiMH battery, part number 0602589723938. Support us by buying yours from ToothbrushBattery.com
How-To
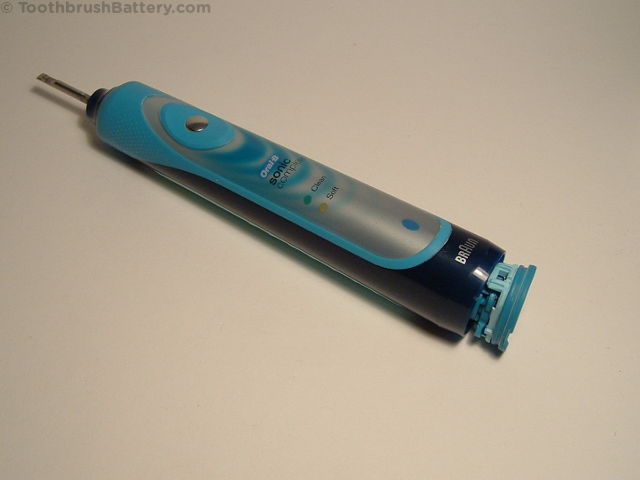
To start with, remove any brush heads from the top of the handle.
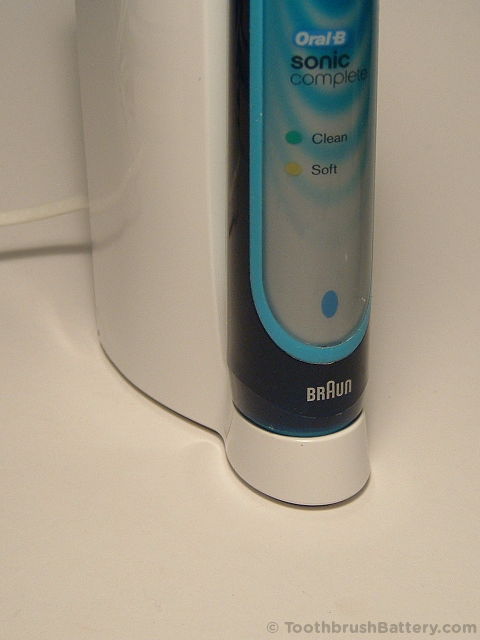
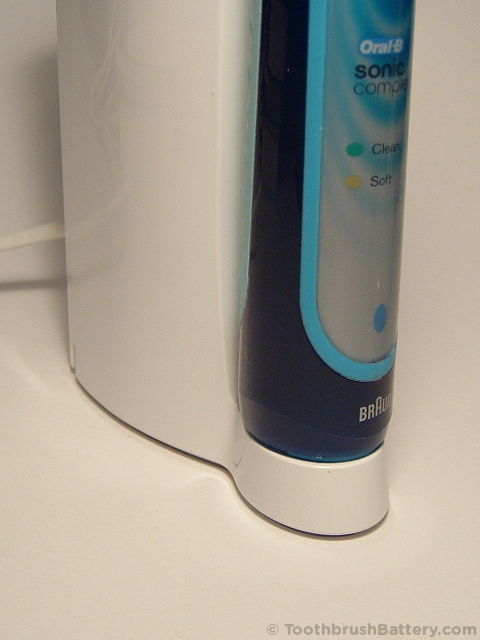
Put the handle on its charger and, while holding the charger steady, start to twist the handle anti-clockwise a quarter of a turn until the latches holding the base cap in release and the toothbrush springs upwards slightly.

Take the brush off its charger and start to push the shaft in from the top.
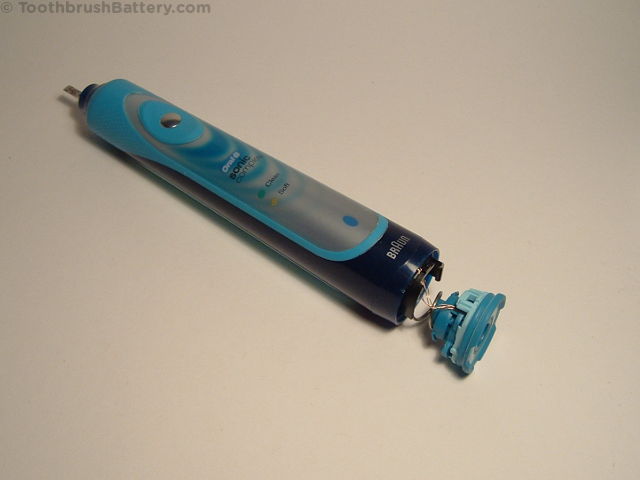
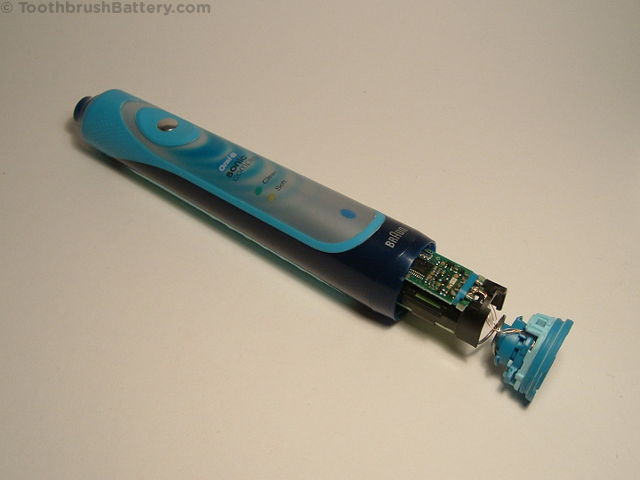
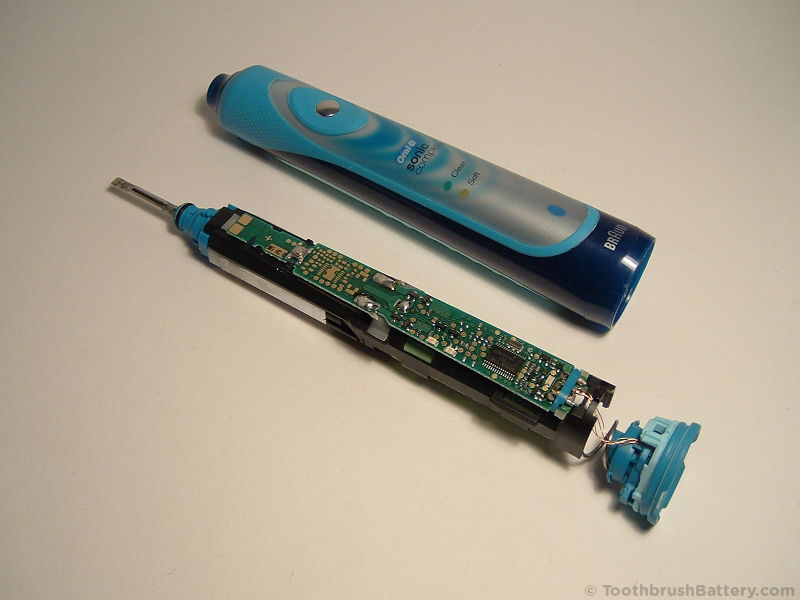
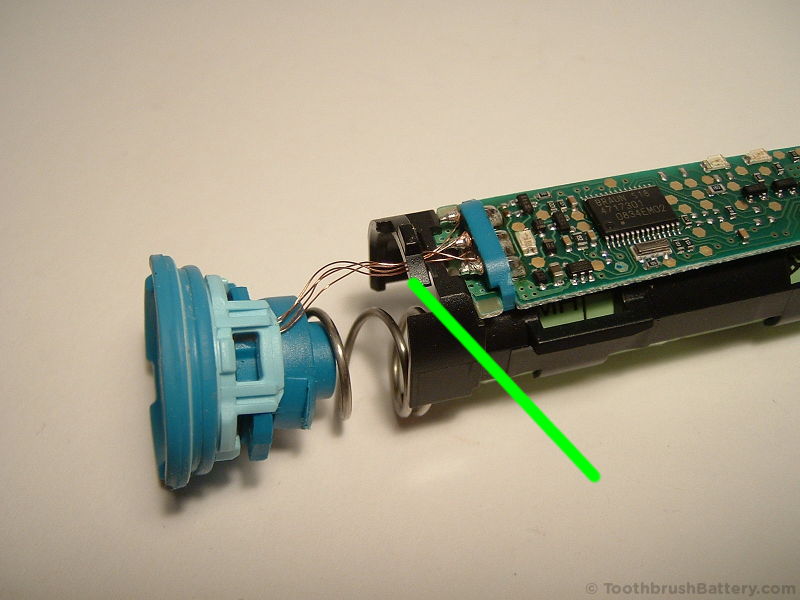
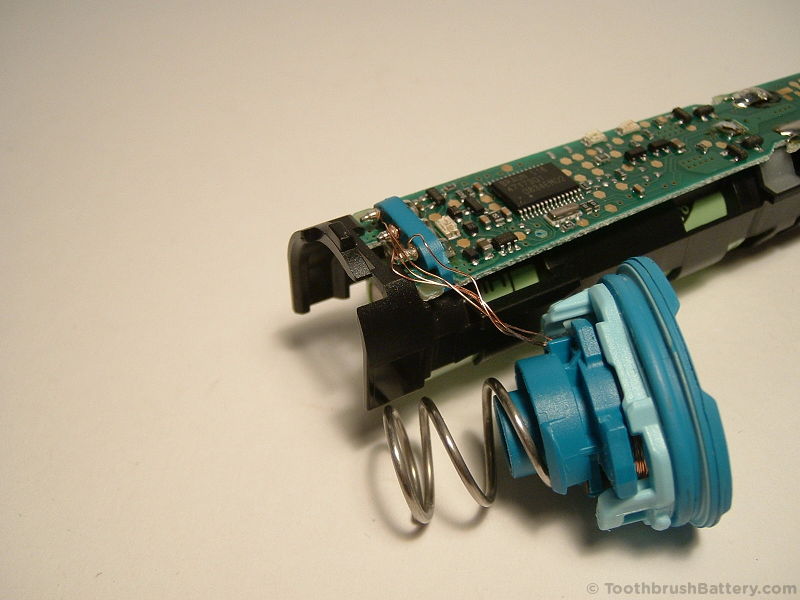
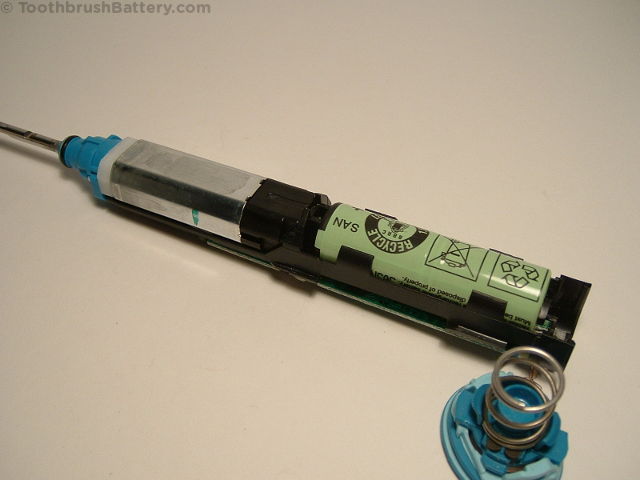
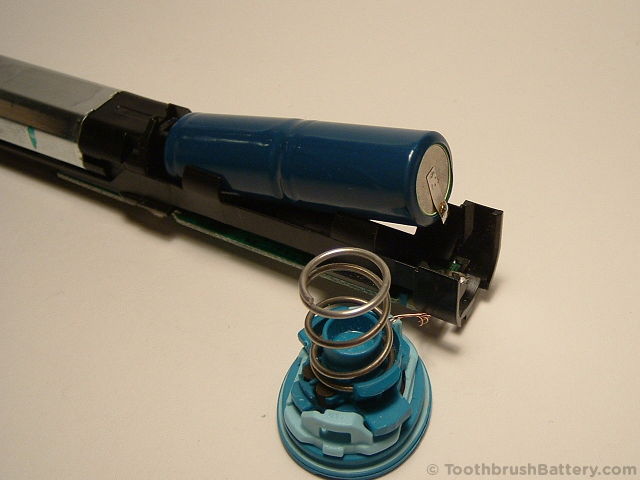
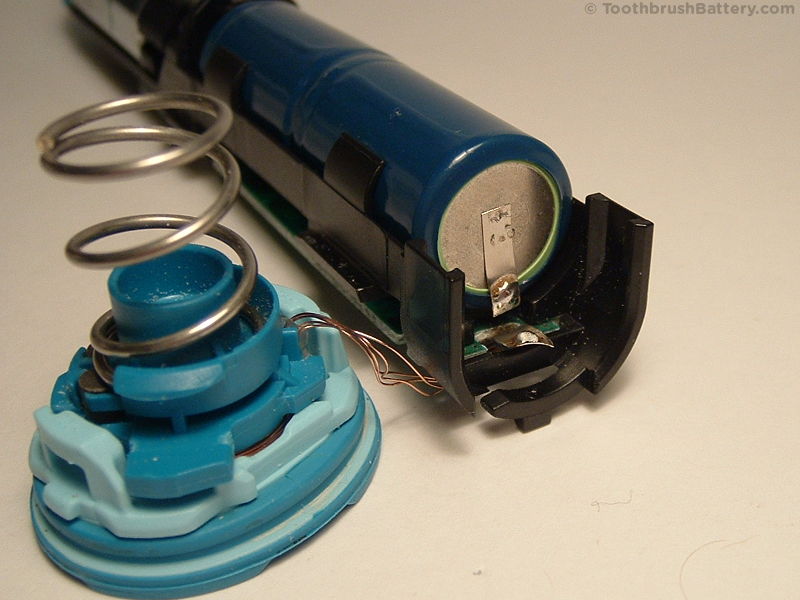
Carefully extract the inner workings of the toothbrush without pulling on the thin copper wires from the charging coil.
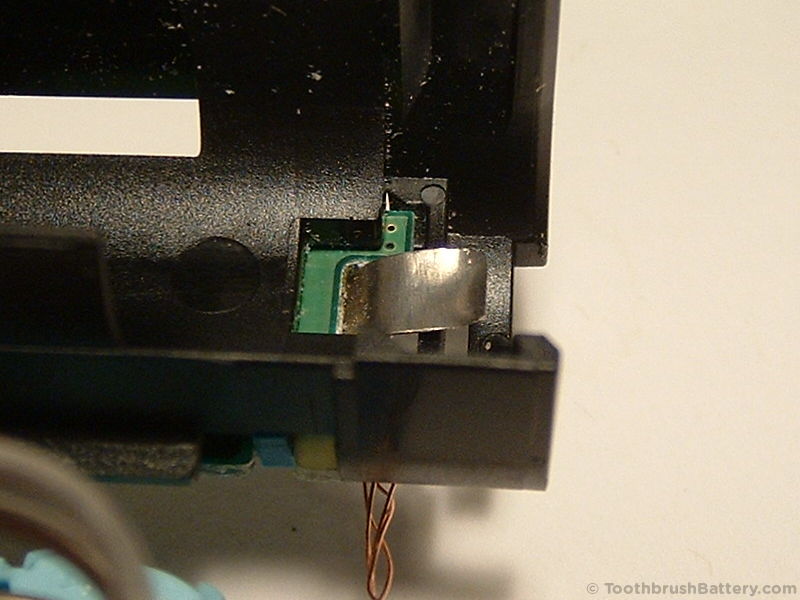
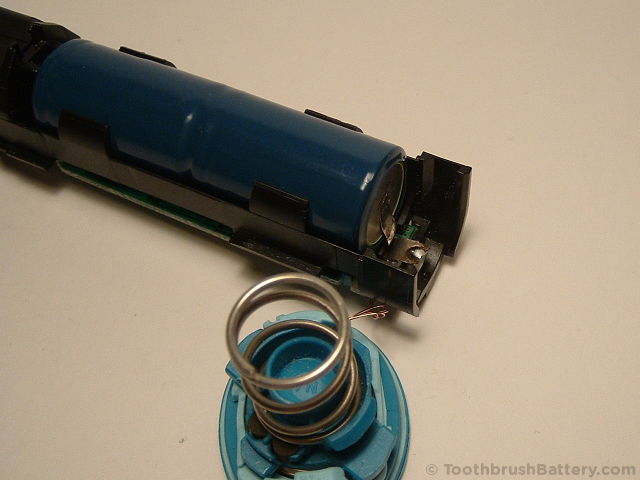
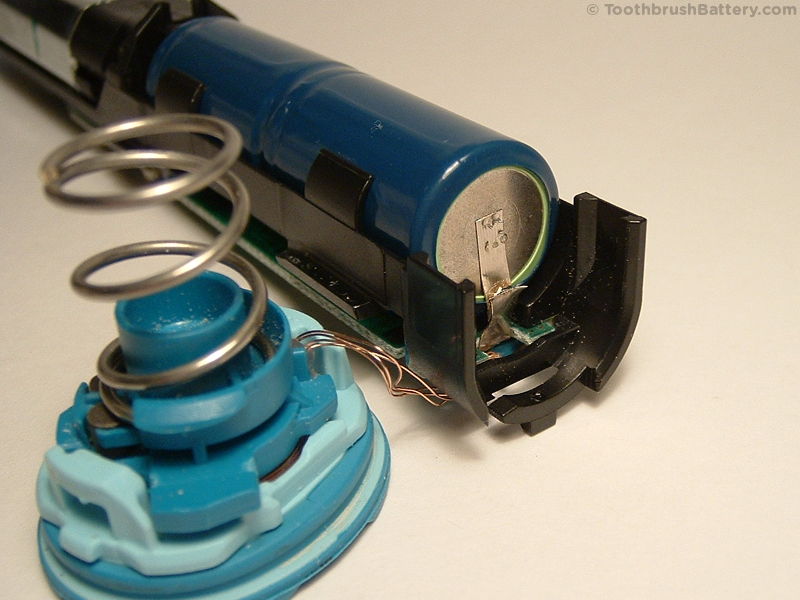
Carefully unhook the copper wires to the charging coil from under the black plastic clip holding them in place. The clip is open on one side (arrowed below.)
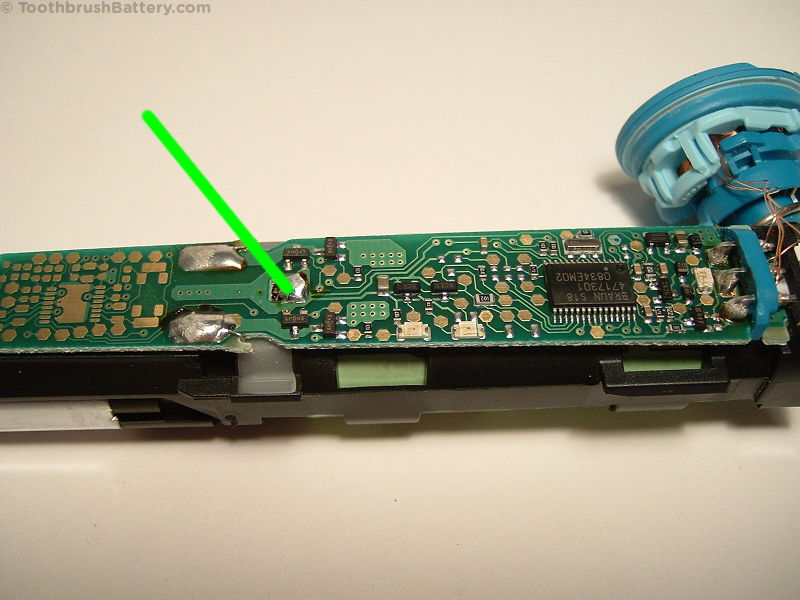
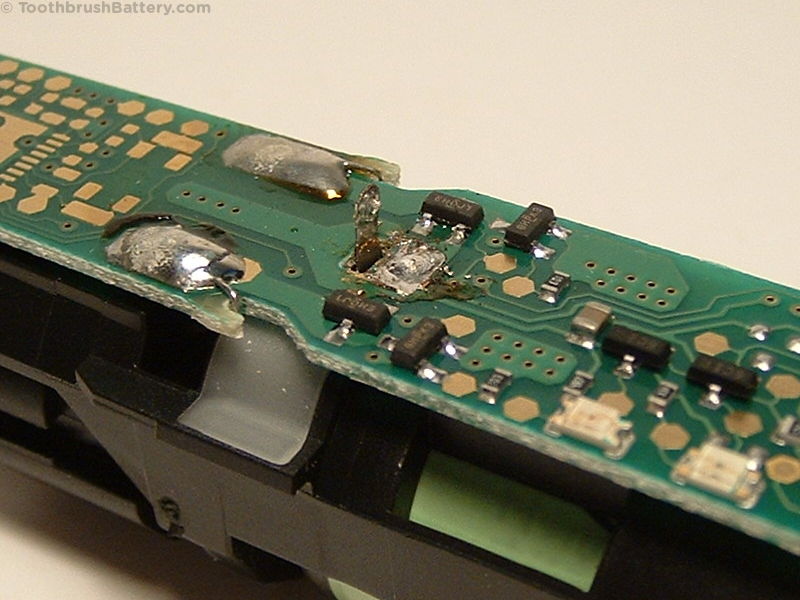
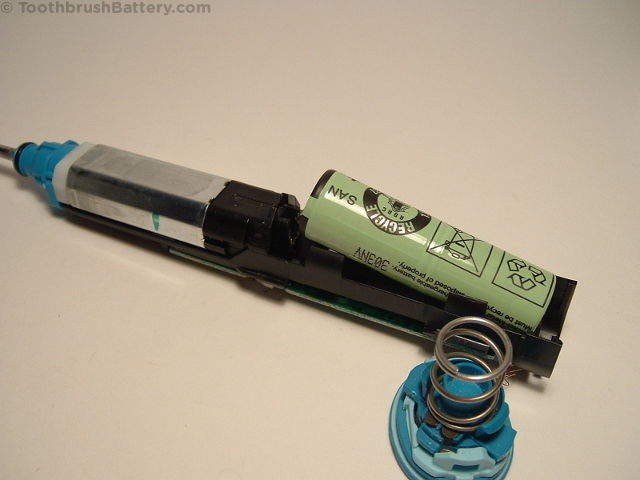
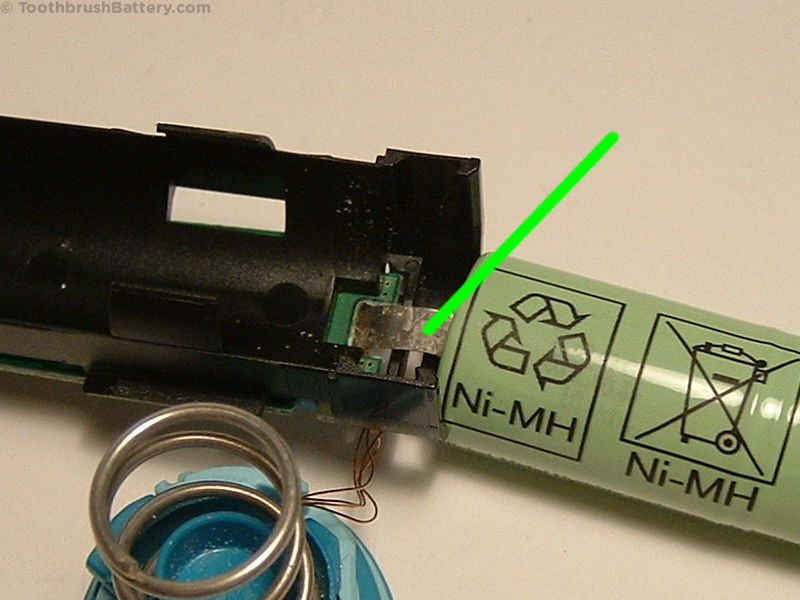
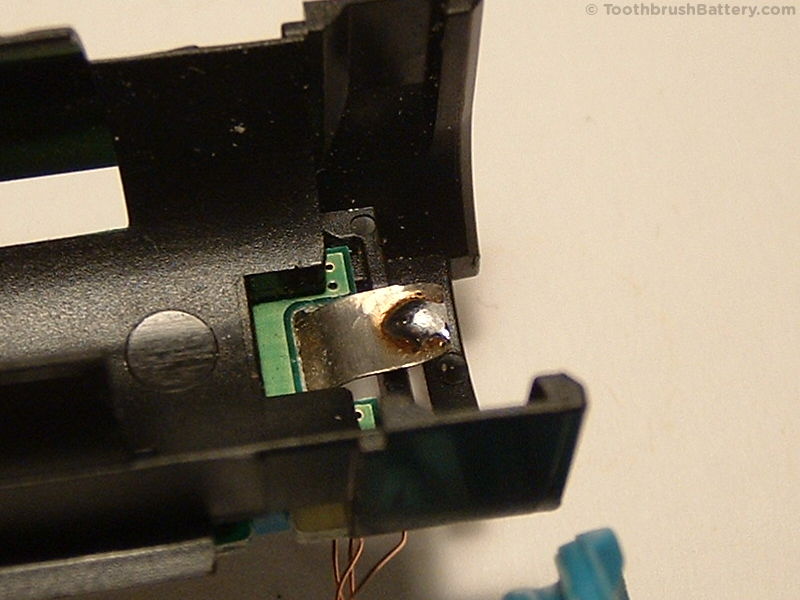
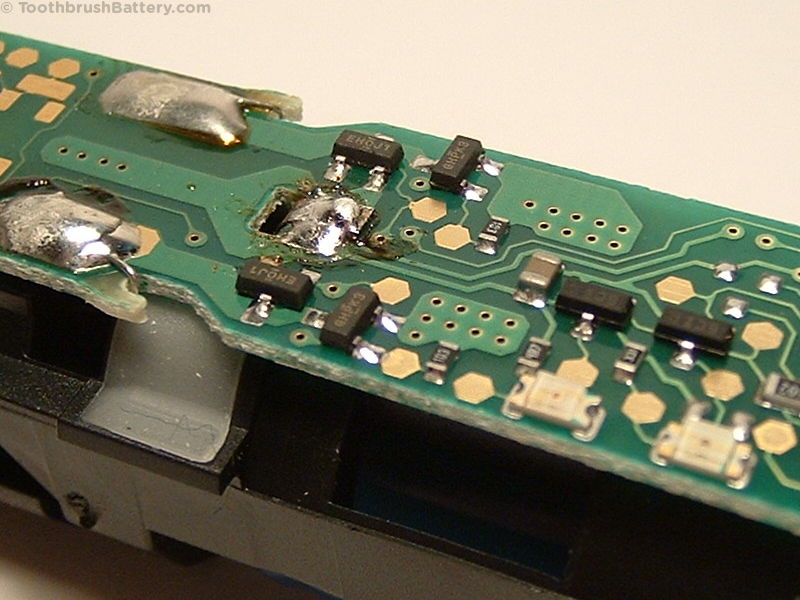
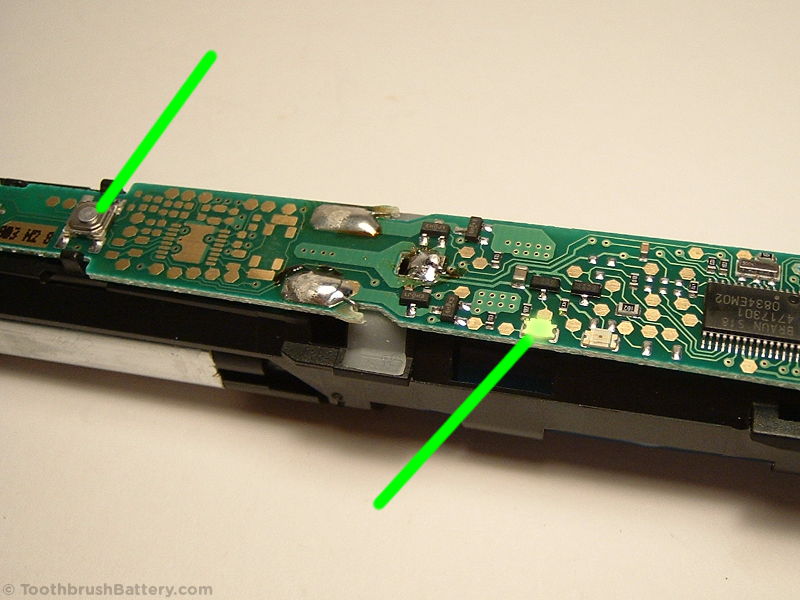
Time to get your soldering iron warmed up now! Using the soldering iron and desoldering pump carefully desolder the battery’s positive terminal solder tag from the circuit board (arrowed below) and bend the metal tag upright with a knife so there is no solder left joining the solder tag to the board. Desoldering braid might also be useful for this.
Turn the toothbrush over so the battery is uppermost.
Using the screwdriver, pry out the battery at the positive end and gently bend it up and over so it pivots where the negative tag is attached.
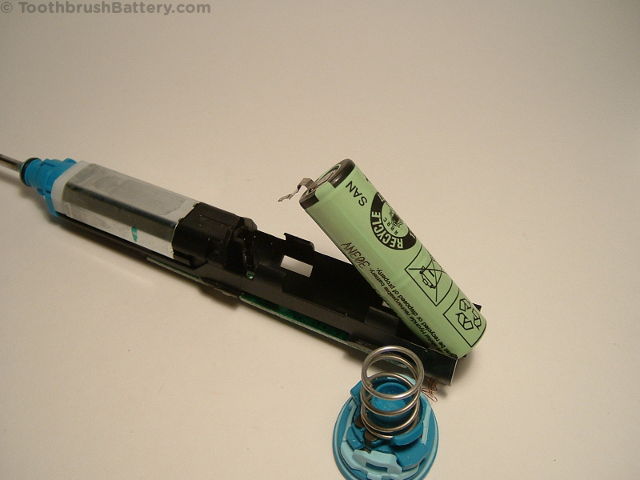

Using scissors, cut the negative tag (arrowed below) close to the battery or about half way between the battery and PCB. You might need to twist the battery and tag slightly to get the scissors in position.
Untwist the tag if it got significantly bent.
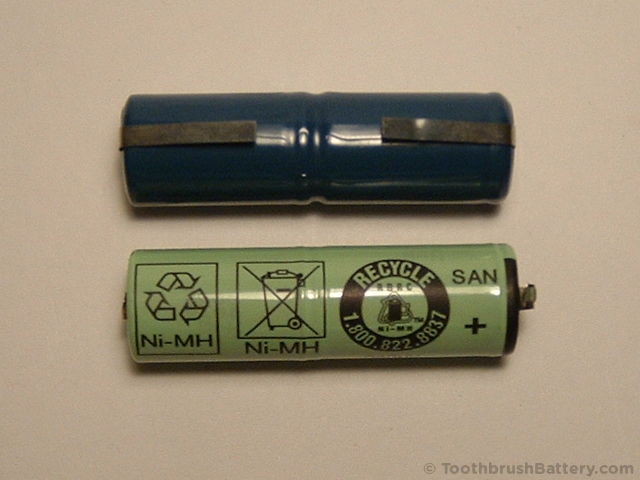
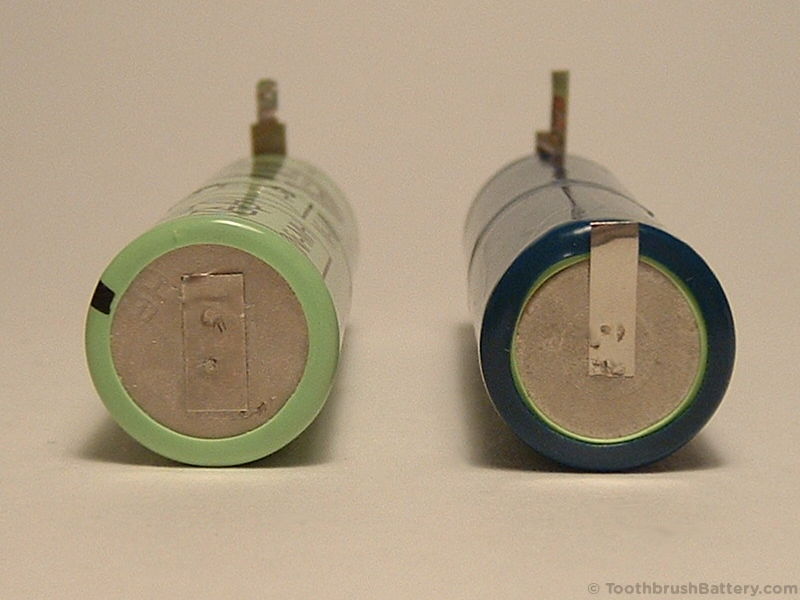
Compare the original battery to its replacement. Please support us with writing these repair guides by buying your replacement battery through our secure online shop at ToothbrushBattery.com here. This is a 2.4V NiMH 56mm x 17mm battery, part number 0602589723938, made up of two shorter 1.2V cells. Your original battery might be either Ni-Cd (NiCad / NiCd) or Ni-MH (NiMH) chemistry, but both can be replaced with our NiMH battery. To maximise the lifespan of your new battery see our electric toothbrush care tips here.
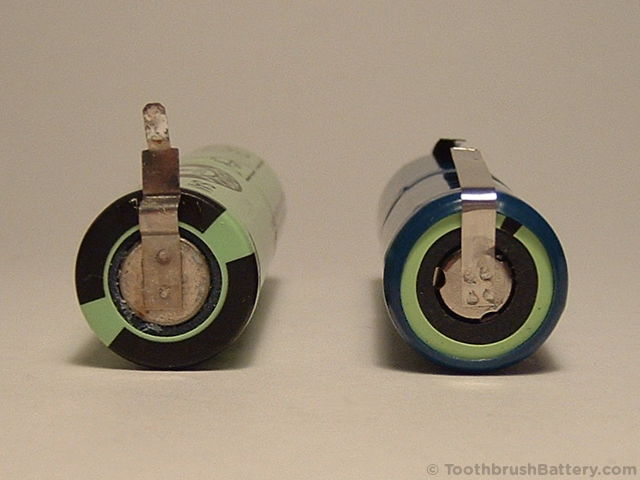
Positive terminals:
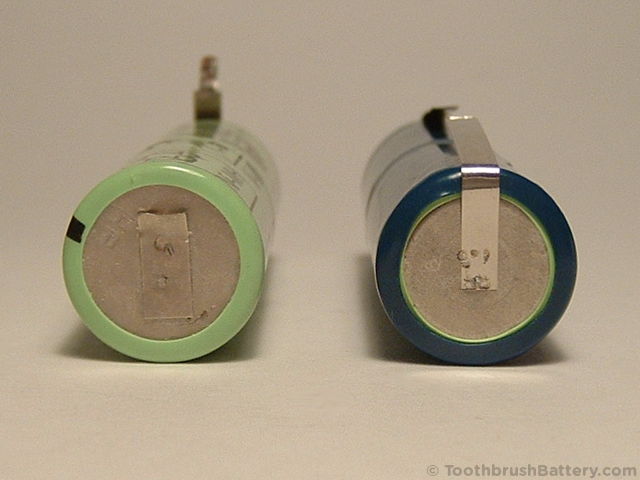
Negative terminals:
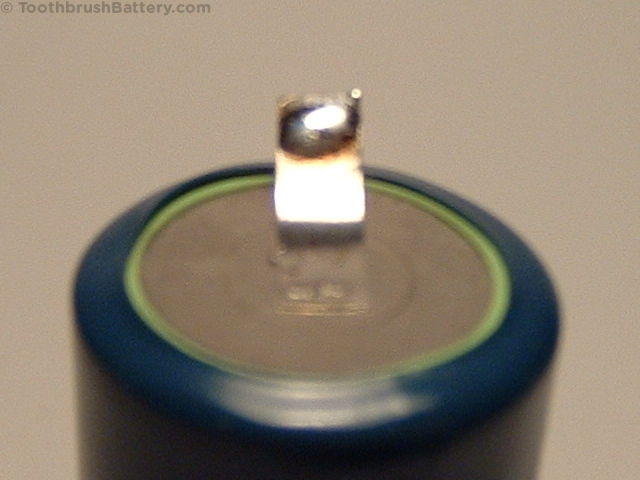
Bend the positive tag to shape so it matches the original battery. Bending the tag over the tip of the screwdriver might help get neat bends. Then trim the tag to length using the scissors.

Using the tip of the scissors narrow down the width of the positive tag. Carefully cut in from the side of the tag, then down from the top.

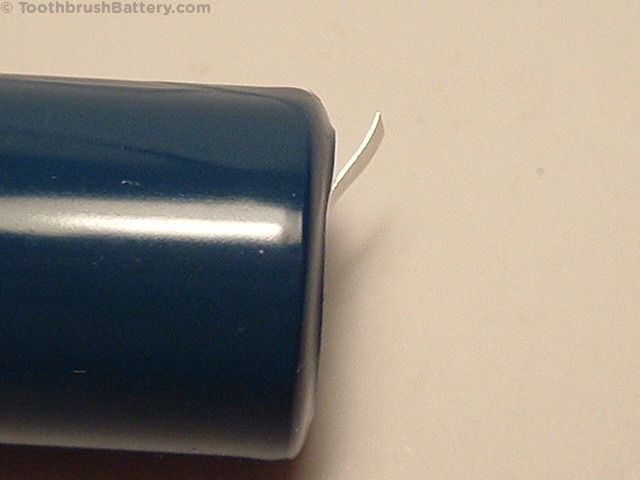
Cut off the end of the negative tag level with the edge of the battery.
With the soldering iron and some solder, quickly tin the upper surface of the tag that is still attached to the toothbrush. Don’t hold the soldering iron tip in place for too long or you risk detaching it from the PCB.
Bend the negative tag on the battery away from the battery surface a little.
Tin the battery’s negative tag. Apologies for the blurry photo!
Insert the positive end of the battery into its holder, ensuring the tag goes through the hole in the PCB.
Push the rest of the battery into its holder and slide it up towards the head end as far as it will go.
Check that the positive tag has come through the PCB hole, then fold it over and solder it into place.

Fold the negative tag from the PCB up so it is touching the negative tag on the battery.
With the soldering iron, quickly heat the joint so the two tags become soldered together. Don’t hold the soldering iron tip in place for too long or you risk melting too much of the battery’s plastic covering.

You can now press the power switch (arrowed below left) and check that the toothbrush turns on. If it doesn’t then check your solder connections. If the toothbrush won’t run you might need to ‘reactivate’ the circuitry by standing the assembly on its charger for 5 seconds. It should start charging. Then you can remove it and try the switch again.
Hook the charging coil wires back in place.
Slide the inner workings of the toothbrush back into the handle casing. Make sure there is no debris inside blocking it.
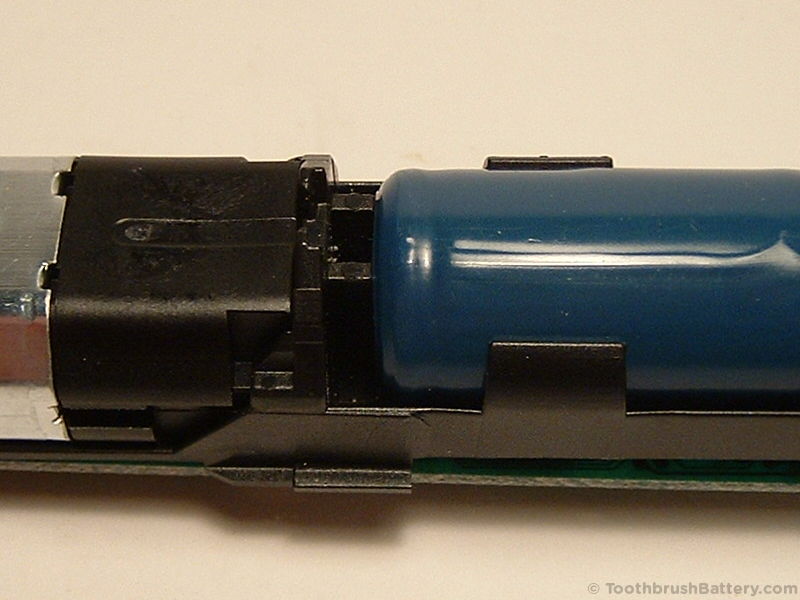
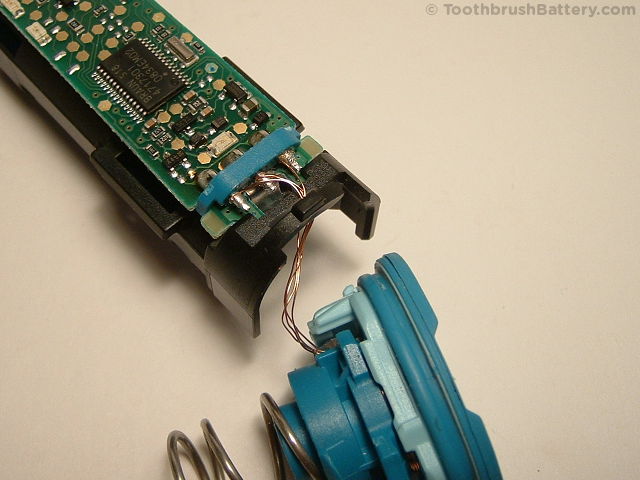
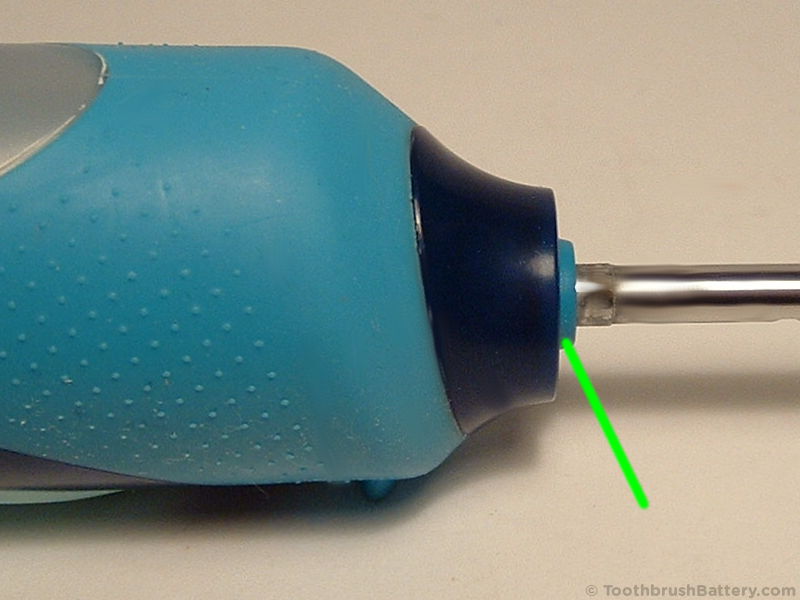
Ensure the innards slide all the way in so the collar (arrowed below) protrudes from the casing.

Without pulling on the coil wires, carefully put the toothbrush back on the charger. Push down on it so the cap fits into place then turn it clockwise so the latches in the cap lock it into place.
You should now have a fully reassembled and repaired Sonic Complete toothbrush!
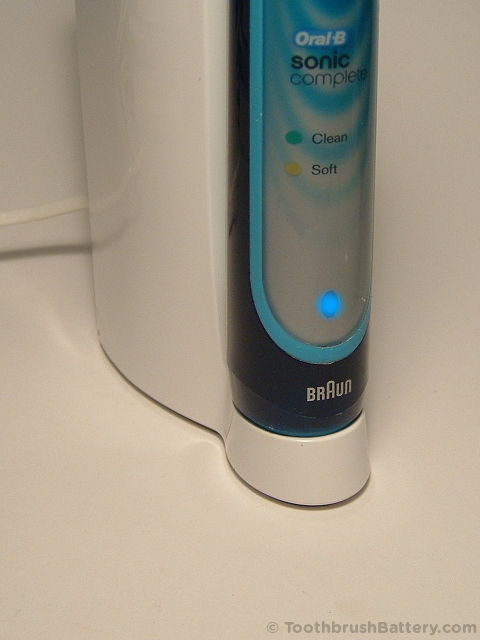
Put the brush on to charge for a full 24 hours and check that the charging light starts to flash. Please recycle your old battery either at a local civic amenity or a supermarket collection point.
Please leave any questions, comments or tips about this guide below.
FAQ
Yes, you can use our photographic guide to open up your Sonic Complete toothbrush handle and replace its internal rechargeable battery.
The Braun Oral-B Sonic Complete toothbrush needs a specialist NiMH battery with part number 0602589723938. See the parts list near the start of our guide.
Hi,
When I was changing the battery , I disconnected the wires of the transformer and now I don’t know the arrangement of transformer to the pc board.
It would be appreciated if I could have the related drawing.
Thanks
Kazem Rahimian
We have a diagram on our charging coil wires blog post. Hope that helps!
why on earth don’t they have normal replaceable batteries?
I ordered your new batteries and went to solder them in, but 3 of the 4 thin charging wires broke off inside the coil.
Hi Tim, There’s an article about repairing the fine copper charging coil wires here. The wires have a clear coating so when re-soldering them make sure you burn off the coating.
Hi, I found this type of brush in my old moving box. Stored for so many years. With your detailed instructions I easily replaced the battery and it works! It was fun. I appreciate your guide. Thanks.
It is great to hear that your Sonic Complete toothbrush is repaired and running again after years in storage. Happy brushing!
I have two of these, I bought new batteries, replaced the batteries now both of them when fully charged runs only 30 second then stops. Is there a programing or resetting that I need to do to correct these.
Each of them had two original battery in them soldered in series and used to last for a week.
Which batteries did you fit to your brushes? If you want to post a link please remove the letters “http” from the link.
I put two of these batteries in series in each unit (the original was just likes this 2 in each toothbrush) each battery is 1600mAh NiMH 2/3A Rechargable 1.2v by Tenergy. I do not know if this site allow me to attach a photo.
Hi Michael, those batteries should charge and run in your Sonic Complete. Are you able to measure the voltages of each cell both before and after a full 24 hour charge?
I have the battery now but the small wires from the coil loose by opening 🙁
How to measure which one where?
Can you help me out please?
Hi Jan, take a look at our coil wire blog post.