
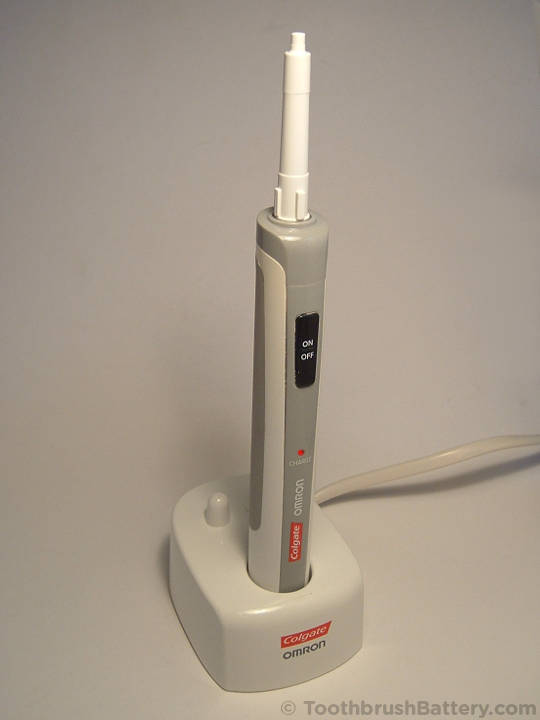
This guide will show you how to open the Colgate Omron C200 toothbrush and repair it by replacing the internal Ni-MH battery. These are great, lightweight electric toothbrushes so are well worth repairing.
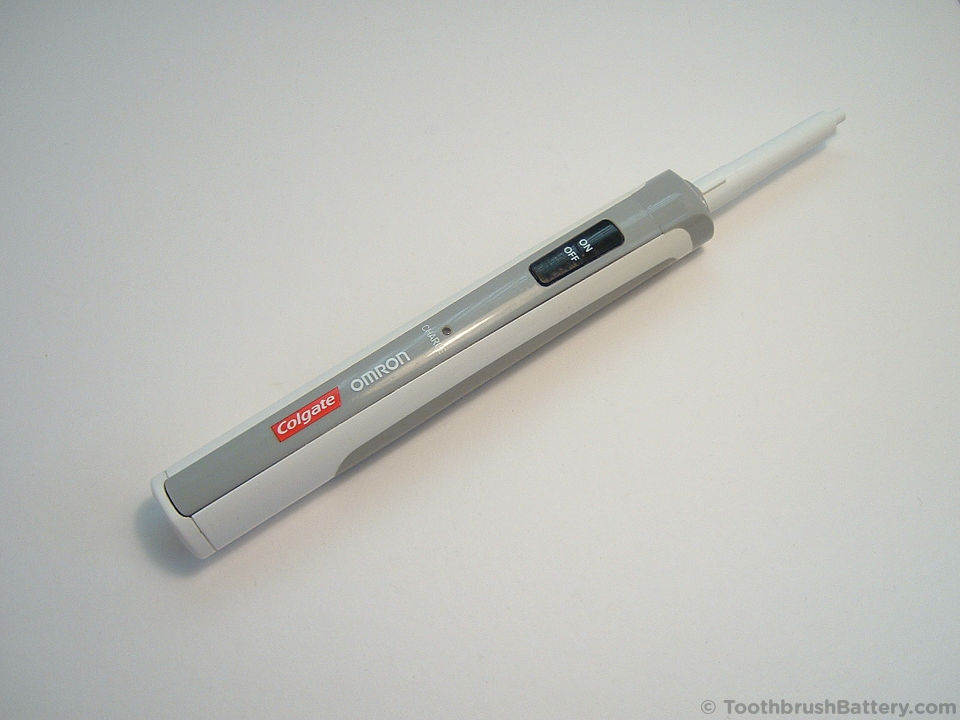
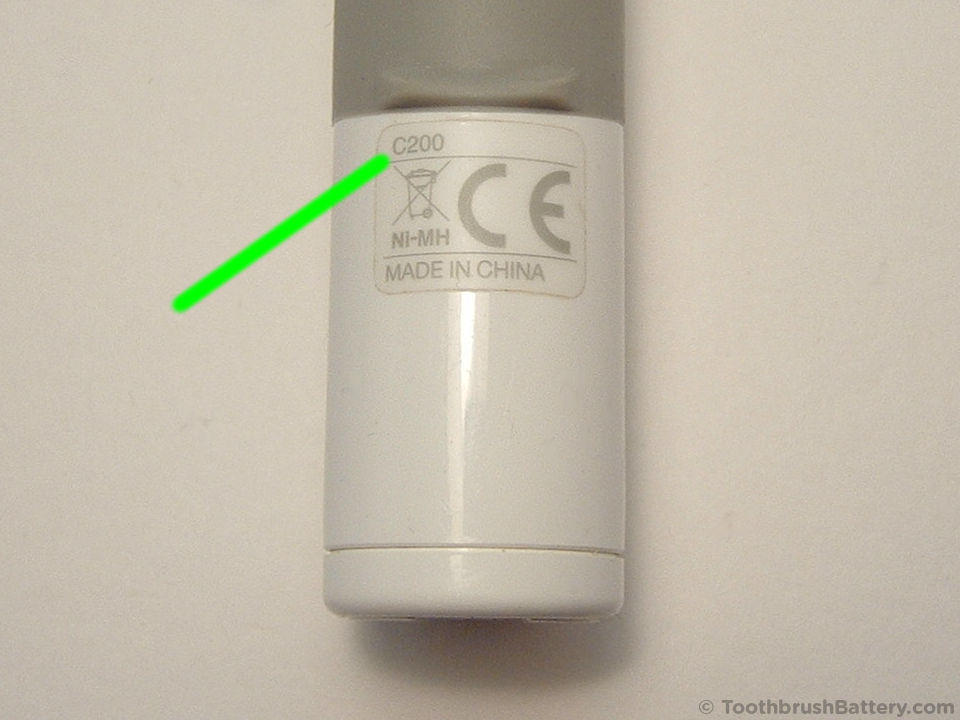
This battery replacement guide is based on the Colgate Omron C200 ProClinical toothbrush but also applies to various other Colgate Omron C-Series brushes such as the C250, 250+, 250 Black, C350, 350 Whitening and C600 ProClinical models. The model number of your Colgate Omron toothbrush is marked on the back or bottom of the toothbrush as shown in the photo below. Click to enlarge the photo and compare it to your toothbrush.
For other toothbrush makes and model numbers the battery replacement procedure is different so please see our other toothbrush battery replacement guides for these toothbrushes.
The basic method is:
- Open and dismantle the toothbrush handle
- Desolder the wire connections from the old battery
- Remove the old battery
- Solder in the replacement toothbrush battery
- Reassemble toothbrush handle
The battery replacement process for the Colgate Omron C200 ProClinical is detailed below along with lots of photos. Click on any photo to enlarge it.
Disclaimer
Any damage or injury to yourself, your toothbrush or anything else is entirely your responsibility. This guide is for professional, educational usage only and is offered without guarantee or liability. Ni-MH batteries should be handled safely and the correct polarity observed.
Tools, Parts & Equipment
- Colgate Omron C200 ProClinical electric toothbrush
- Original charger
- Soldering iron with chisel tip: Electronics grade (about 18-25 watt)
- Solder: Lead-free silver solder with a flux core is recommended
- Craft knife e.g. scalpel, snap-off, retractable or Stanley type
- Small flat-bladed screwdriver: 2 to 4mm wide
- Small cross-head Phillips screwdriver
- Scissors
- Adhesive putty such as Blu Tack to hold the toothbrush to the work surface
- Replacement Ni-MH battery: Support us by buying one from ToothbrushBattery.com here
How-To
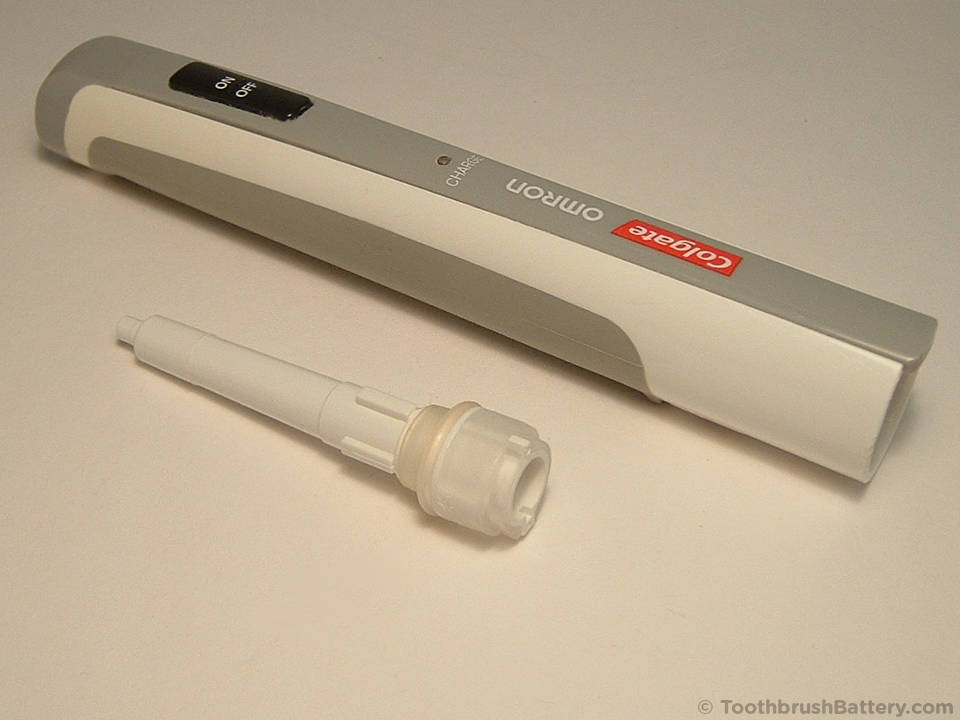
Remove the brushing head from the top of your toothbrush handle and then inspect the bottom of the handle.
Using the small flat-bladed screwdriver gently peel the black cover off. It is held on by a piece of sticky tape so it will peel off rather than pop off.

Using the same screwdriver or a craft knife gently peel off the sticky tape and stick it to the back of the cover as you will re-use it later.
Stand the toothbrush upright in a glass of hot (60 degrees C) water for 3 minutes to warm up the plastic and glue inside the handle.

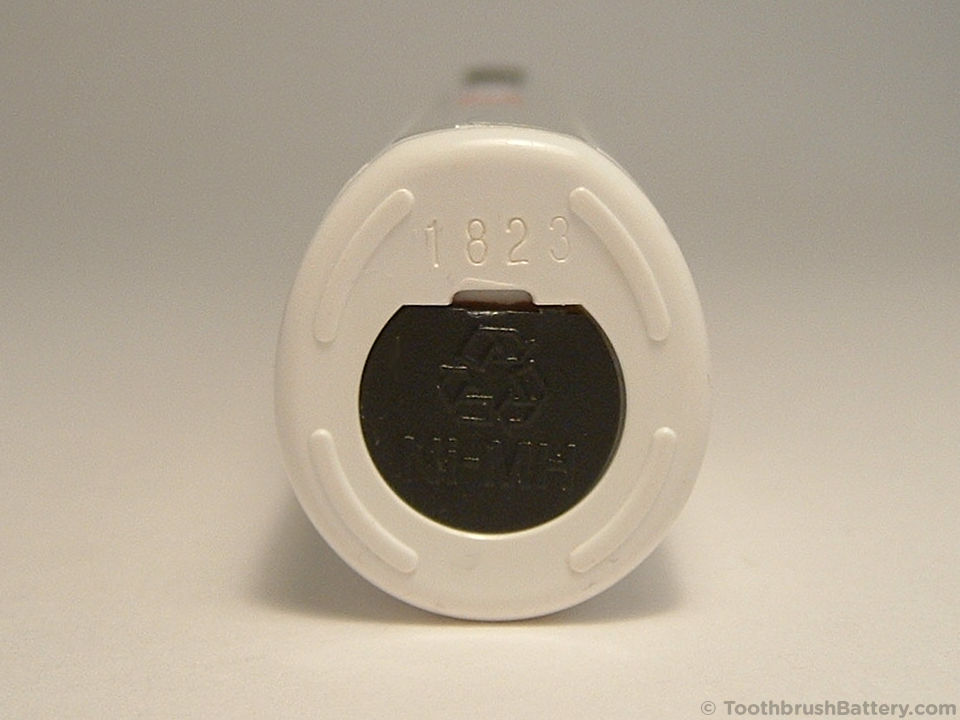
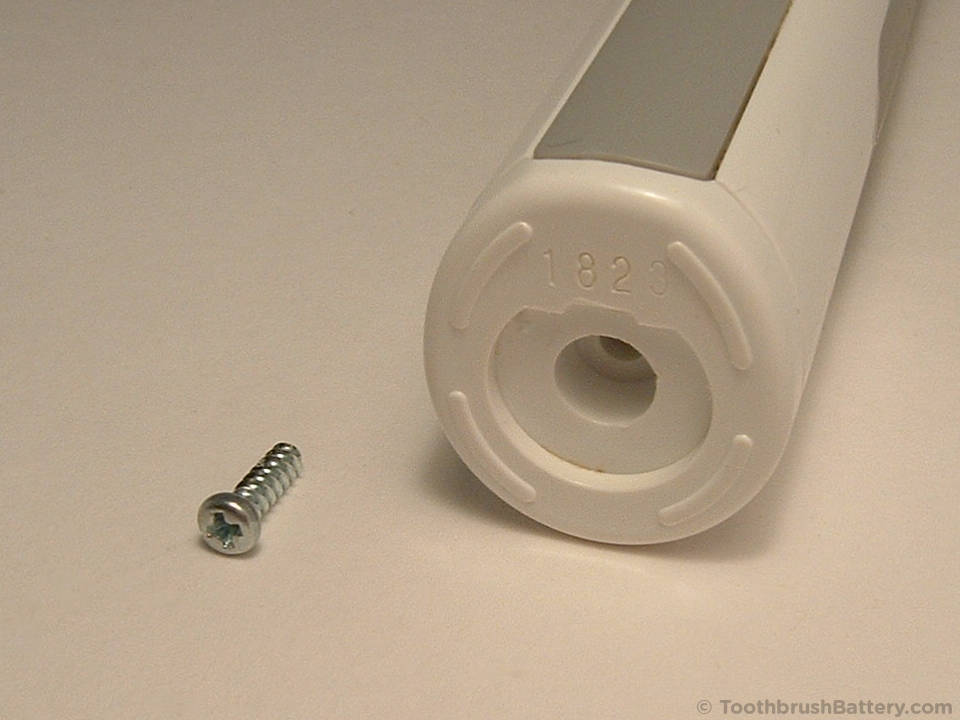
Dry off the toothbrush and pry the pink rubber screw cover out of its hole with the flat-bladed screwdriver.

Remove the screw using a small cross-head (Phillips) screwdriver.
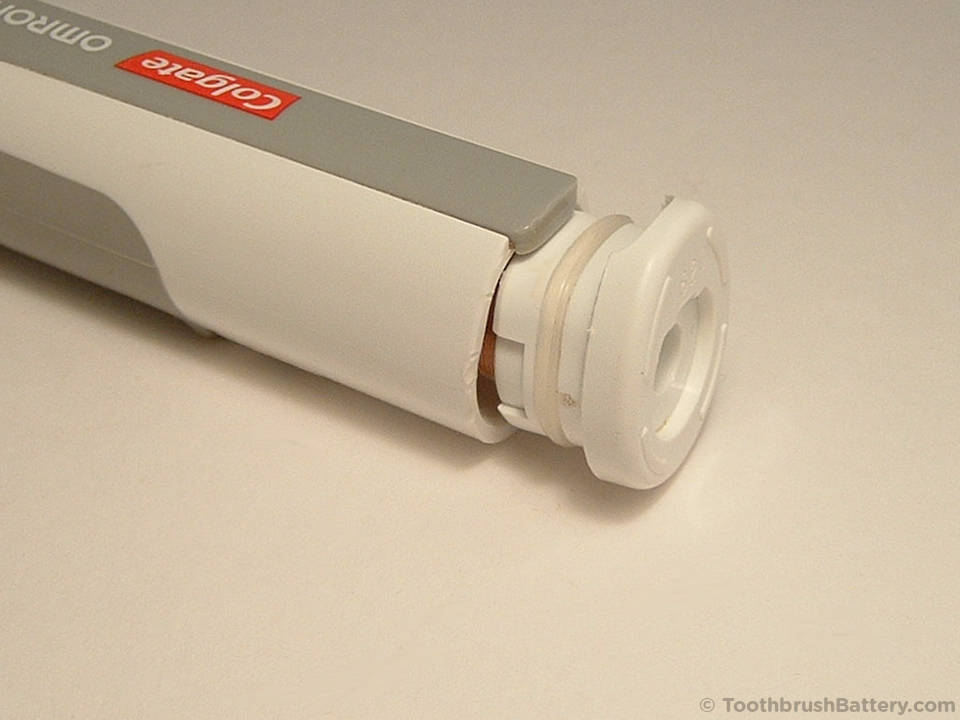
Start to pry off the bottom cap from the toothbrush handle. Be careful not to mark the plastic too much. You can use fingernails, a large blunt screwdriver or some sort of plastic prying tool or spudger.

As well as the rubber seal creating friction when removing the base cap there may be a little glue inside. Heating the toothbrush by standing it in hot water should have softened this enough to let you pry the cap out.
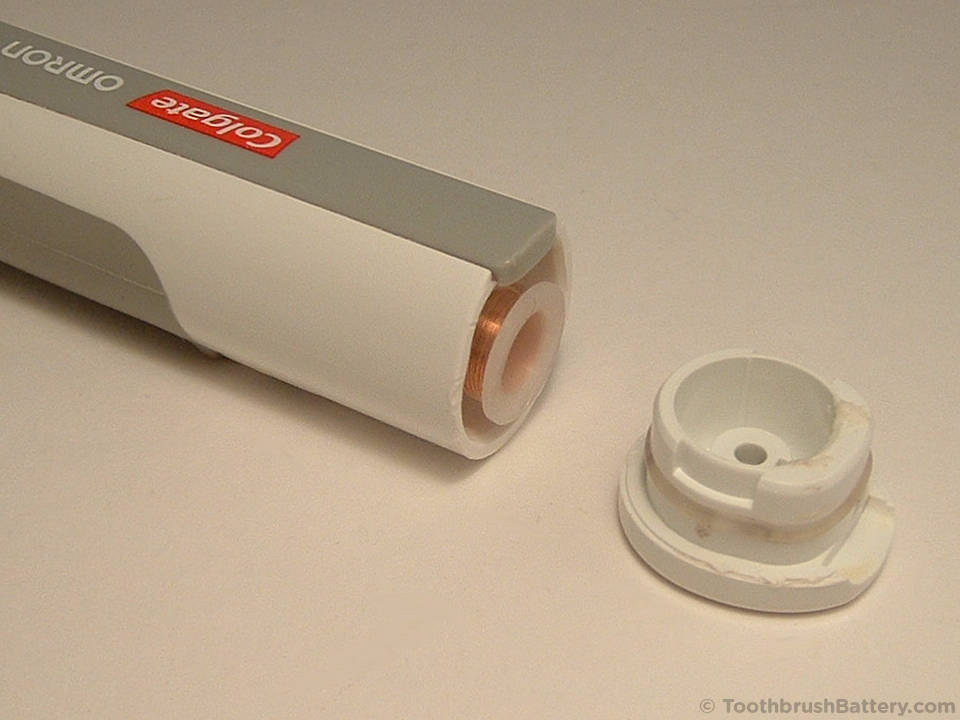
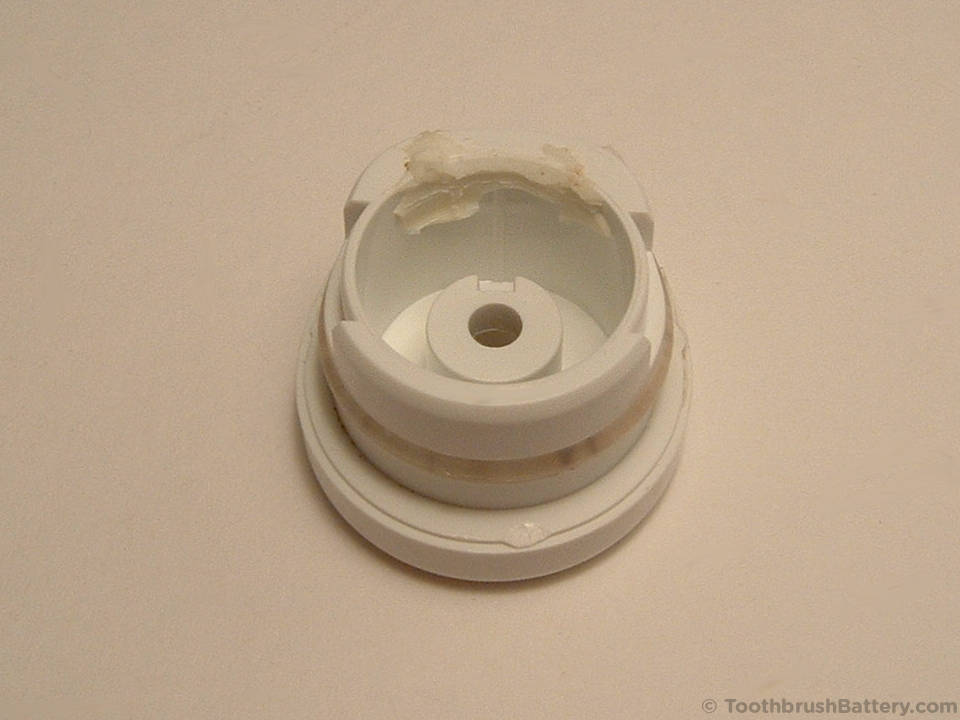
Below is the removed cap showing glue at the top.
Using the small flat-bladed screwdriver release the two white plastic clips by moving them away from the internal wall of the handle (arrowed below).
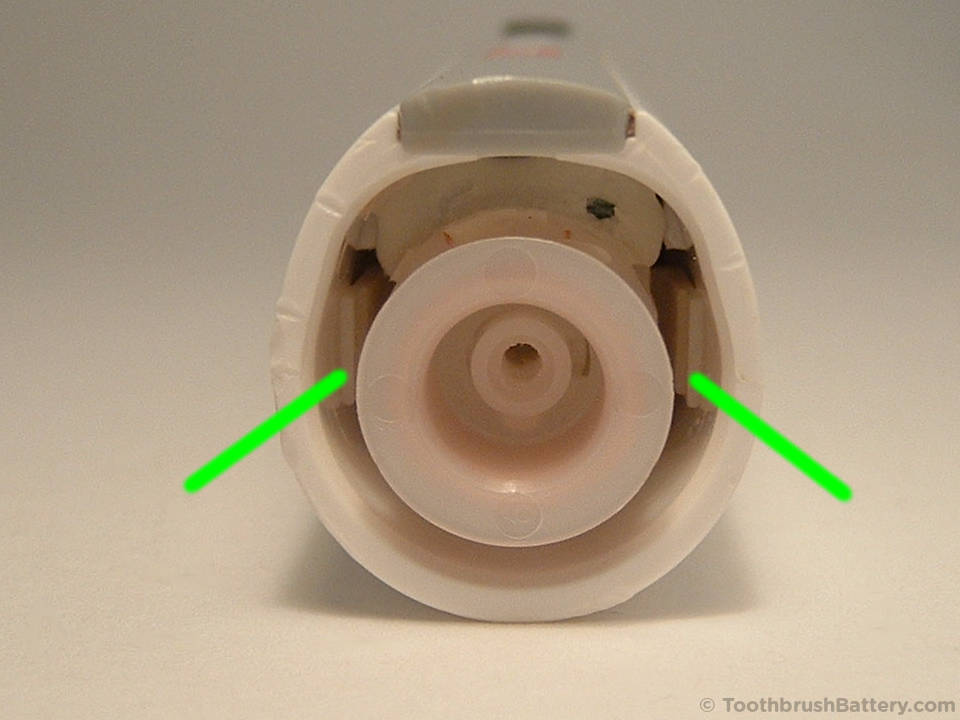

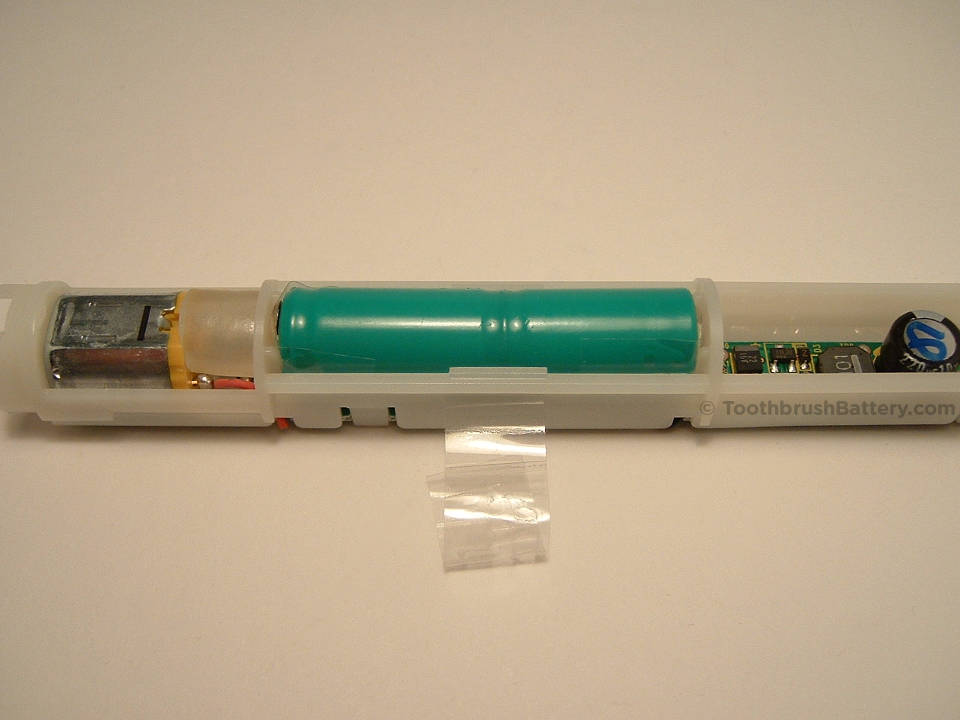
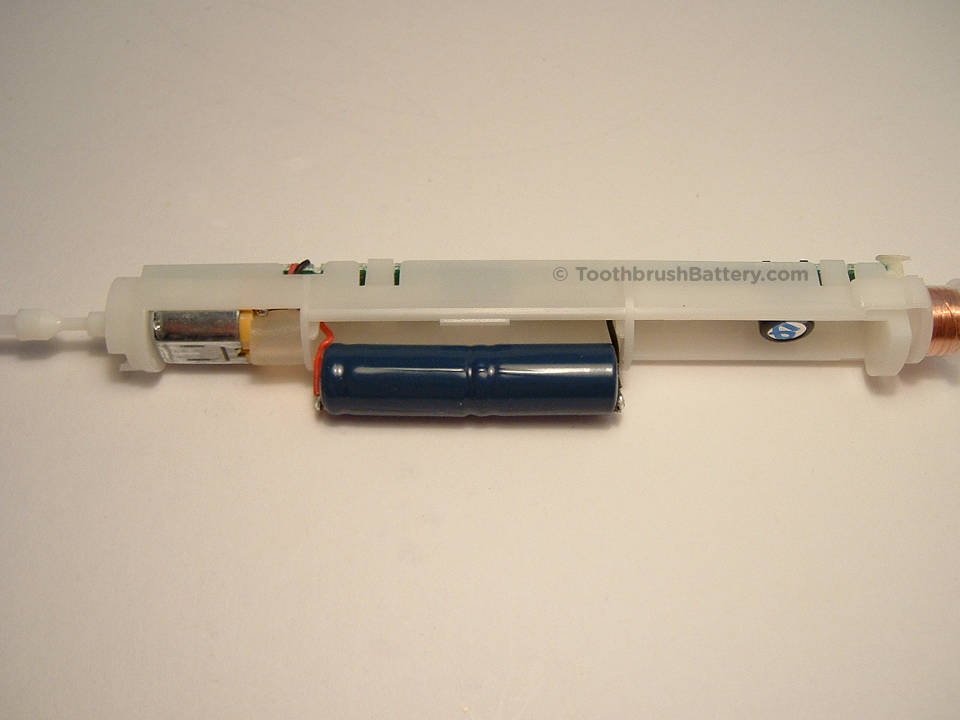
Push the top shaft of the toothbrush to start sliding the internals out and gently remove them from the handle casing.
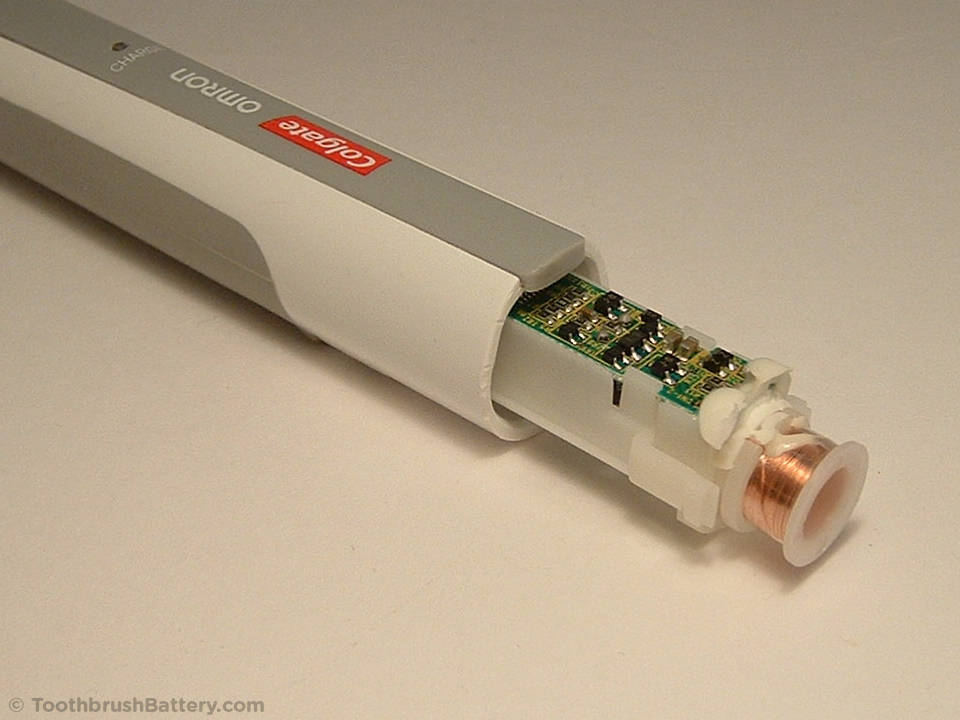
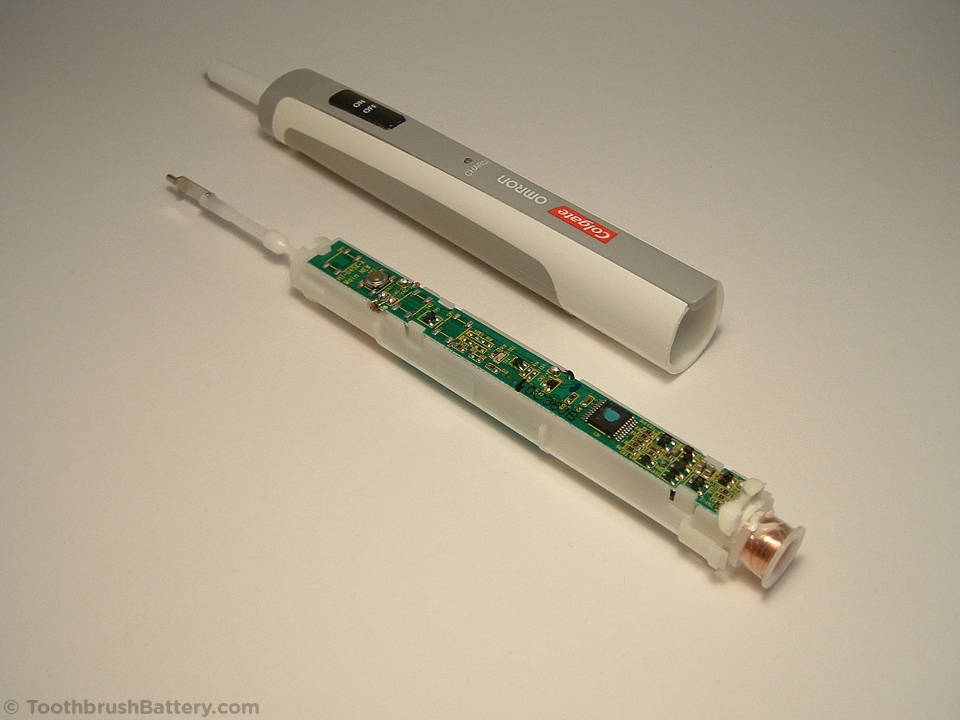
Also remove the top shaft cover from the handle.
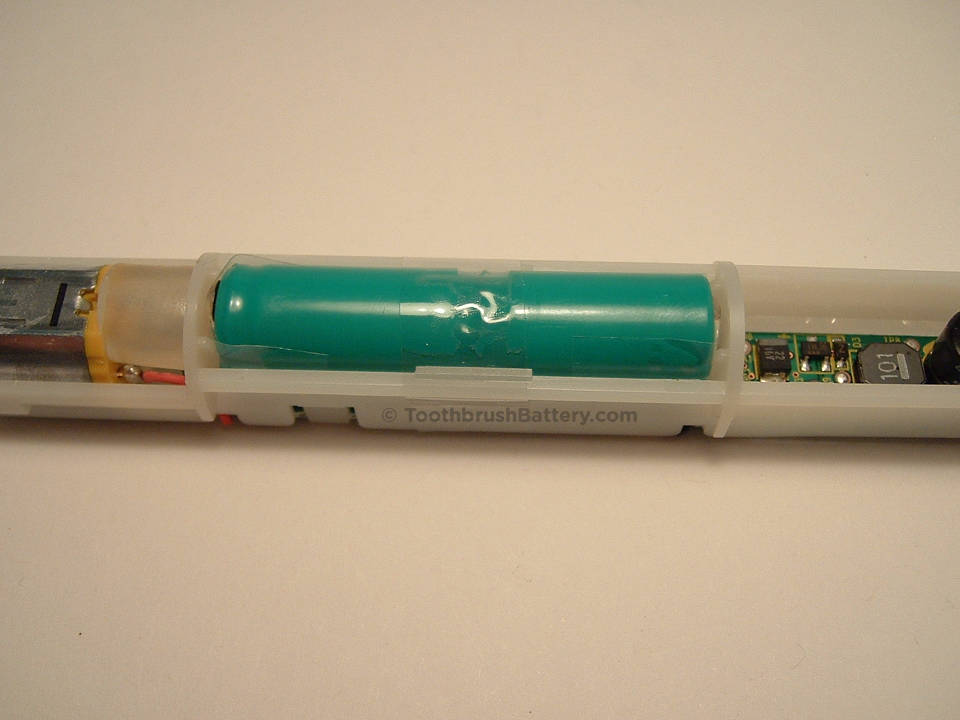
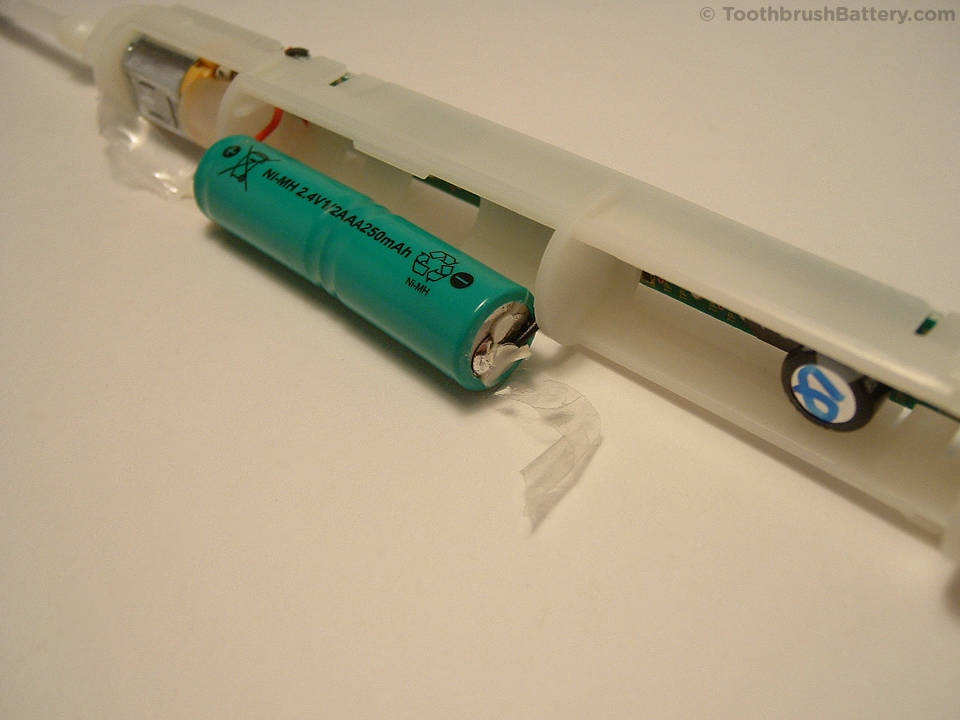
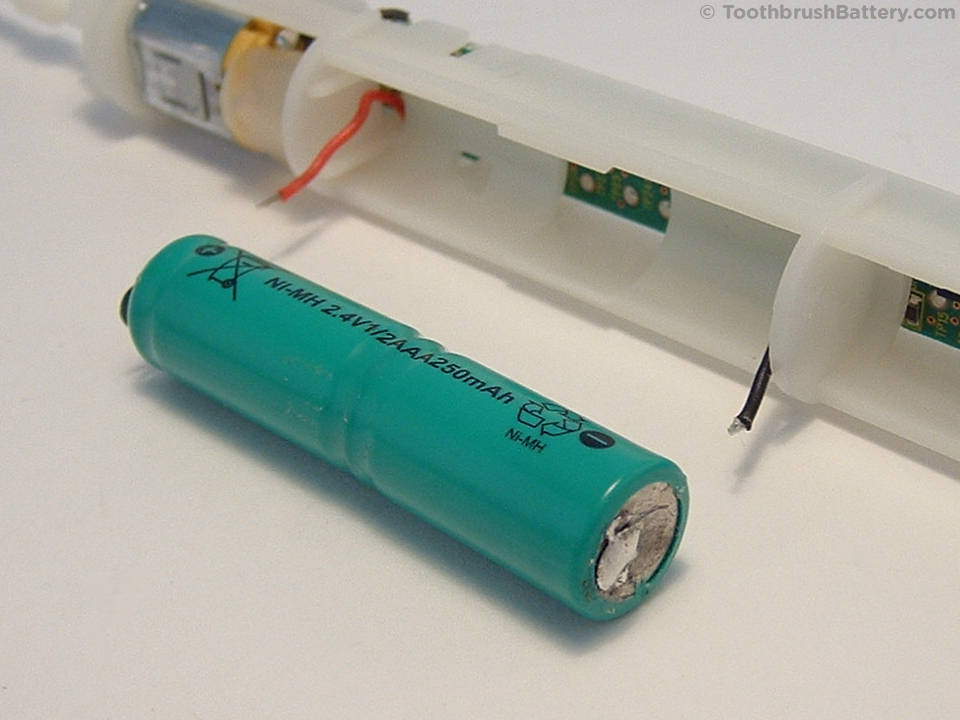
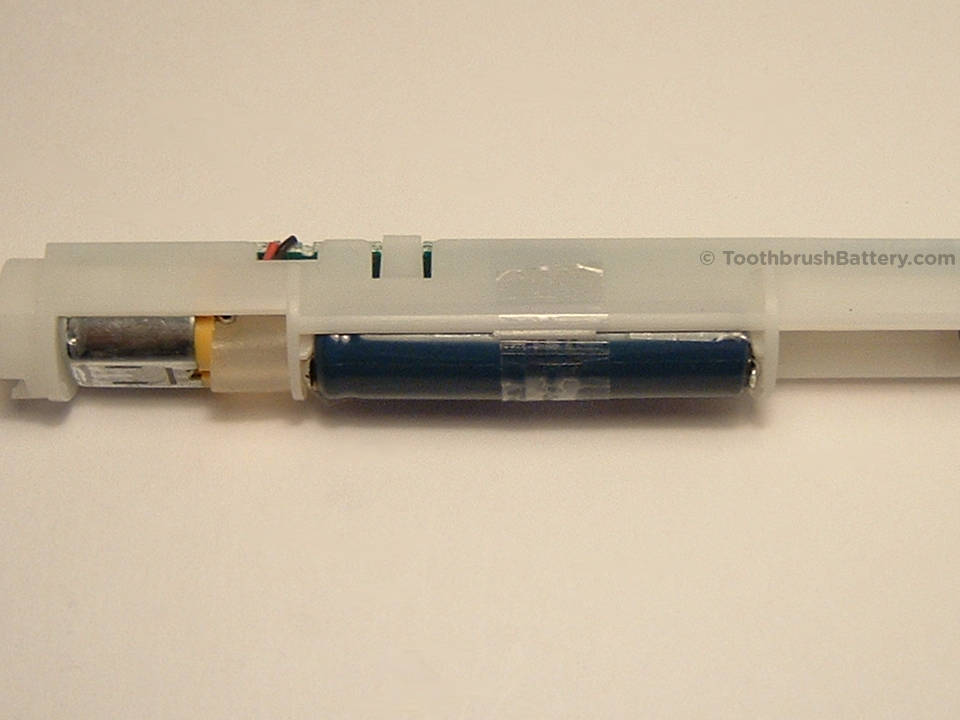
Below you can see the original battery installed in the toothbrush.
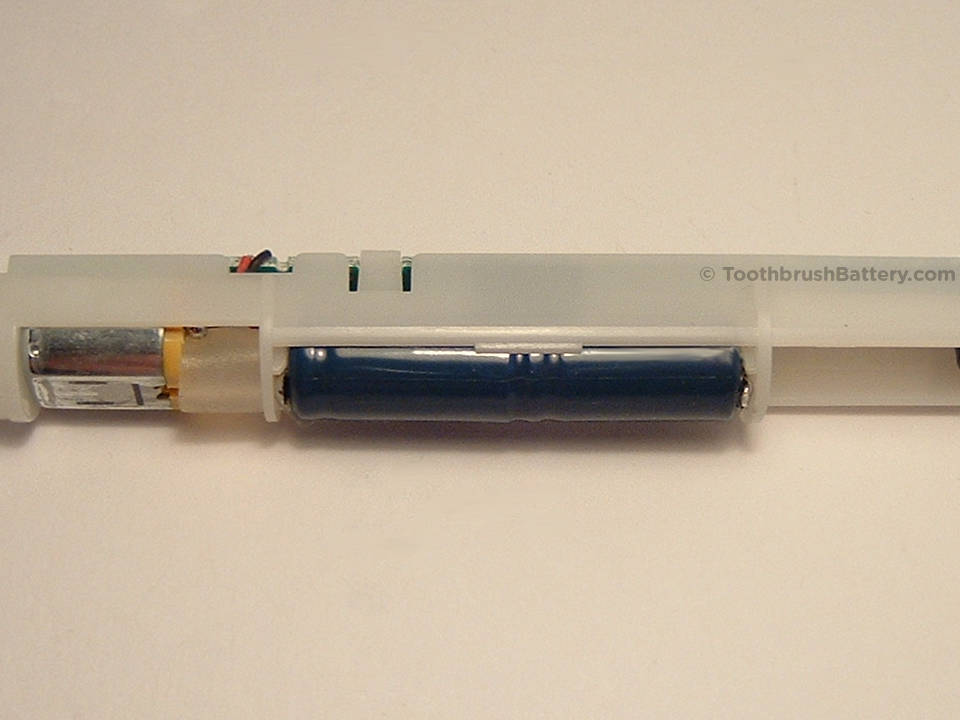
Remove the tape holding the battery into the plastic frame and save it for later.
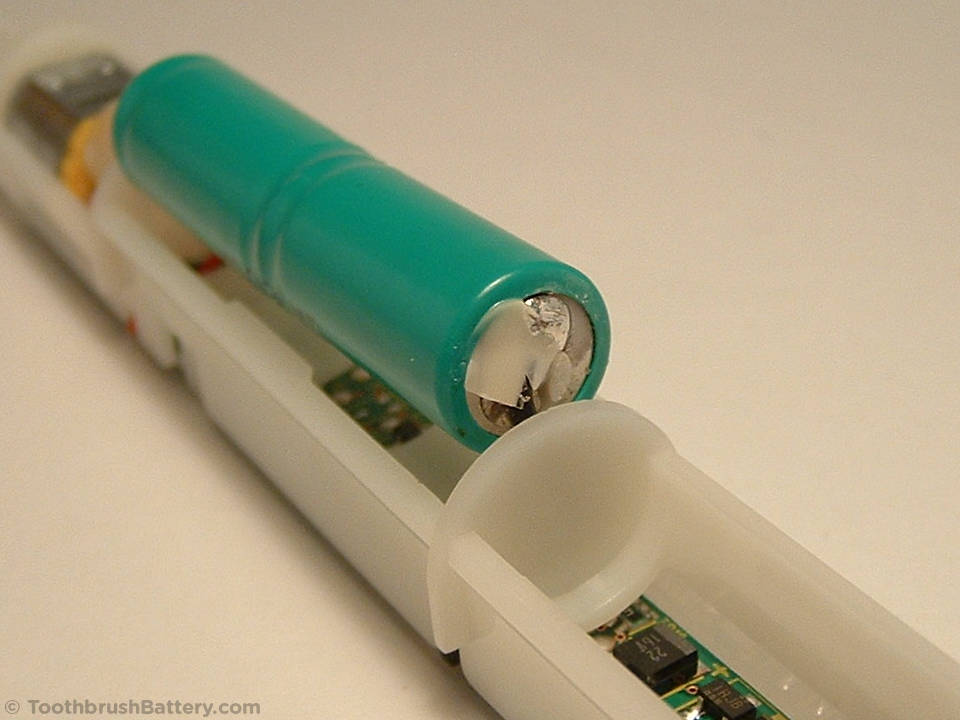
Gently pry the battery out at one end:
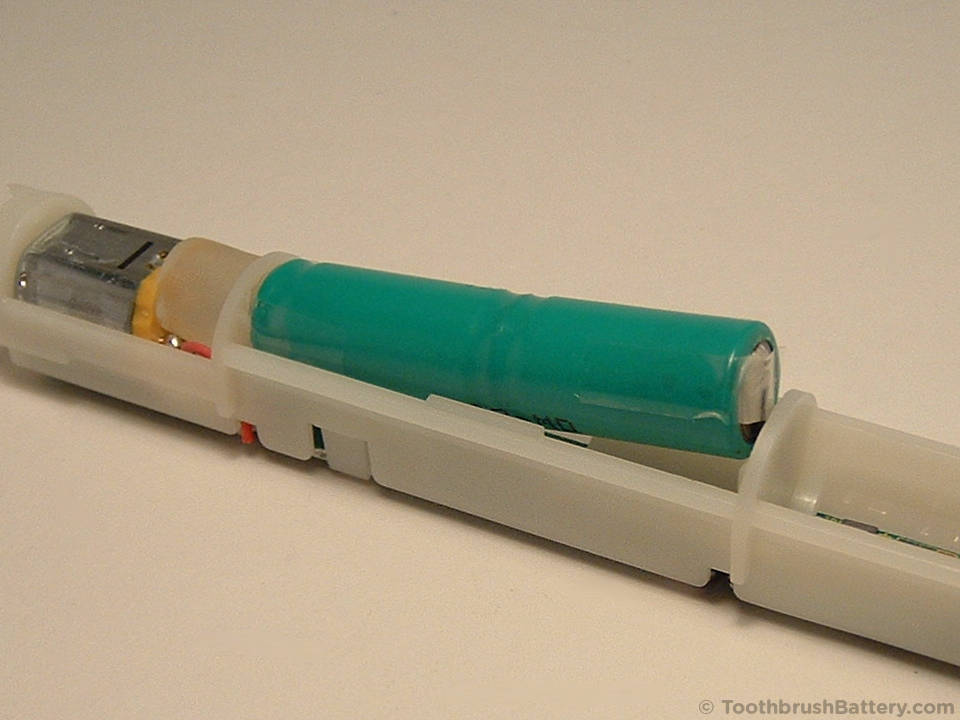
Then the other end:

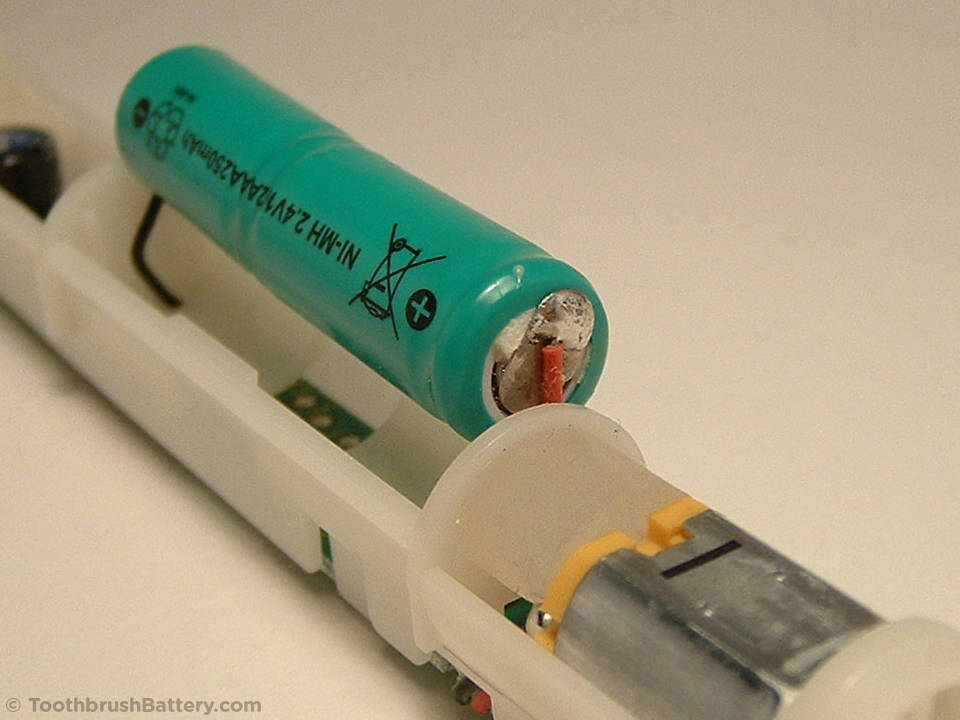
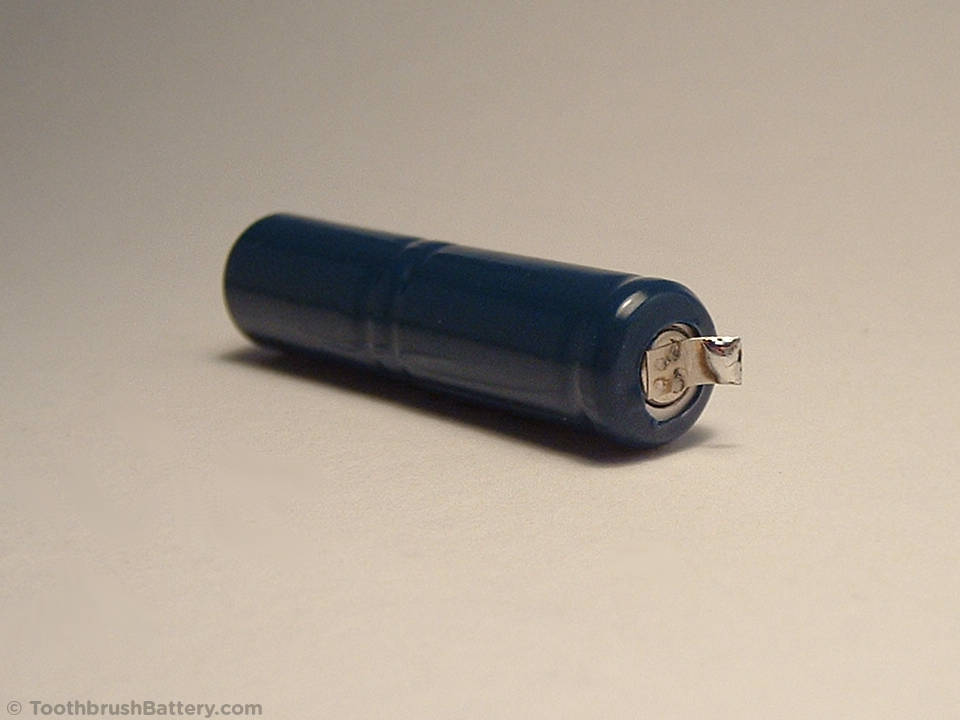
The original battery is a 2.4V Ni-MH type fitted with the positive terminal nearest the motor (red wire).
Peel the tape off both ends of the battery and save it for later.
Gently scrape off the glue from both ends of the battery without breaking the wires.
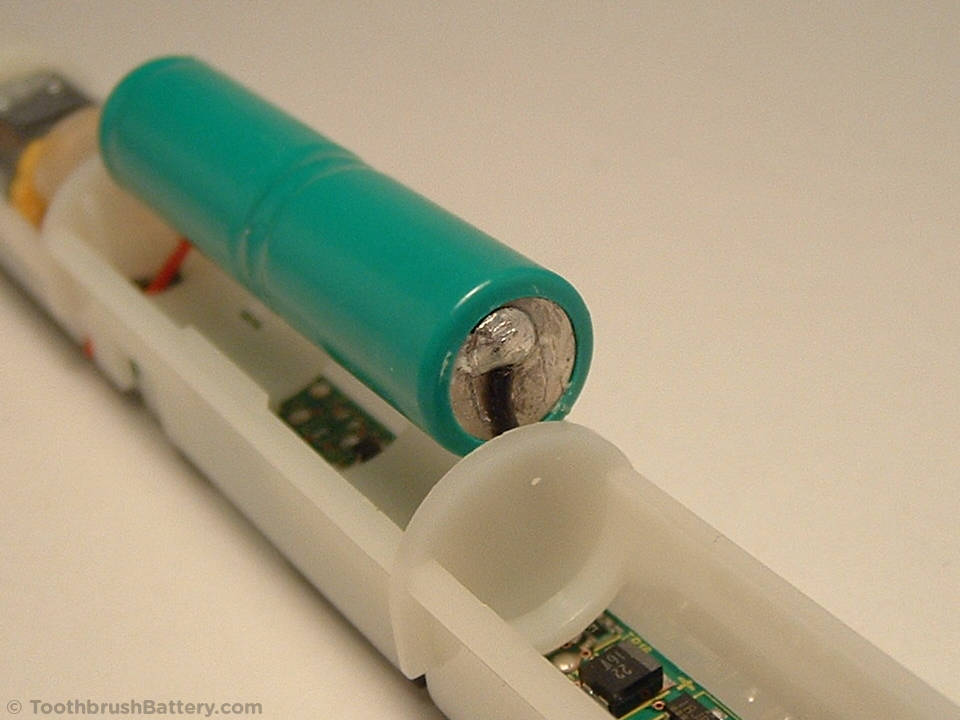
Time to get that soldering iron warmed up and desolder the wires from the battery tags!
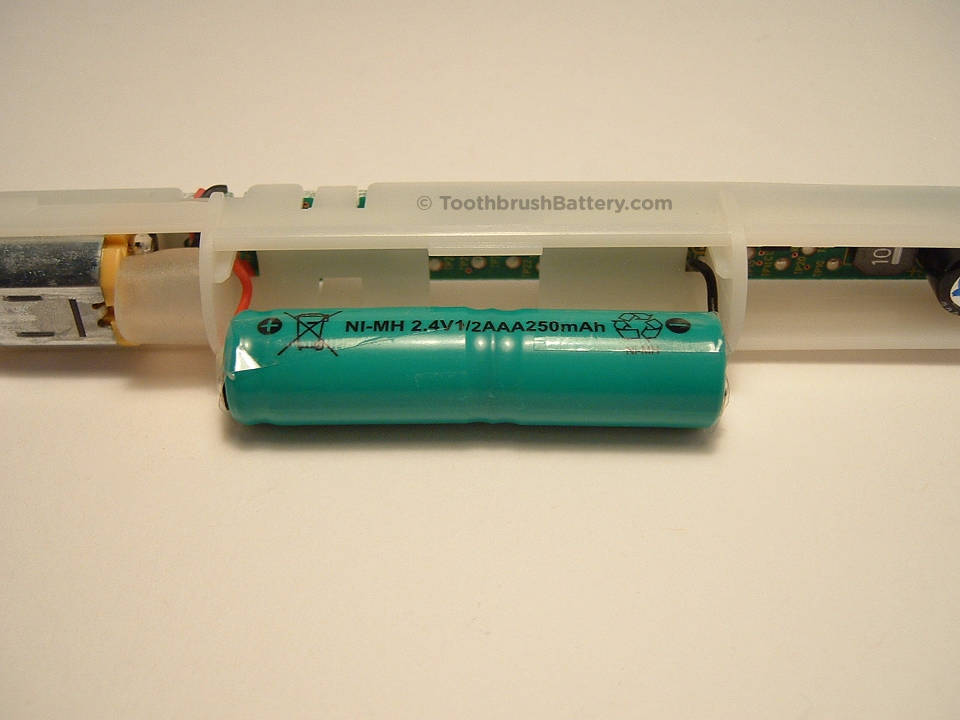
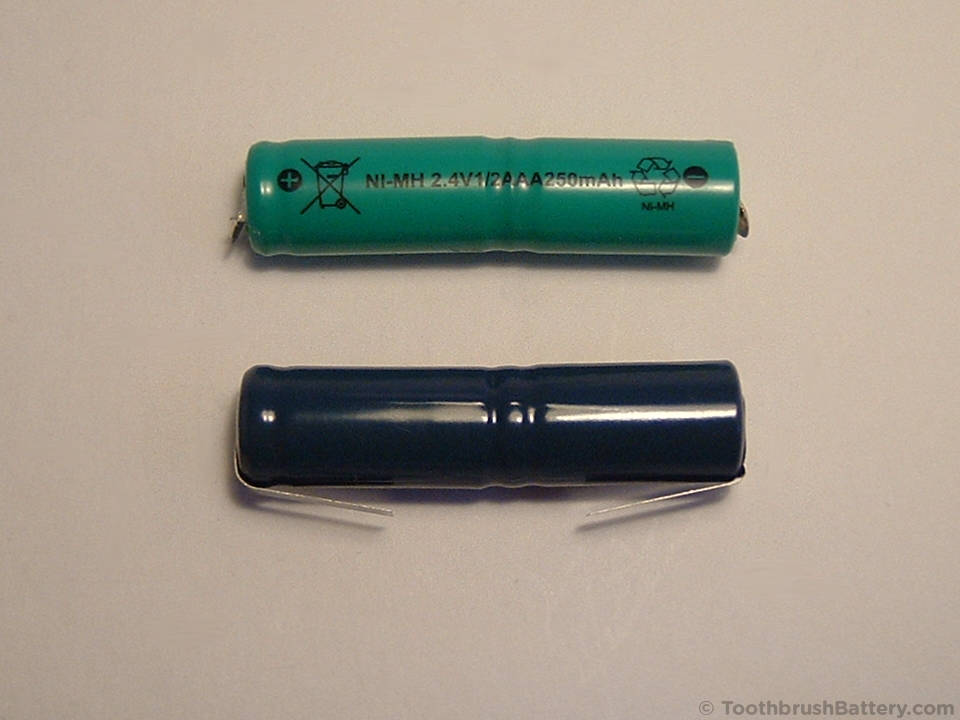
Compare the original battery with its 2.4V replacement. Please support us with writing these repair guides by buying your replacement battery through our secure online shop here at ToothbrushBattery.com !
Note the groove around the outside of the batteries at the positive ends (on the left).
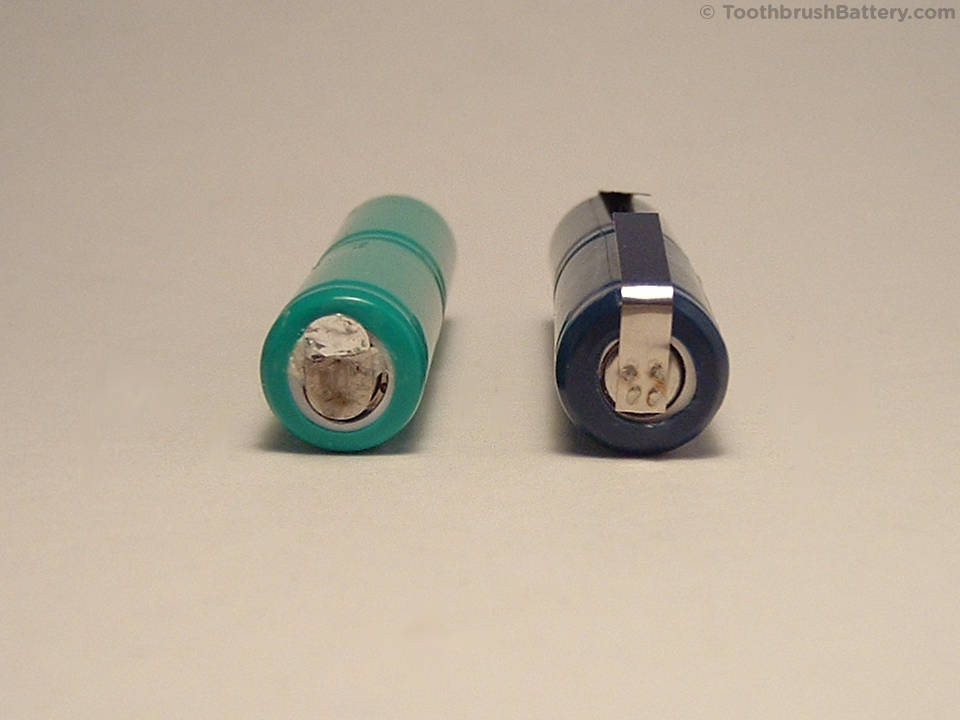
Positive terminals:
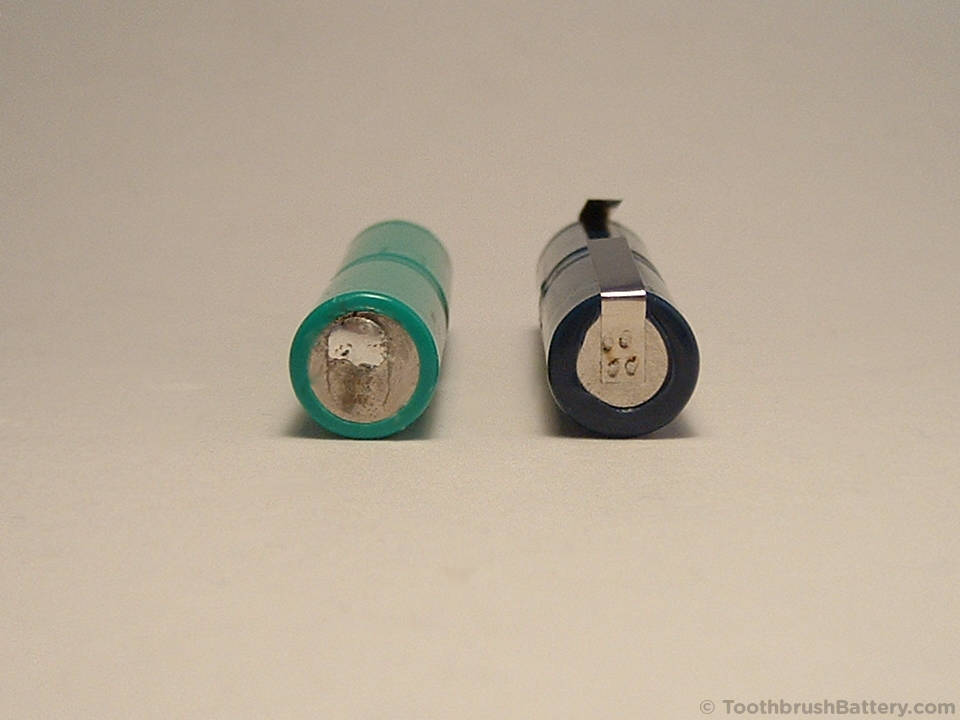
Negative Terminals:
Use a pair of sharp scissors to cut both tags on the new battery level with the outer edge of the battery.

You can test fit the battery in its holder if you like. Keep the wires clear and in their channels.

Fold both tags away from the plastic sleeving of the battery so the plastic won’t melt. Then tin the tags with solder.
You can now solder the wires to the replacement battery.

Once the solder connections have cooled you can fold the solder tags back against the battery.
Check that the battery will fit into its holder then slide it back out and re-apply the tape over the solder joints.
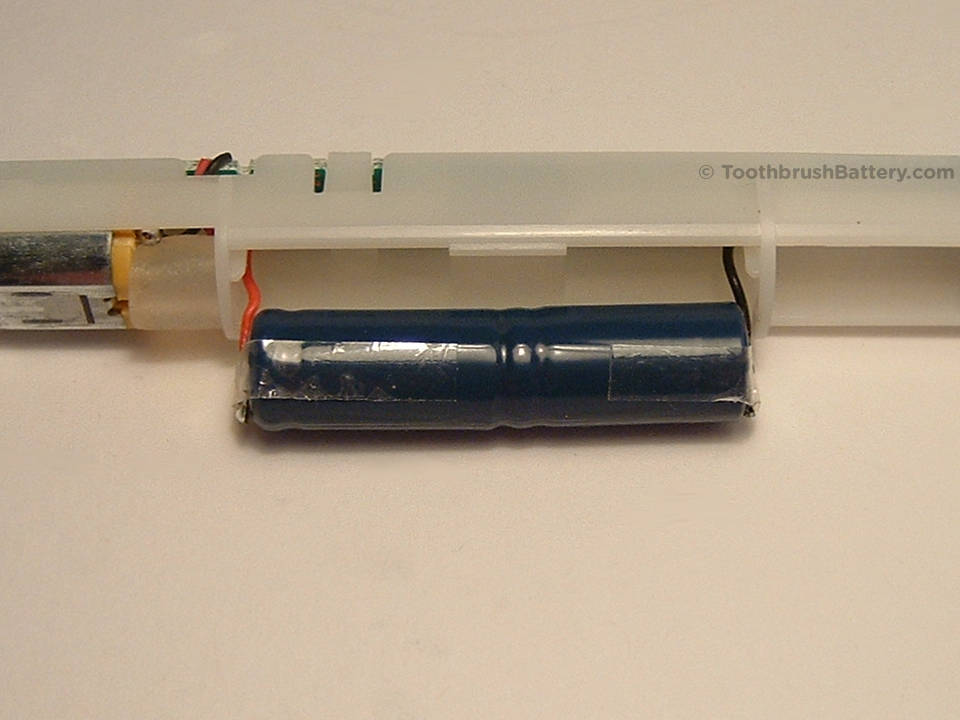
Fit the battery into its holder. Try not to crush the wires.
Re-apply the tape to hold the new battery into the plastic frame.
Note the notches in the shaft cover and see how they line up with the slots in the toothbrush frame. The small notch is at the top and the large notch at the bottom as arrowed below:
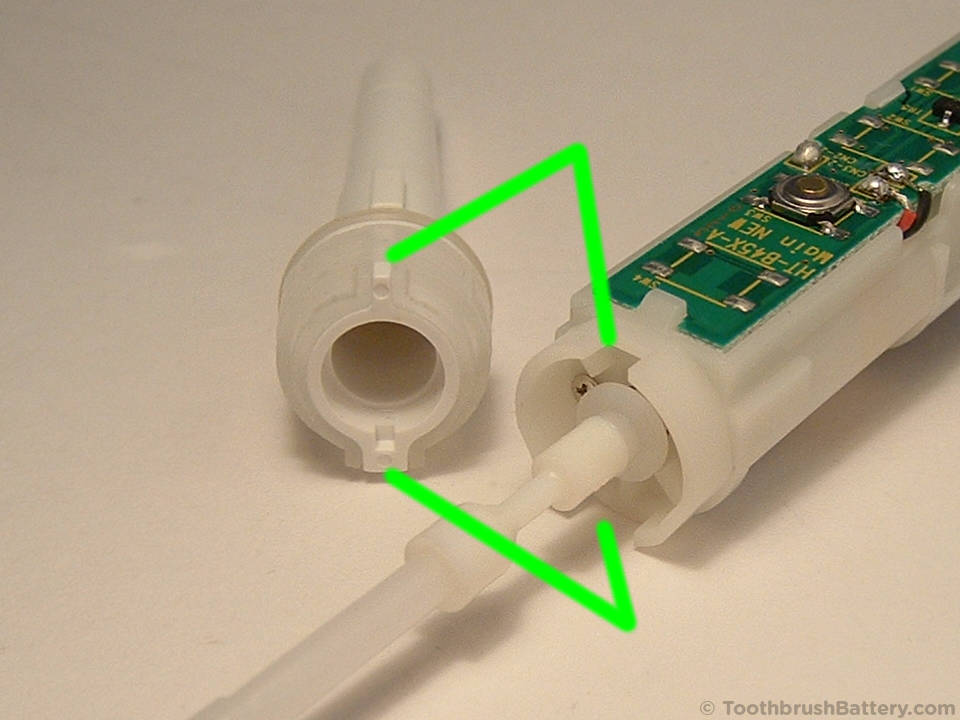
Fit the shaft cover to the toothbrush.

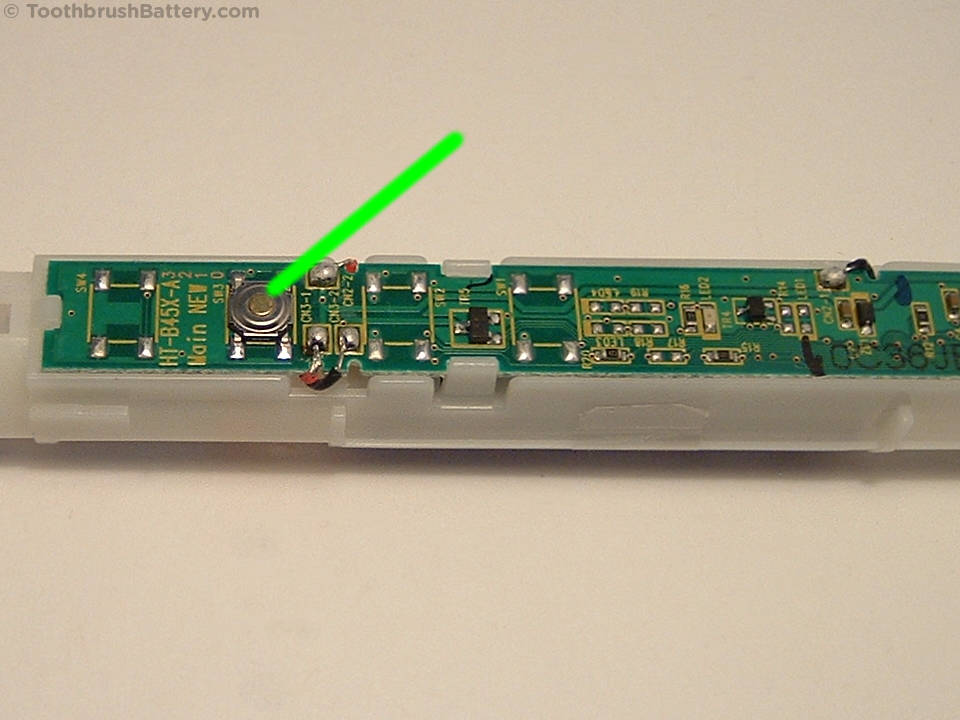
While holding the shaft cover in place and firmly holding the toothbrush internals you can test the new battery by pushing the power switch on the PCB, and then again to switch it off. If the brush will not switch on check your connections and also try holding the toothbrush mechanism in the charger for 10 seconds to reset it.
Gently slide the innards of the toothbrush back inside the handle casing.
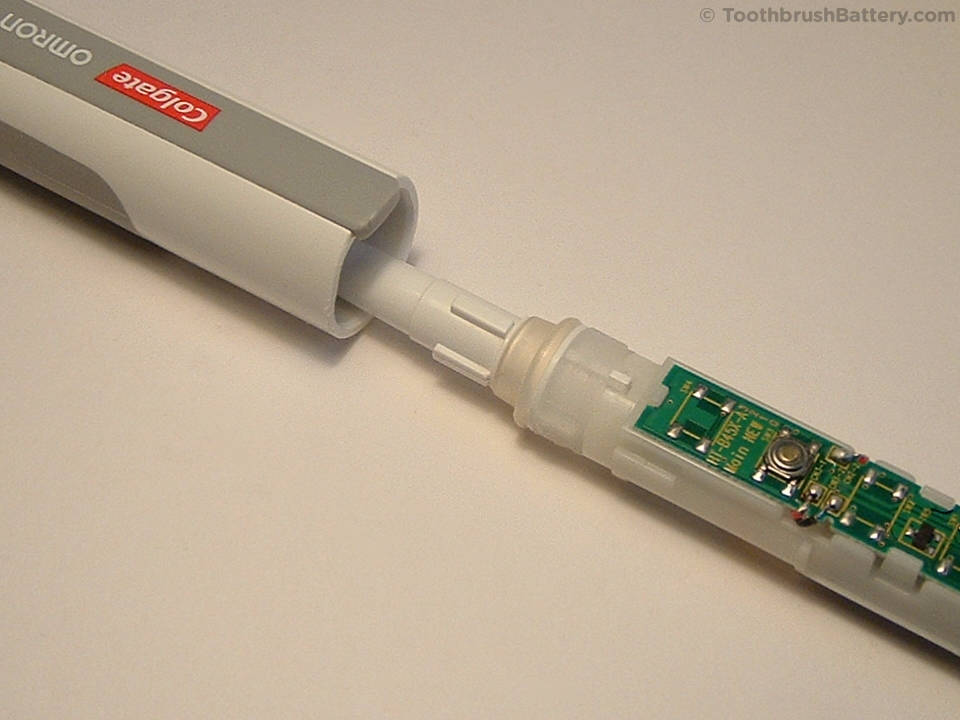
Make sure the shaft cover is pushed fully in to place.

Push the base cap back in to the bottom of the handle.
Re-fit the securing screw. If you give it half a turn anti-clockwise first this will allow the screw to drop into its thread to prevent cross-threading.
Push the rubber screw cover into the hole to cover the head of the screw.

Stick the plastic cover back on to the base cap using the original sticky tape.
You now have a fully repaired Colgate Omron toothbrush!
Put the toothbrush on to charge for a full 24 hours then it is ready to use.
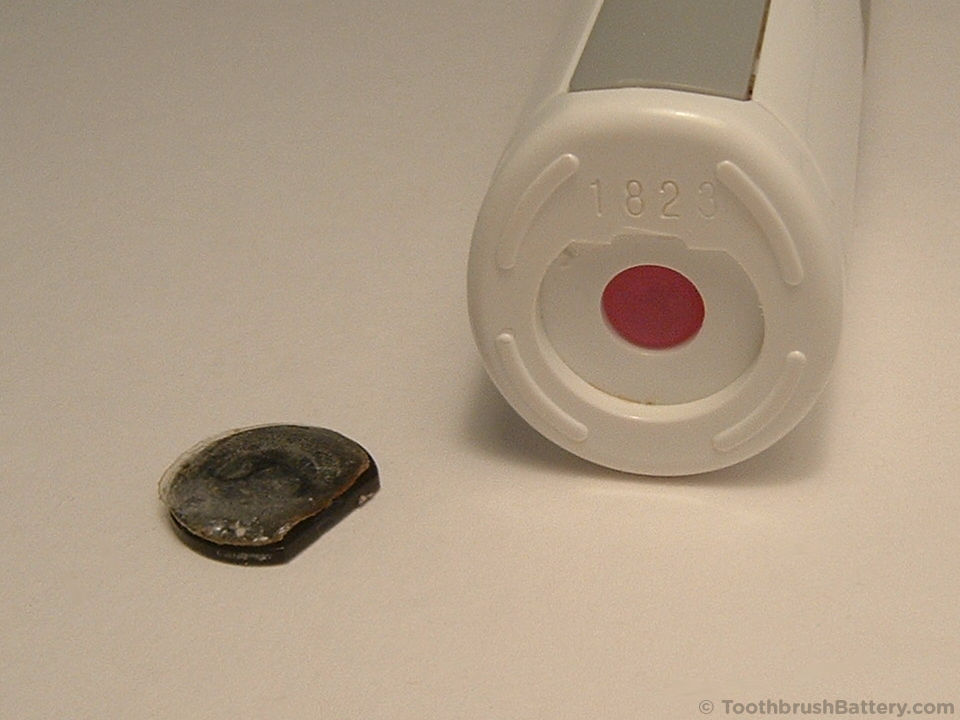
You can recycle your old battery at your local supermarket battery collection point or civic recycling facility.
Please leave any questions, tips or comments about your Colgate Omron C200 tootbrush repair below!
I enjoyed reading the instructions for replacing the Colgate Omron C200 battery. I really wanted to replace the battery in my electric toothbrush. It is such a waste to throw battery, holder, charger, the lot away just because the battery has run out. Unfortunately I am not an amateur electrician and do not have a soldering iron. Good luck to all those who do replace their batteries, so saving further waste.
If you have a friend, relative or colleague who has a soldering iron perhaps they could let you use it, or assist you in replacing the battery in your Colgate brush.
I would rather pay for a local electronics repair shop to repair mine (permanent injuries mean that I can no longer do this sort of thing myself), than simply leave another piece of durable plastic junk for our descendants, even though it costs more money than replacing the toothbrush.
Another way to look at it is: Someone has to pay. Either the owner pays for repair, or future generations have to pay by living in even more polluted surroundings than us.
There are some further options for getting the repair done on our repair service page here.
To pry off the bottom cap, you can use a plastic spudger. It tends to be a bit kinder to the edges than a metal screwdriver. You might need to peel off the sticker on the new battery to make it fit inside.
Very well explained, I’ll be giving it a try 🙂
I really enjoyed reading these instructions about the colgate omron 200. Shame mum didnt have a soldering iron
You might have a friend, relative or colleague who can help you out with the soldering iron so you can fit the new battery.
Where to buy the battery??
Click here for Colgate Omron C200 batteries.
My town has a monthly repair cafe and I know they have a soldering iron. I will be buying the new battery and getting them to replace it using your instructions.
Thank you
This is a great idea! Many towns have a regular Repair Cafe where volunteers repair appliances.
In Singapore where can I sent my Omron proclinical C200 for repair
For toothbrush repair services please see our list of Toothbrush Repair Services. You might need to buy the battery first then take it to your chosen repairer along with your toothbrush.
Excellent instruction. I looked through it and decided that based on an electronics course I had in school about 36 years ago, I could replace the battery in my son’s toothbrush. Ordered the battery, bought a cheap soldering iron and.. easily made it.
Greetings from Fanø, Denmark.
The soldering was really tricky, but that was mainly due the fact I hadn’t done any in a while. After a few goes and a little bit of advice, it was straight forward. Hopefully my soldering lasts. Try and practice on a few bits of old wire beforehand 🙂
My C600 has a different base – white plastic with out the flip off cover – and just a round indentation for the tip of the charger base to fit in – is it still possible to replace the battery on this one? I can’t see anywhere to get a screwdriver or similar in..? Thanks
Hi Pete, are you able to send a photo of the bottom of your C600 to the email address at the bottom of this page?
Yes will do, thanks
Absolutely brilliant – thank you!! I think the hardest part for me was trying to not set off the toothbrush on reassembly (pushing the shaft assembly back through the case can inadvertently switch the brush on) 🙂
Thank you so much for these excellent instructions. I dug out my electric toothbrush and couldn’t believe that I so easily found exactly what I needed – replacement battery and clear instructions as to how to replace it myself. It was the first time I have done an electrical repair and the first time that I used a soldering iron (which I borrowed the soldering iron from a local tool library). Such a satisfying repair. Thank you.
Great work Rebecca, more electronics saved from the bin and more money saved for you!
I have a c250 omron toothbrush & the base isn’t removable it’s a sealed unit, all plastic so there’s nowhere for me to insert screwdriver to get battery out.. can you assist me.
There are some tips on opening the Colgate Omron ProClinical C250 to replace the battery on our other toothbrushes page.
Your instructions are briliiant.
I easily took the toothbrush apart to check the battery size as advised in the instructions before ordering a replacement battery.
Many thnks.
Steve.
The top shaft needed a bang on carpet to push it through.
In 2023 I can’t get a spare battery. I tried a Rechargeable Lithium Battery 3.7 V, same size but 2mm too long. I banged the nipple down, lol, gently with a hammer. ???? It depressed almost flush, ???? and went in the holder by jamming the wires I tipped with solder. It works! With 50% more power, and nearly no discharge, it almost takes off like a rocket.
I hope it doesn’t create a Colgate Scandal.
Please remove the Lithium battery from your toothbrush as it could damage the brush and any attempt at recharging this battery inside the brush could cause it to overheat. Lithium batteries are not compatible with the charging circuitry and are the wrong voltage for the toothbrush. We have the correct 2.4V Ni-MH batteries available in our online shop here.
This is excellent. So happy I didn’t need to buy a new toothbrush! The only thing I struggled with, was fitting the battery in its socket, as I am such a newbie when it comes to soldering that I added too much tin and it wouldn’t go in… Then I realised, I could use the solder tip to melt the plastic socket just enough to allow me to fit the battery back.
Excellent instructions that I was able to follow. I changed the battery and it worked fine until it neeeded charging and then it failed to recharge. How can you test the charging base? The indicator light on the brush is no longer illuminating.
Check the fine copper wire that is wound into a coil at the bottom of the toothbrush internals. Both wires need to be intact and connected to the PCB. They can easily break.
Done and seems to work. I’m an electronics engineer but I wouldn’t have been confident of disassembling the toothbrush without your superb instructions, so thank you!!