
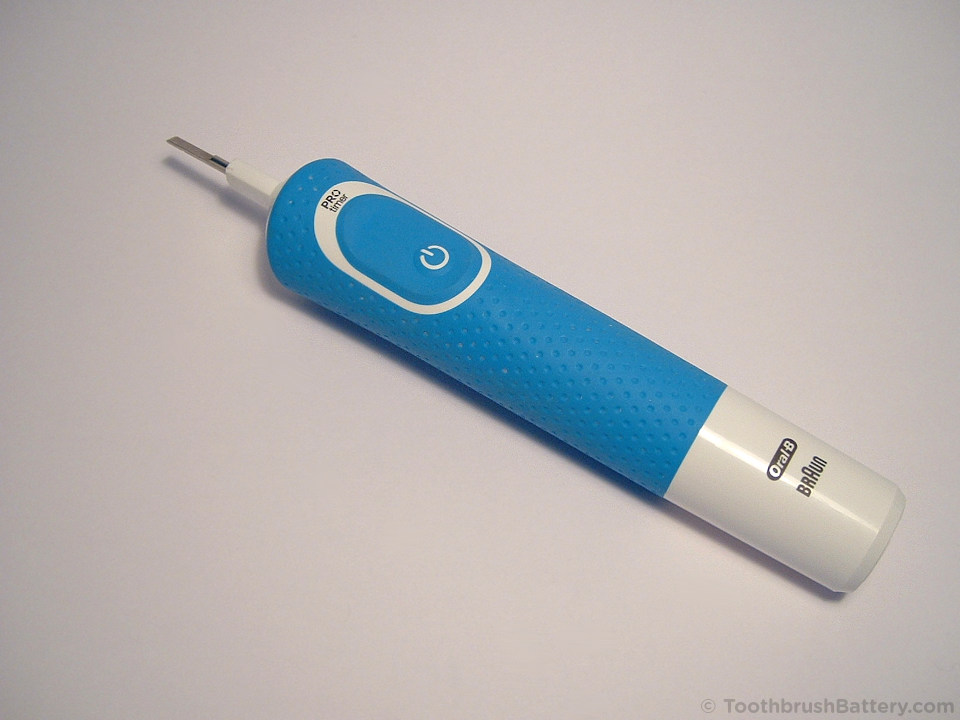
This guide will show you how to open and dismantle the Braun Oral-B Vitality type 3708 and 3710 electric toothbrush models and repair them by fitting a new replacement Ni-MH battery. These are good, solid toothbrushes so they are well worth repairing with a new rechargeable battery.
There are two versions of the Vitality toothbrush – the Type 3709 and the Type 3708/3710. The Vitality Type 3709 has a soft rubber grip around the back and sides with a wavy edge to it, and either one or two buttons on the front. The Vitality Type 3708 and Type 3710 have a soft rubber grip right around the handle with a straight bottom edge, and one button on the front. The differences are shown in the photo below. Click on the photo to enlarge it.
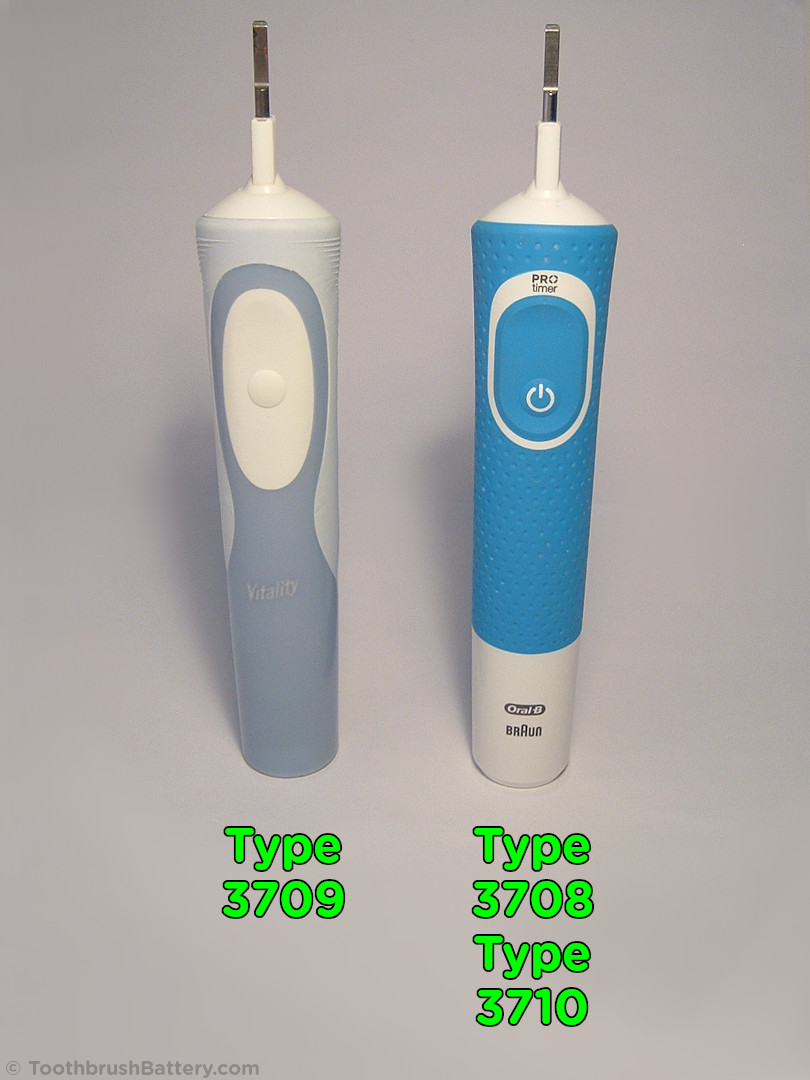
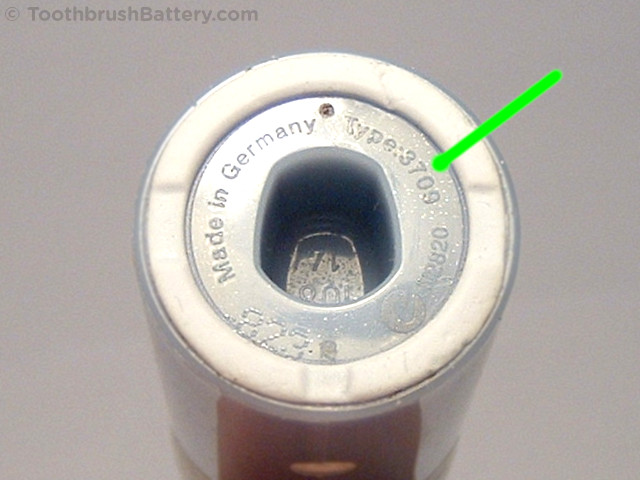
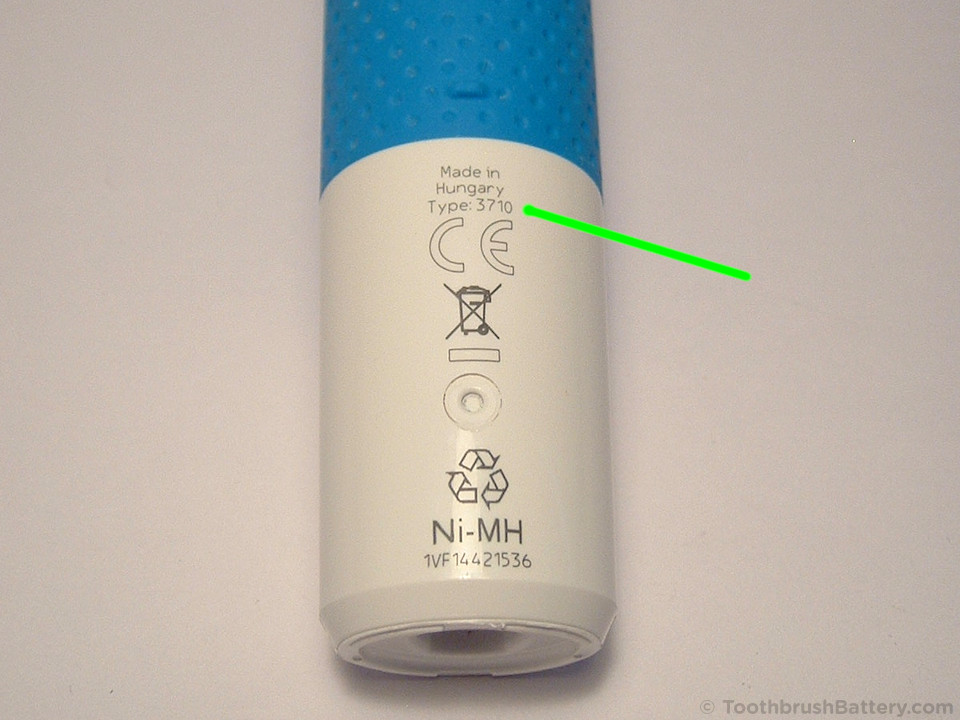
Also check the 4-digit Type number which is marked on the bottom or back of the toothbrush handle.
This battery replacement guide is only for the newer Vitality toothbrushes marked with either Type 3708 or Type 3710. The older Type 3709 Vitality toothbrushes open up in a slightly different way which is covered in our Vitality 3709 battery replacement guide here.
For other type numbers, makes and models the toothbrush opening procedure, battery replacement procedure and battery specification are different so please see our other guides to toothbrush battery replacement for these toothbrushes.
The Vitality Type 3708 and 3710 toothbrushes from Oral-B go by many different names on their packaging including the Vitality Plus, Vitality Pro, Vitality 100, Pro 100 and Vitality Kids. These marketing names are also used for other types of toothbrush (including the older Vitality Type 3709) so do not pay too much attention to the packaging name. The only reliable way to tell which toothbrush model you actually have, and therefore the best guide to use for replacing the battery, is to check the 4-digit Type number marked on the handle as shown in the photos above.
The basic battery replacement method is:
- Open up and dismantle the Vitality toothbrush handle
- Desolder the PCB connections
- Remove the original battery
- Solder in the replacement toothbrush battery, part number 131114466661
- Reassemble the toothbrush handle
The full toothbrush battery replacement process is documented in detail below along with lots of photos. Click on any photo to enlarge it:
Disclaimer
Any damage or injury to yourself, your toothbrush or anything else is entirely your responsibility. This guide is for professional, educational usage only and is offered without guarantee or liability. Rechargeable batteries can be dangerous if short-circuited or mis-handled. Always wear safety glasses when soldering and cutting.
Tools, Parts & Equipment
- Braun Oral-B Vitality type 3708 or 3710 electric toothbrush
- Original charger
- Soldering iron with fine tip: Electronics grade (about 18-25 watt)
- Solder: Lead-free silver solder with a flux core is recommended
- Solder sucker (also known as a desoldering pump) and/or desoldering braid/wick
- Craft knife e.g. scalpel, snap-off, retractable or Stanley type
- Standard pair of pliers
- Pair of wide-opening grips such as waterpump pliers or a vice
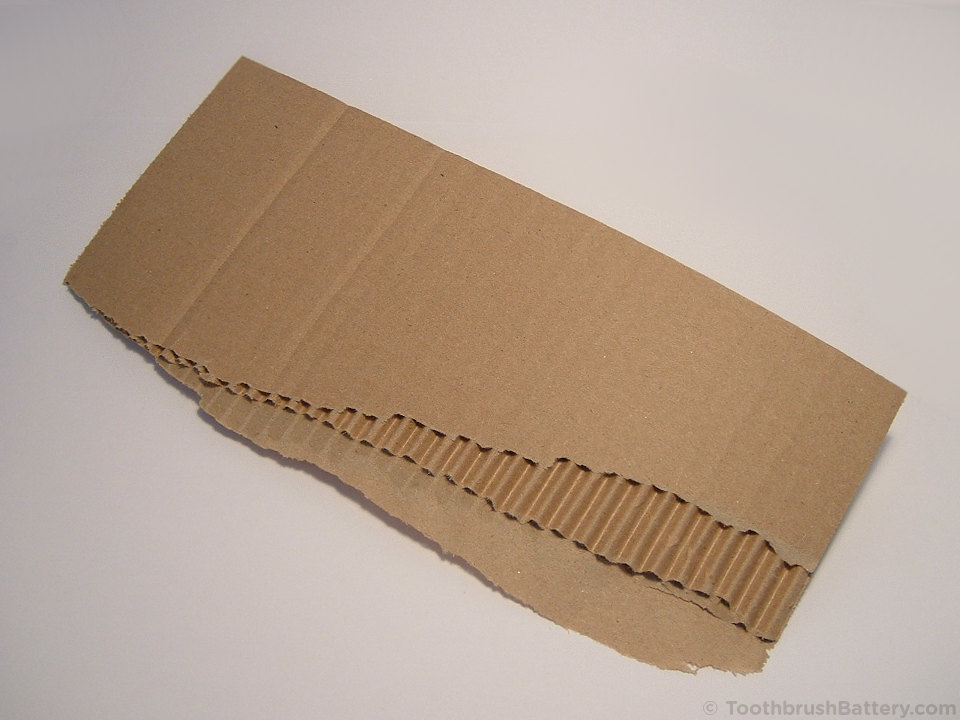
- Corrugated cardboard
- Adhesive tape
- Scissors
- Adhesive putty such as Blu Tack to hold the toothbrush to the work surface
- Replacement Ni-MH rechargeable battery, part number 131114466661. Support us by buying yours from us here
How-To
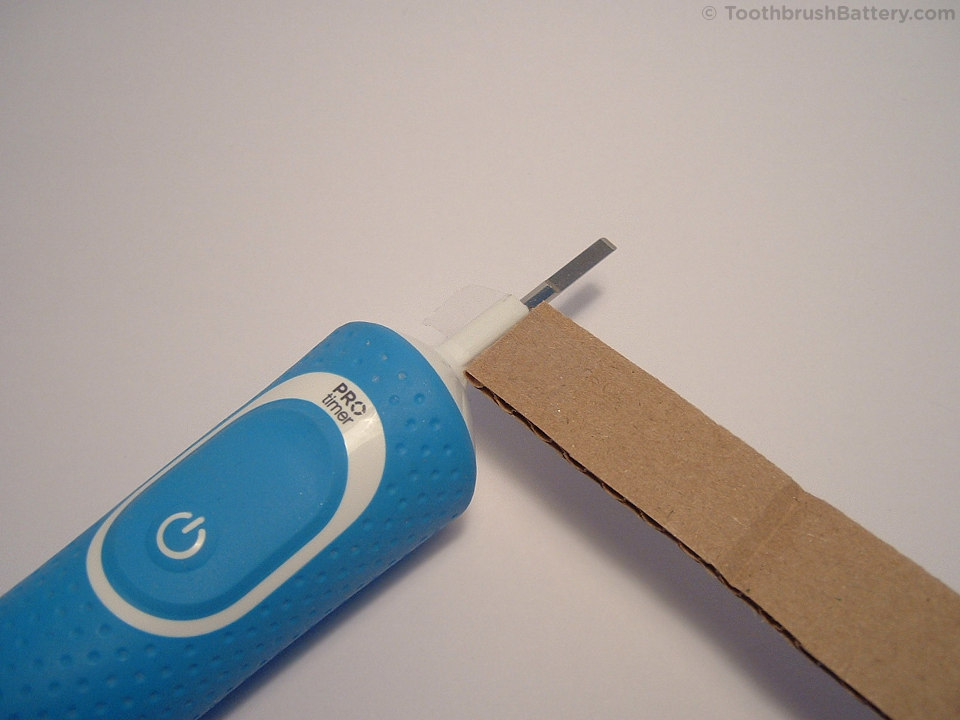
To start with, remove the toothbrush head from the toothbrush.
Using some corrugated cardboard, taken from a cardboard box for example, cut a strip approximately 2cm wide by 25cm long with the ridged corrugations running across the narrow width of the strip. Tape one end of the strip to the white plastic shoulder below the metal output shaft at the top of the toothbrush as shown in the photo below.
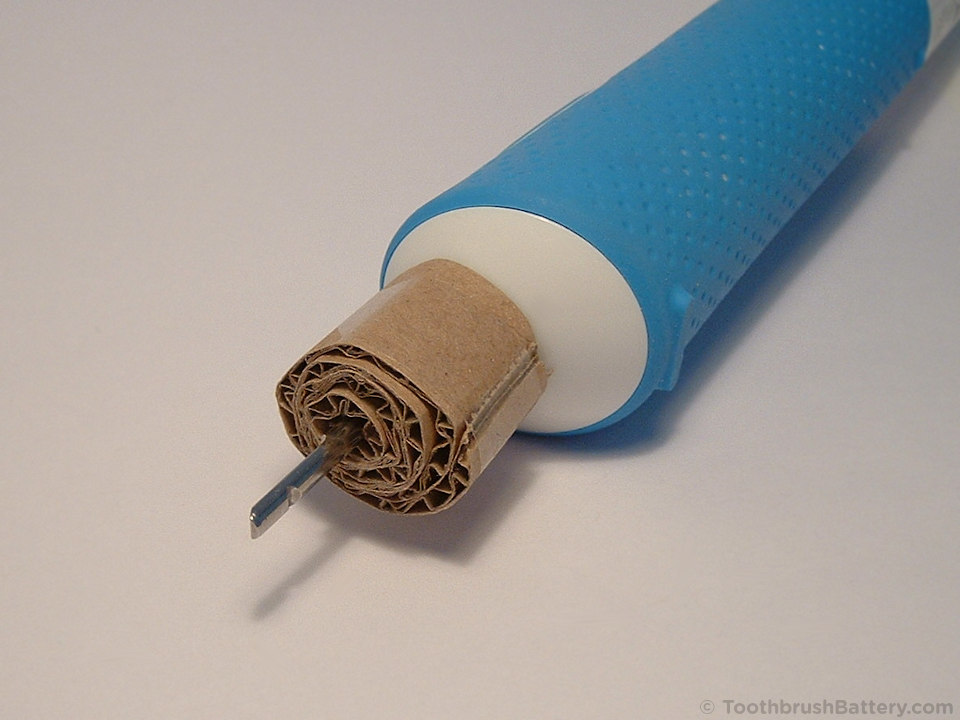
Wind the strip around the shoulder of the shaft and tape the loose end in place.
Cut two more strips of card approximately 3cm by 25cm each and tape them together end-to-end.
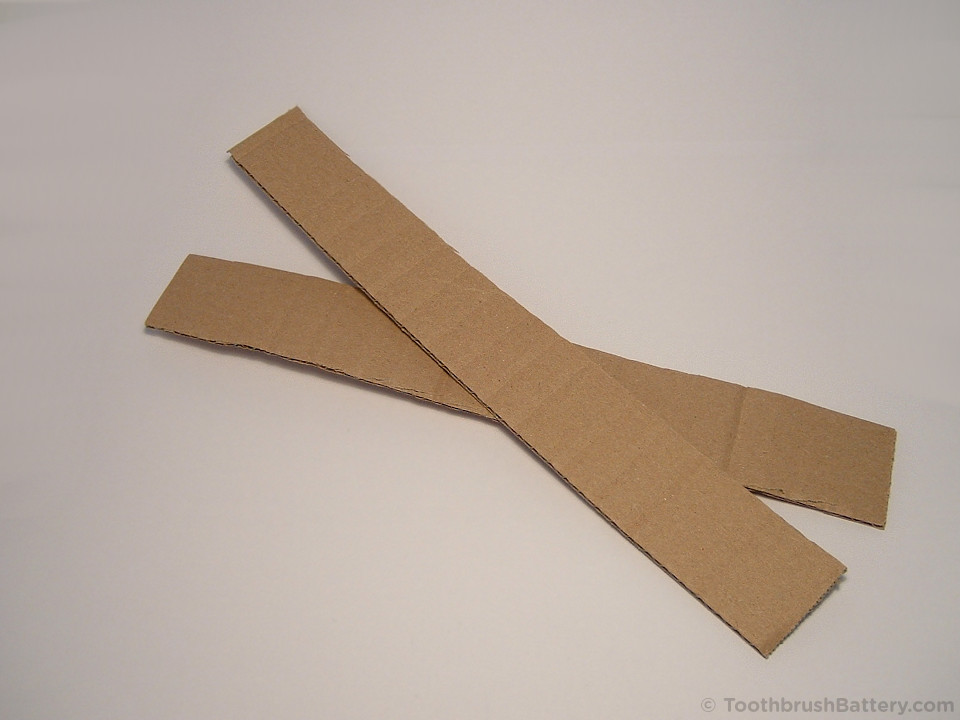
Tape one end of the strip to the front of the toothbrush level with the top of the soft coloured grip.
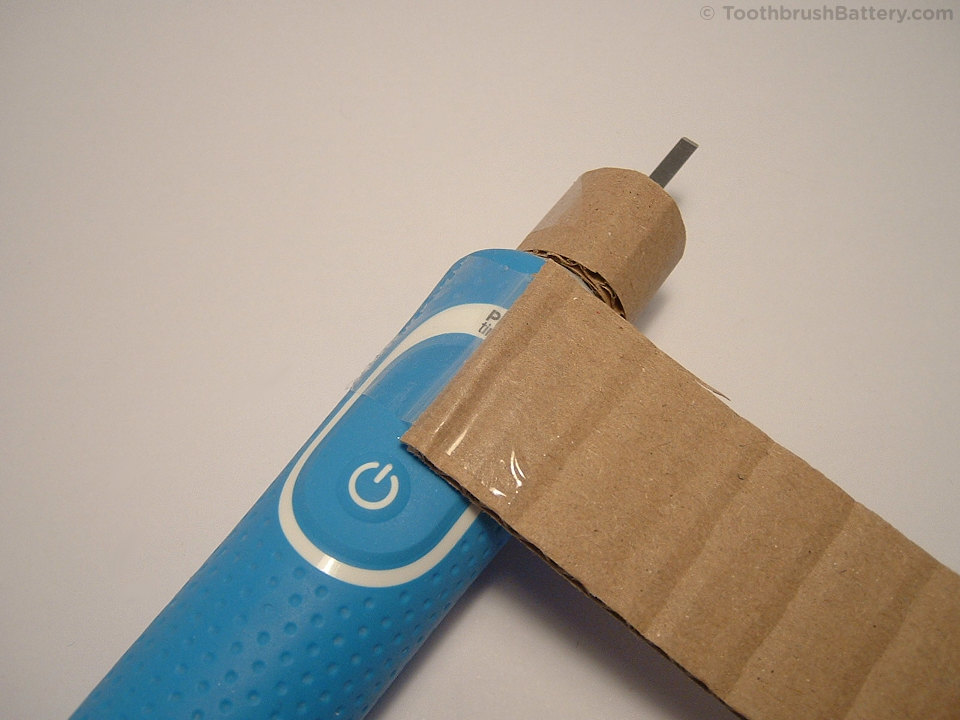
Wrap the strip around the handle and tape the loose end in place.
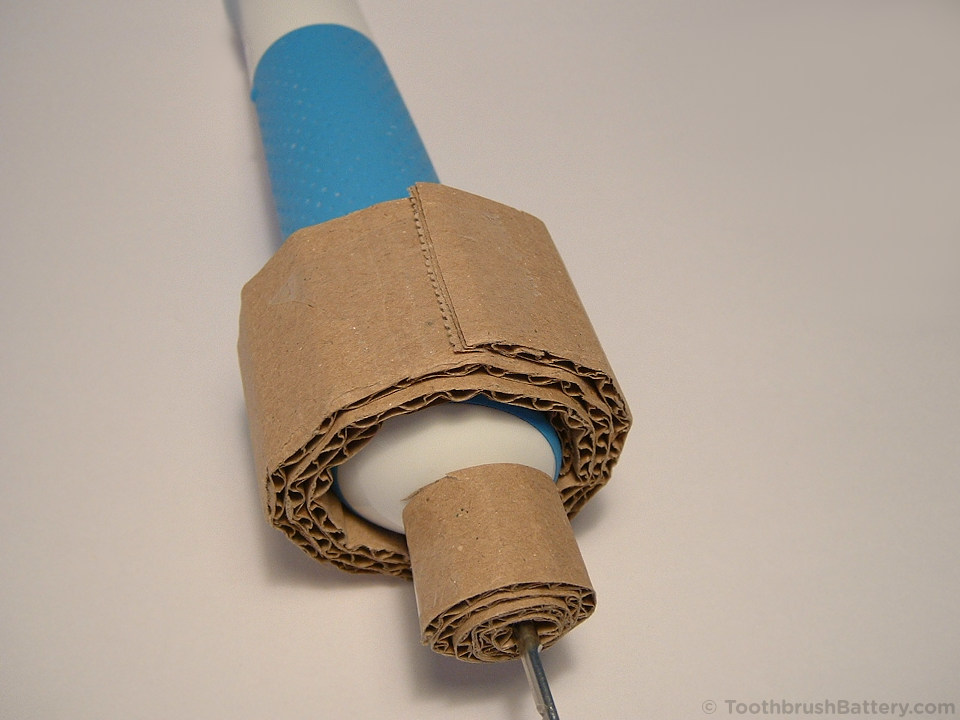
You will need two pairs of pliers next. A pair of wide-opening grips such as waterpump pliers (or use a vice), and a pair of standard pliers or similar.

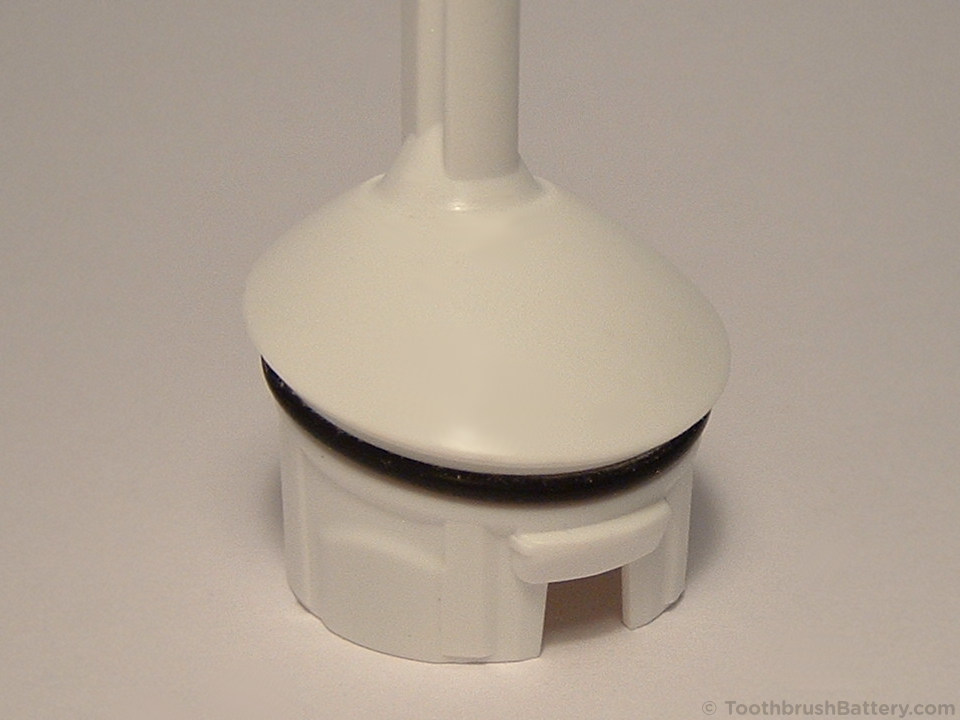
Use the waterpump pliers or vice to squeeze the sides of the handle where it is protected by the card, as arrowed below. This should partially release the internal clips holding the top cap into the handle casing.
Simultaneously, use the pair of pliers to grip the shoulder of the output shaft where it is protected by the cardboard from the front to the back.
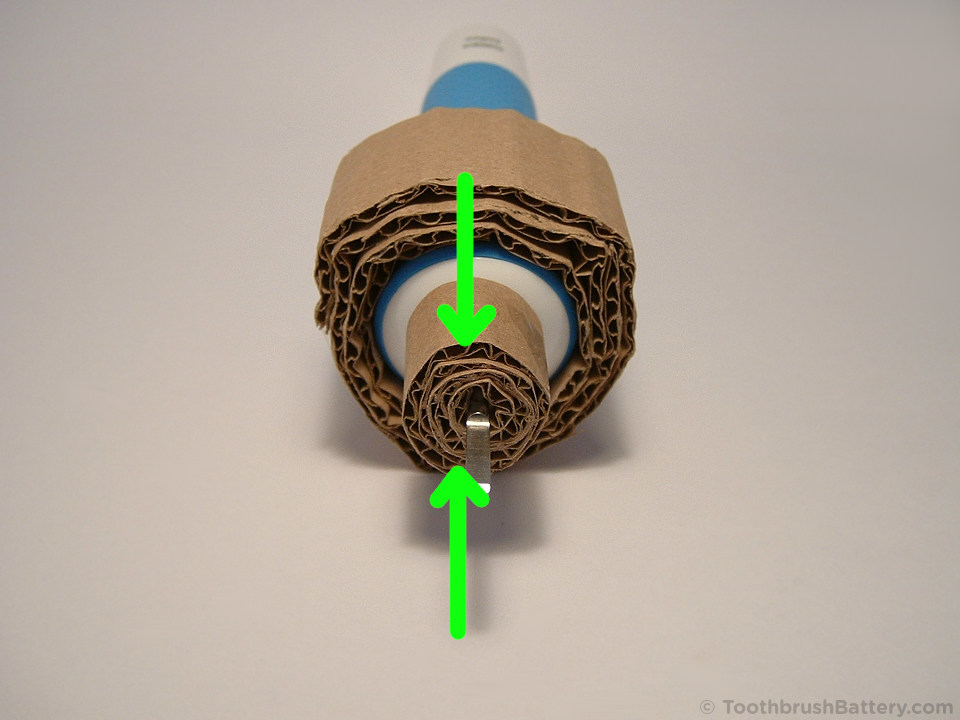
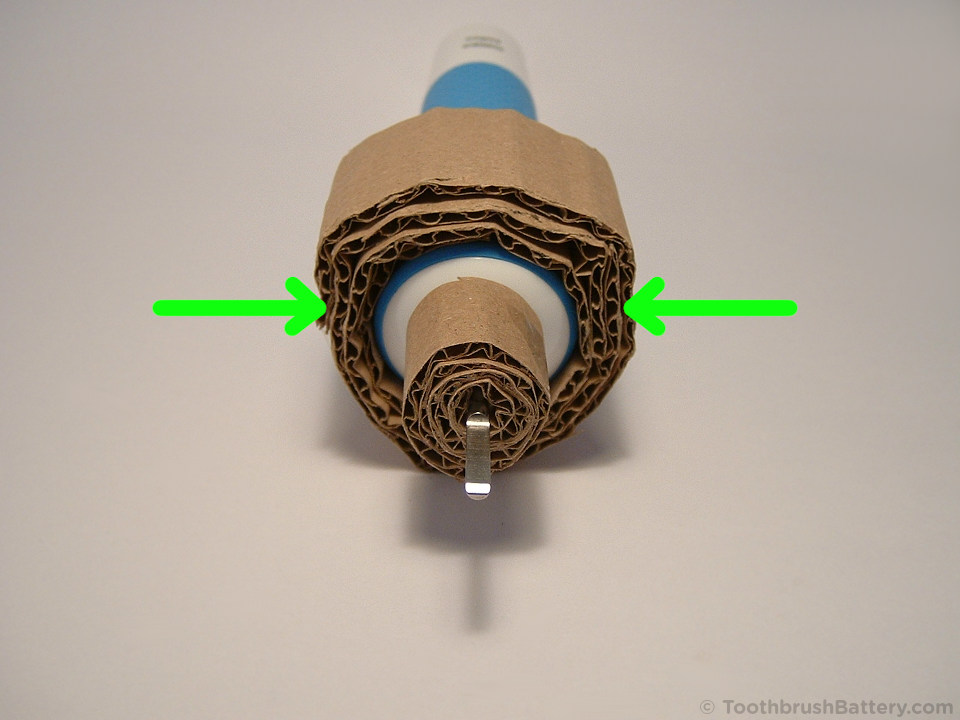
Use the hold on the top shoulder to move it up and down while also squeezing the sides of the handle casing. Try to open up a gap between the cap and the main casing, either at the front of the handle as shown in the photo below, or at the back.
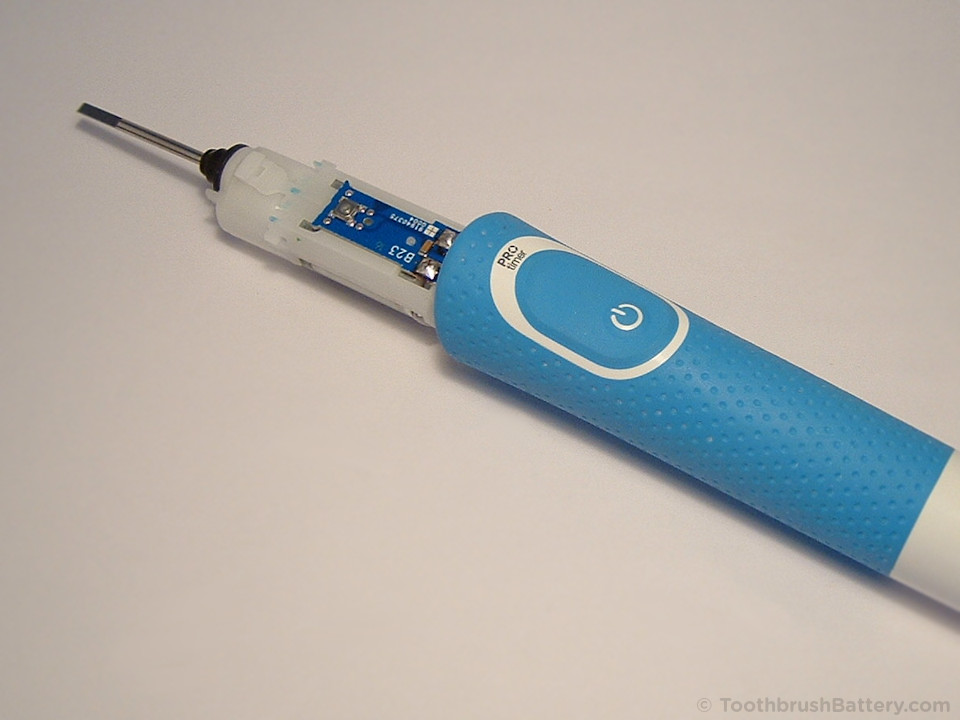
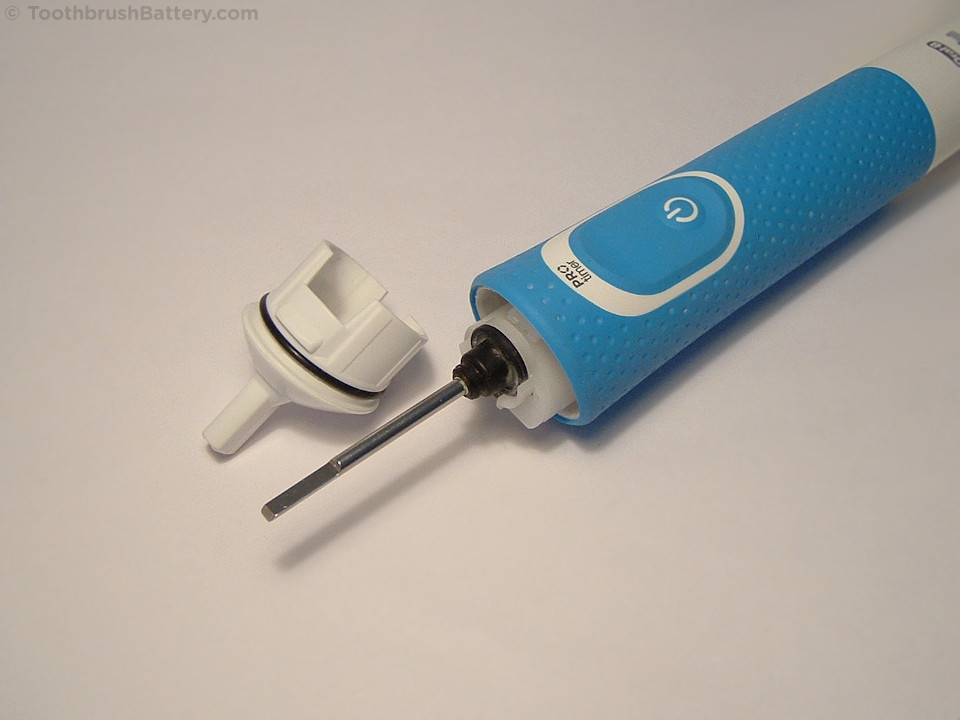
Once you have opened up a gap all around you should be able to pull out the top cap.

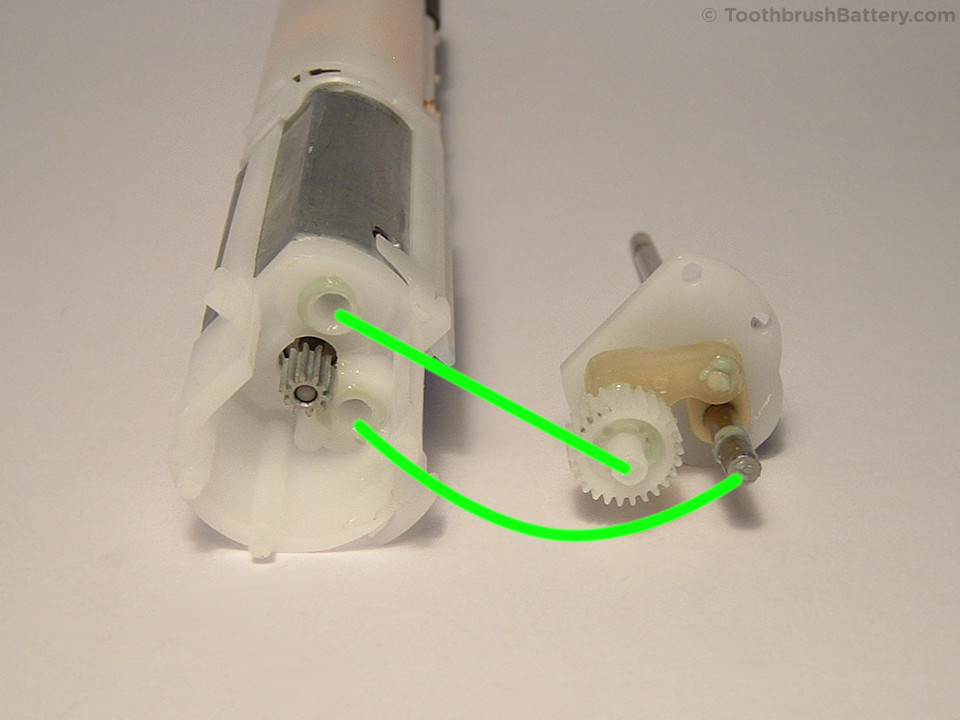
Don’t worry if part of the drive mechanism comes out too. This can be reassembled later.
Note the two clips on the top cap. These are what were holding it in. Squeezing the sides of the handle creates a gap and partially disengages these from the locating holes on the inner surface of the casing.
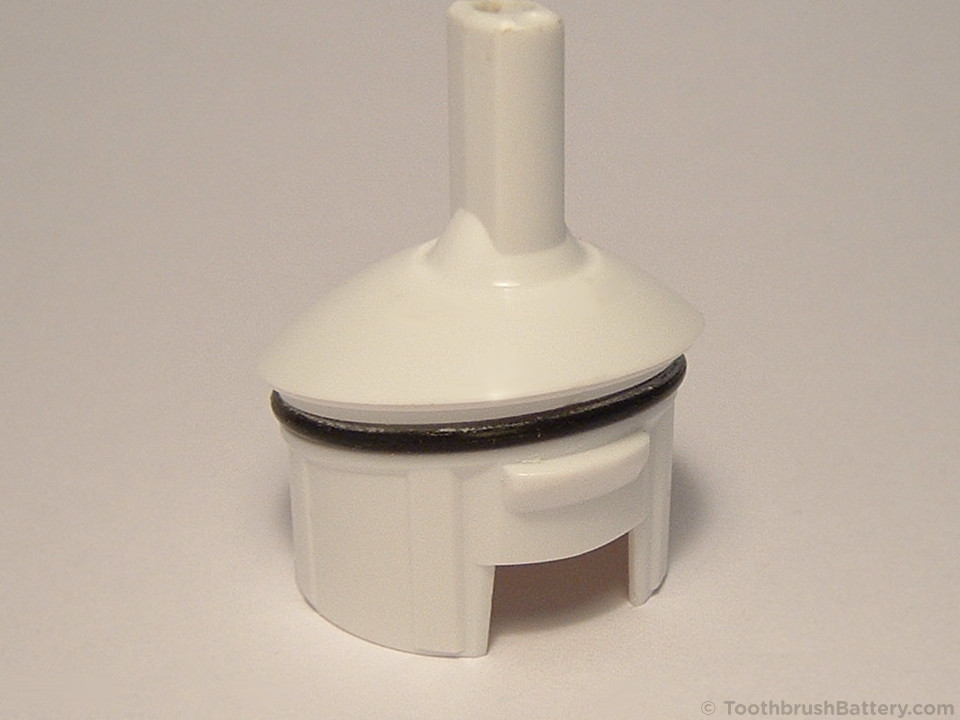
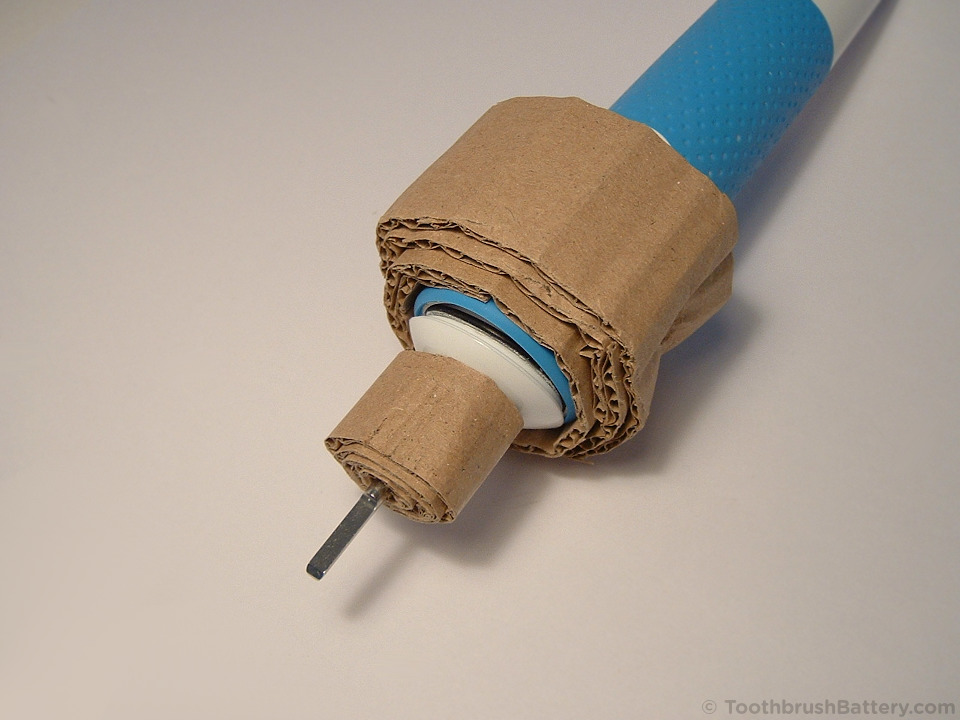
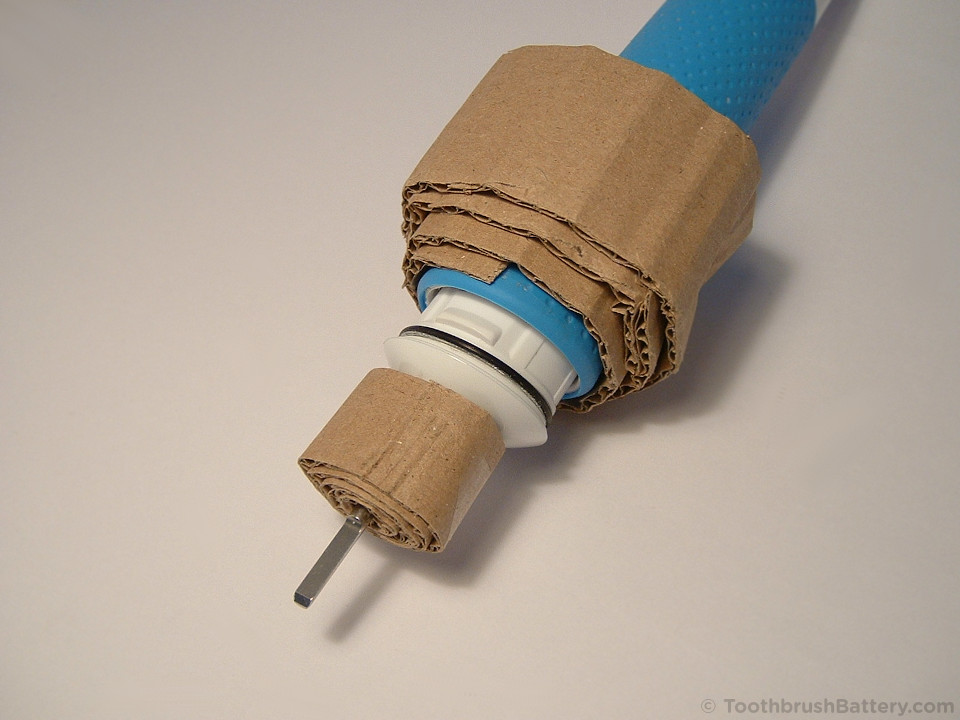
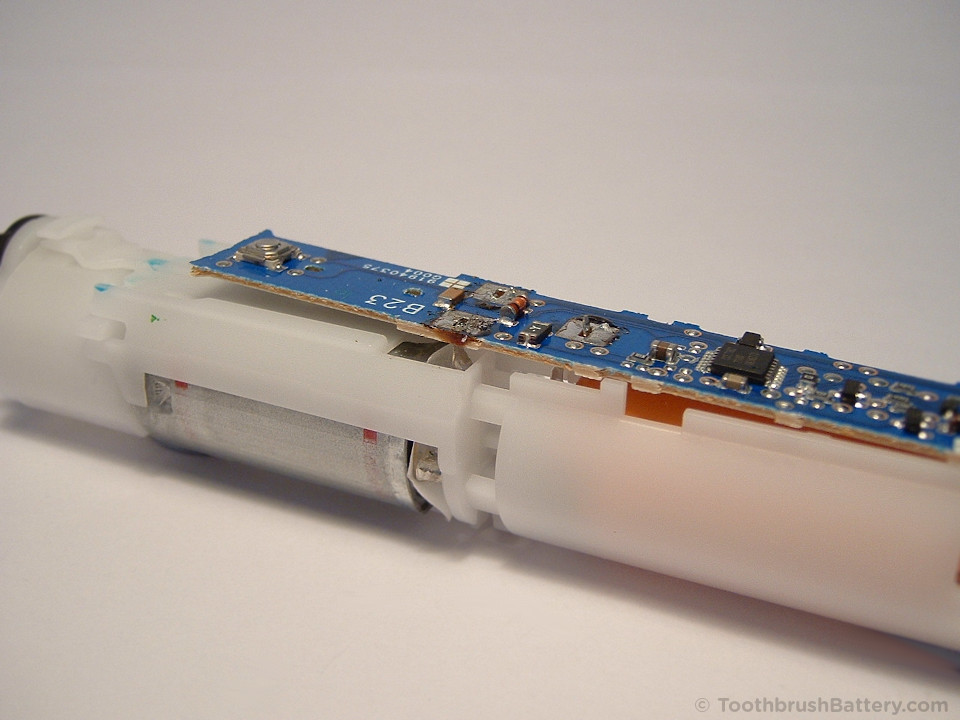
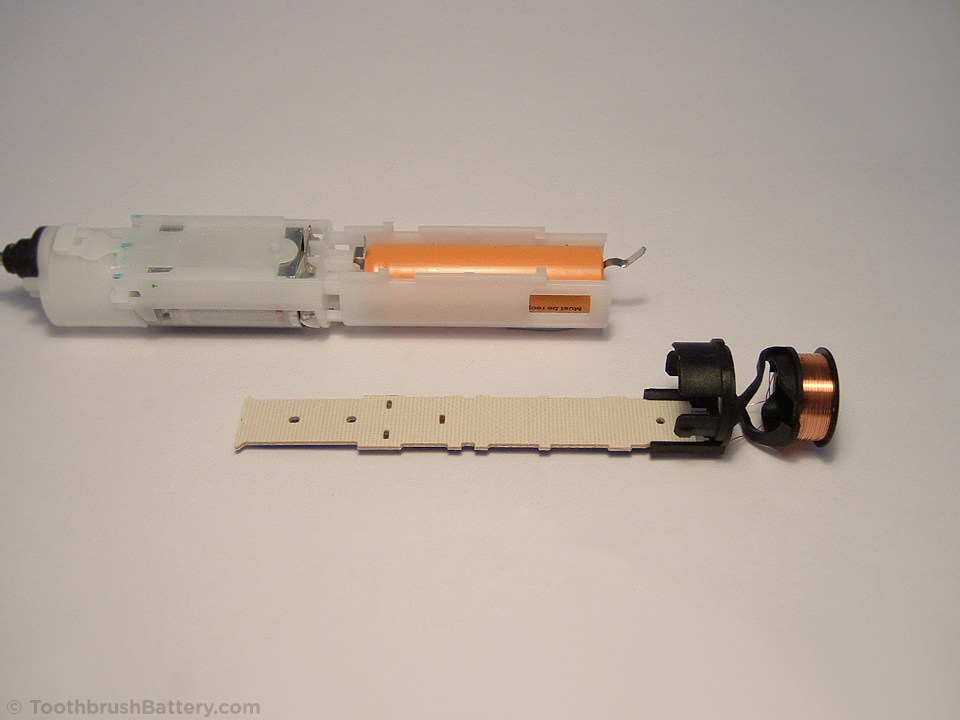
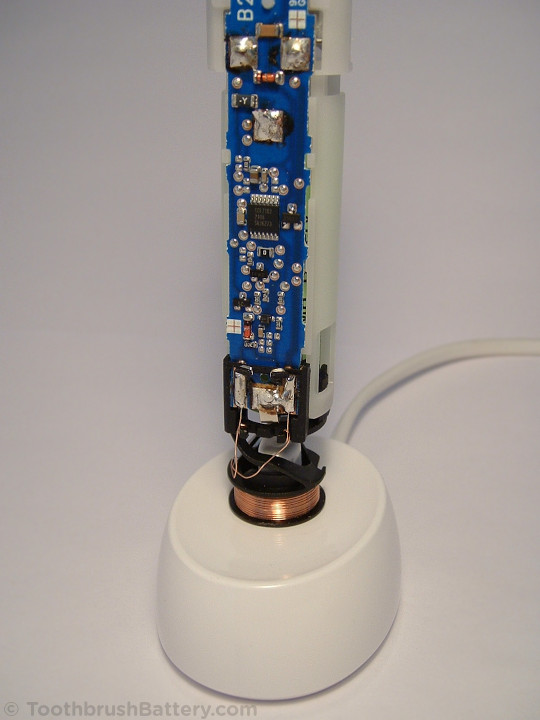
You can now slide out the internals of the handle from the casing.
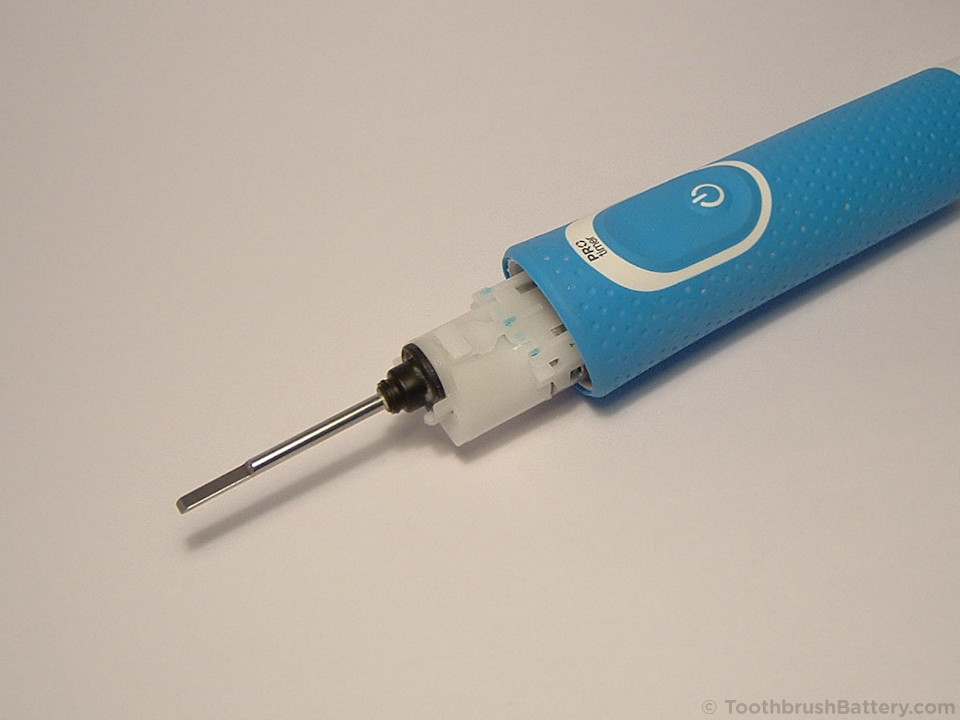
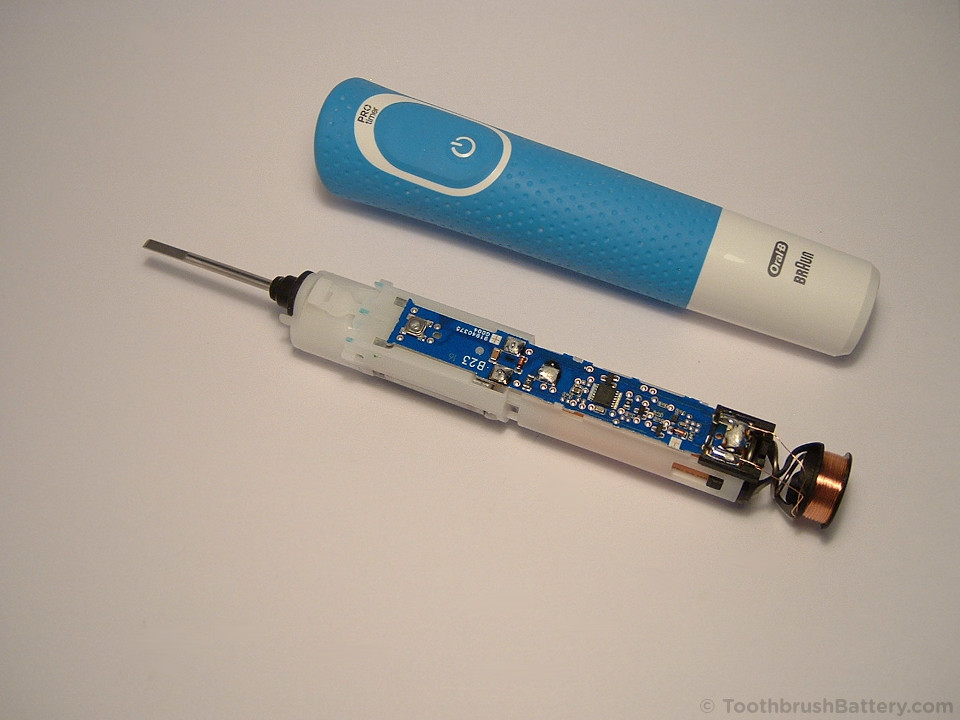
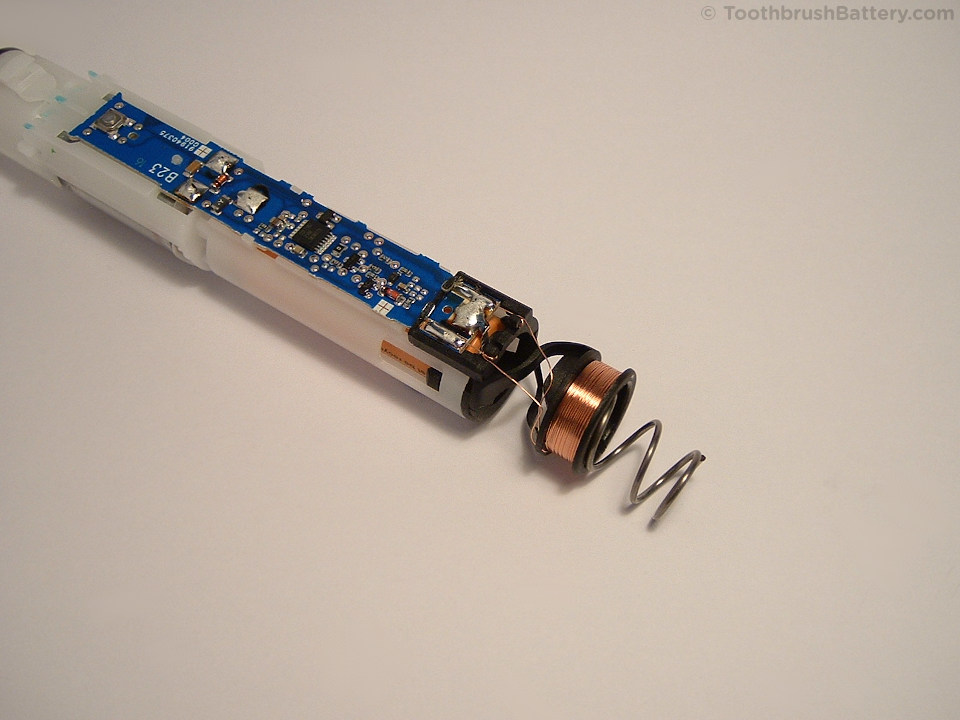
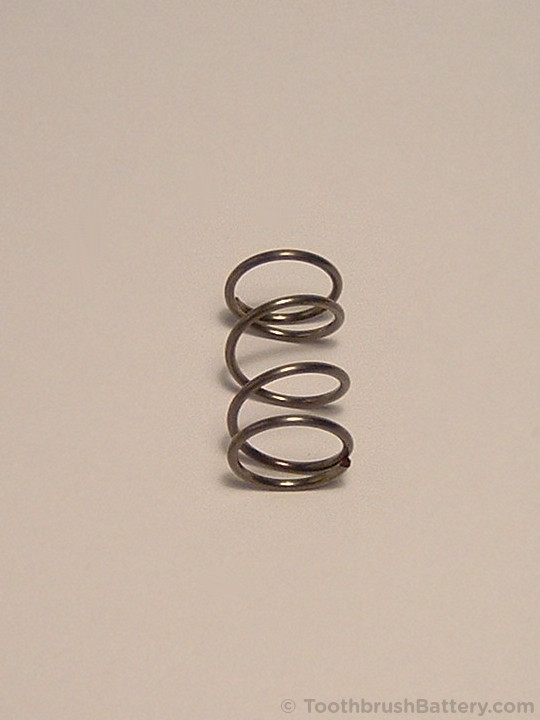
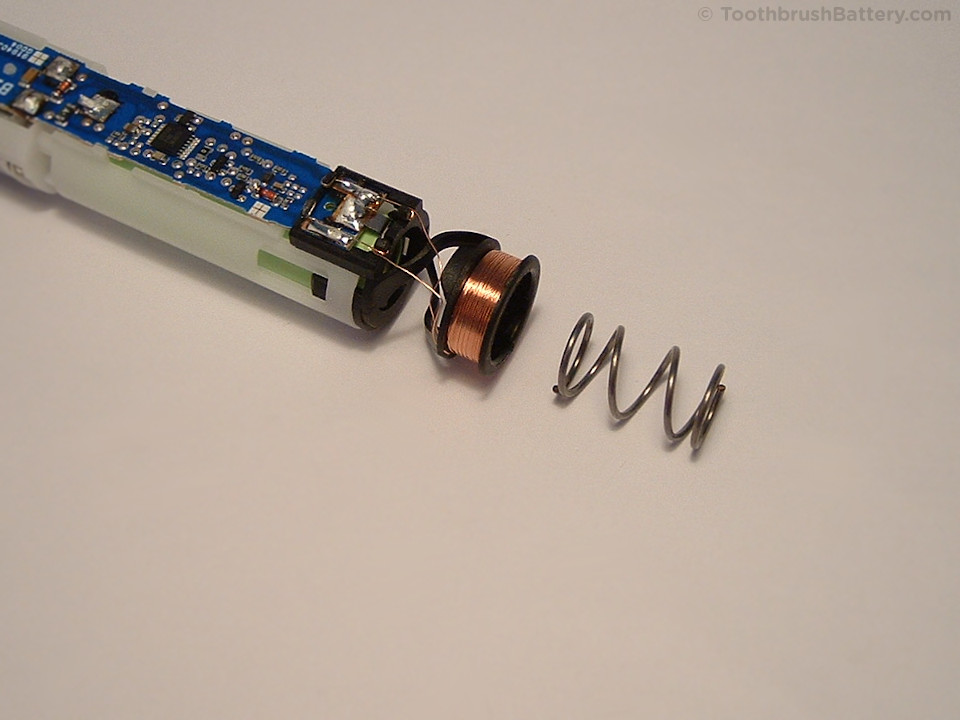
There is a spring that sits inside the coil of copper wire at the bottom of the internals. This might be loose and can get left in the bottom of the casing. Put the spring somewhere safe.
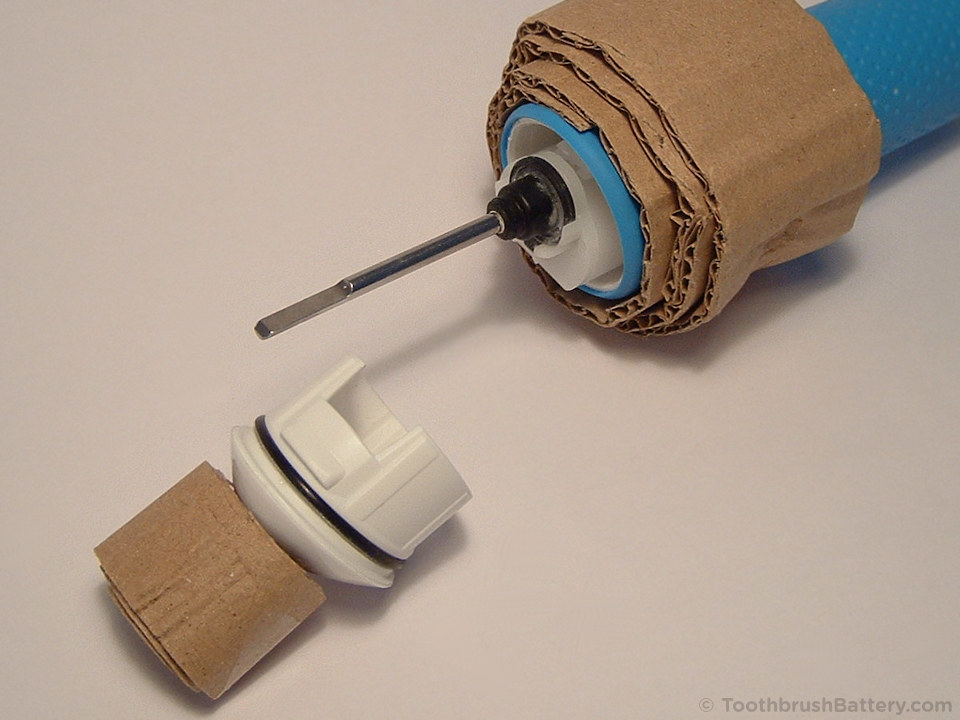
If the drive mechanism came apart you can clip it back together by aligning the holes and pegs as shown below.
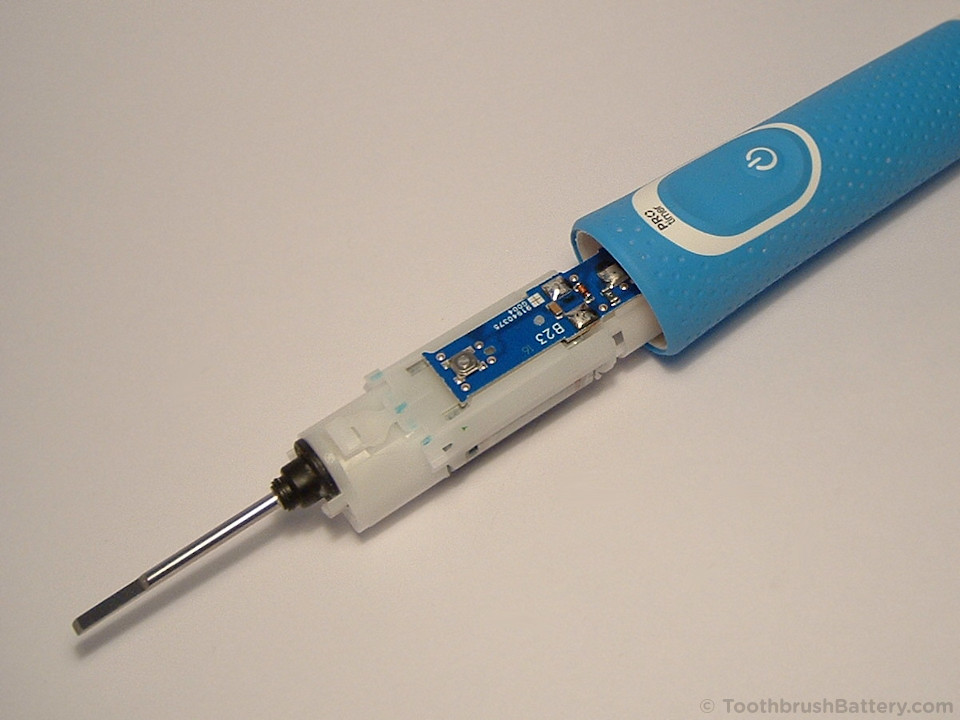
Time to get your soldering iron warmed up now!
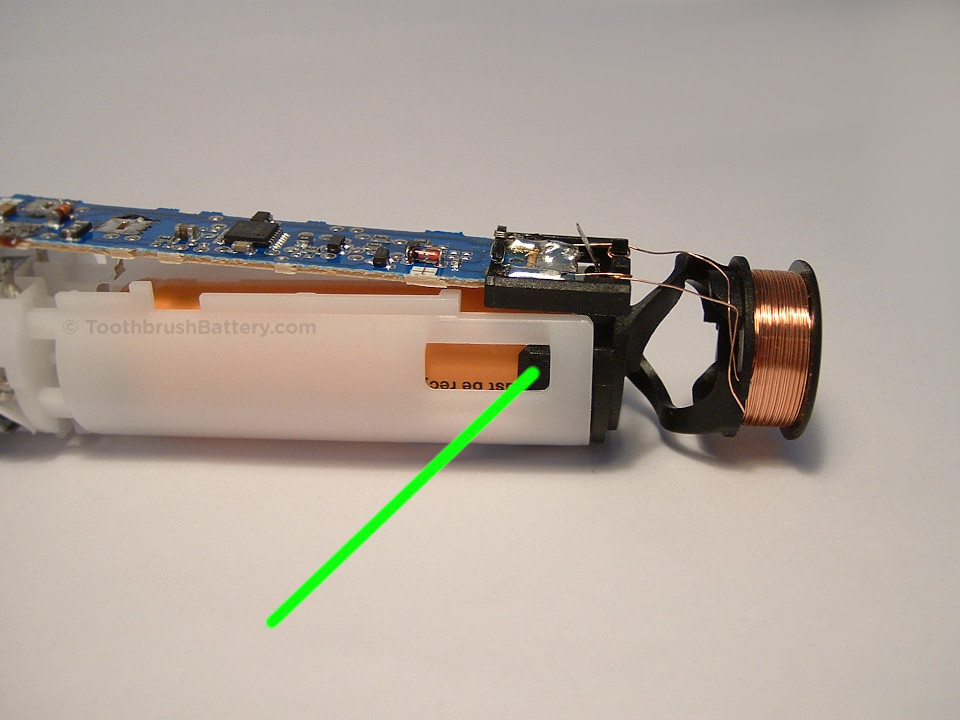
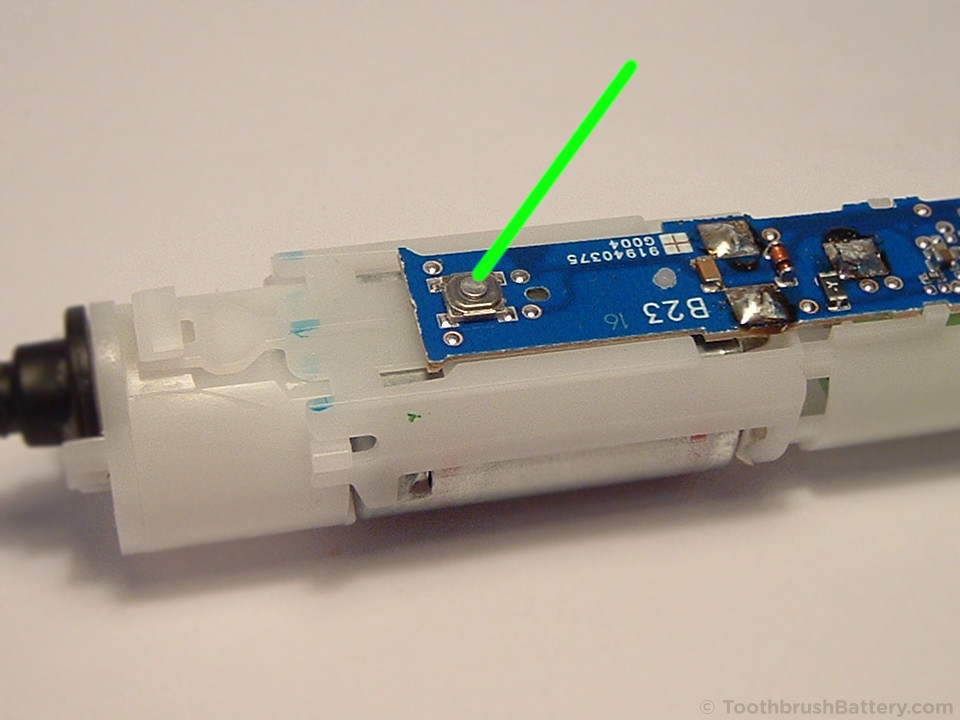
The negative solder connection to the battery is indicated in the photo below. There might be a “plus” sign (+) marked on the PCB near this end. Ignore this, it refers to something else.
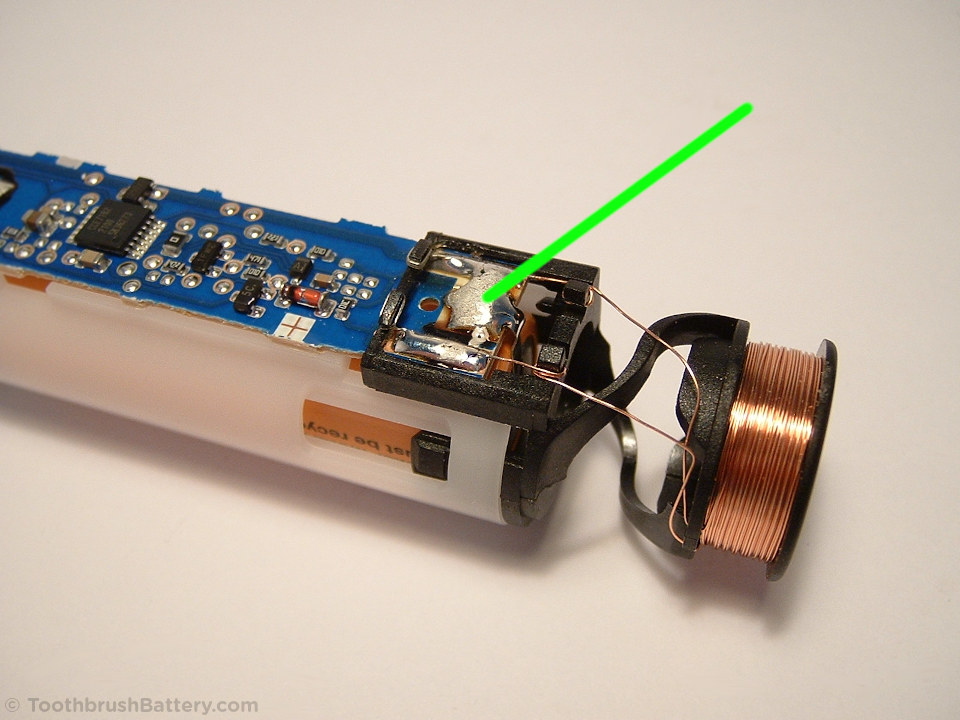
Using a desoldering pump or solder wick along with the soldering iron, remove some of the solder from the negative battery connection. Then heat the remaining solder and use a knife or blade to lift the battery’s solder tag up and away from its pad on the printed circuit board (PCB) so there is no longer an electrical connection between the metal tag and the PCB.

The positive tag of the battery is soldered to the PCB as shown in the photo below.

Desolder the connection and lift the metal tag vertical so it is no longer soldered to the PCB.
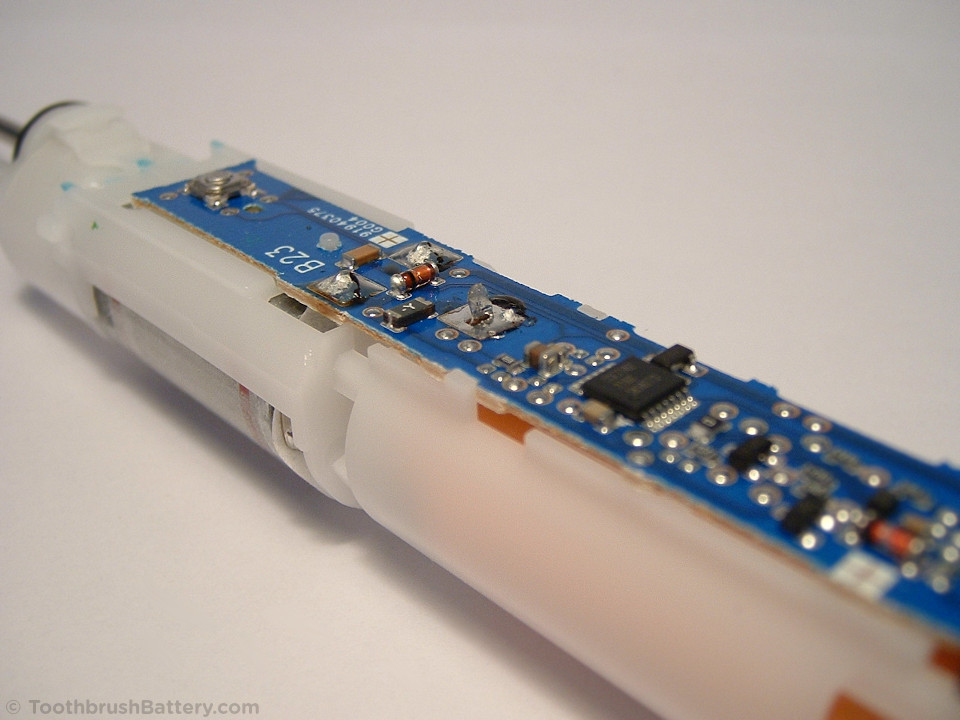
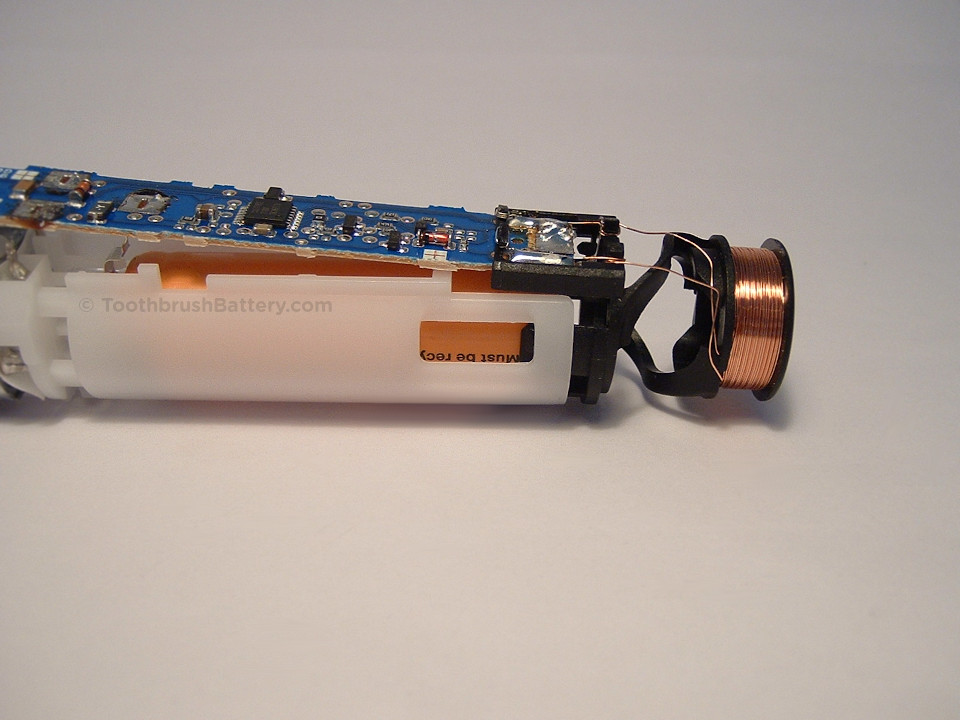
The two motor connections are shown below.
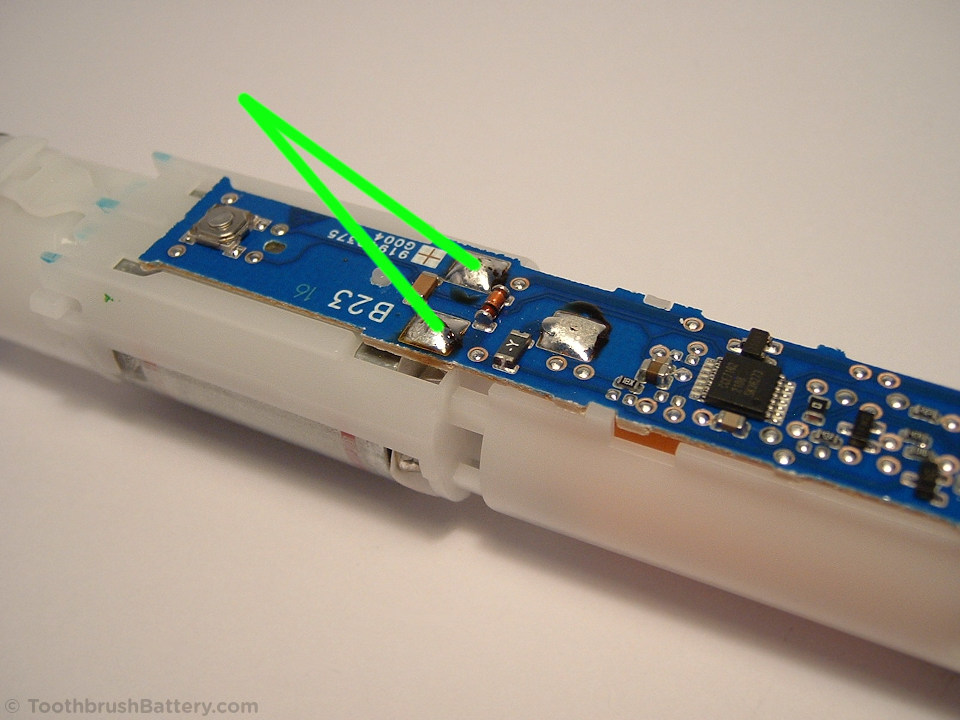
Desolder the motor connections so the metal tags are free to move.

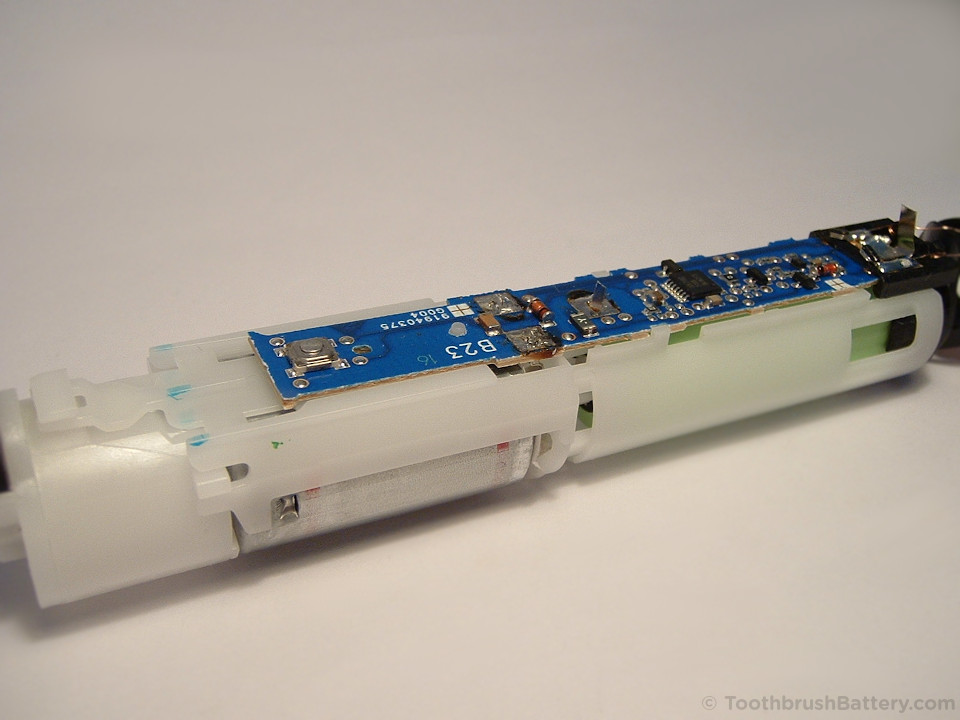
The PCB is held in position by a white plastic peg shown below.
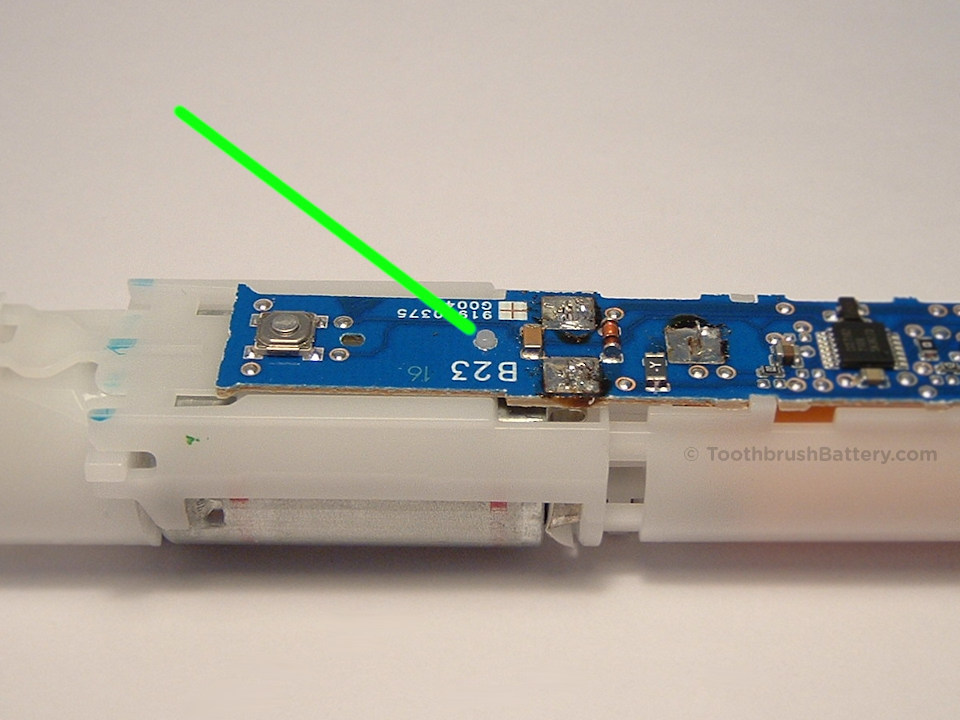
Gently pry the PCB up and off the peg. You might need to melt a few final whiskers of solder from the battery positive connection or motor connections while lifting.

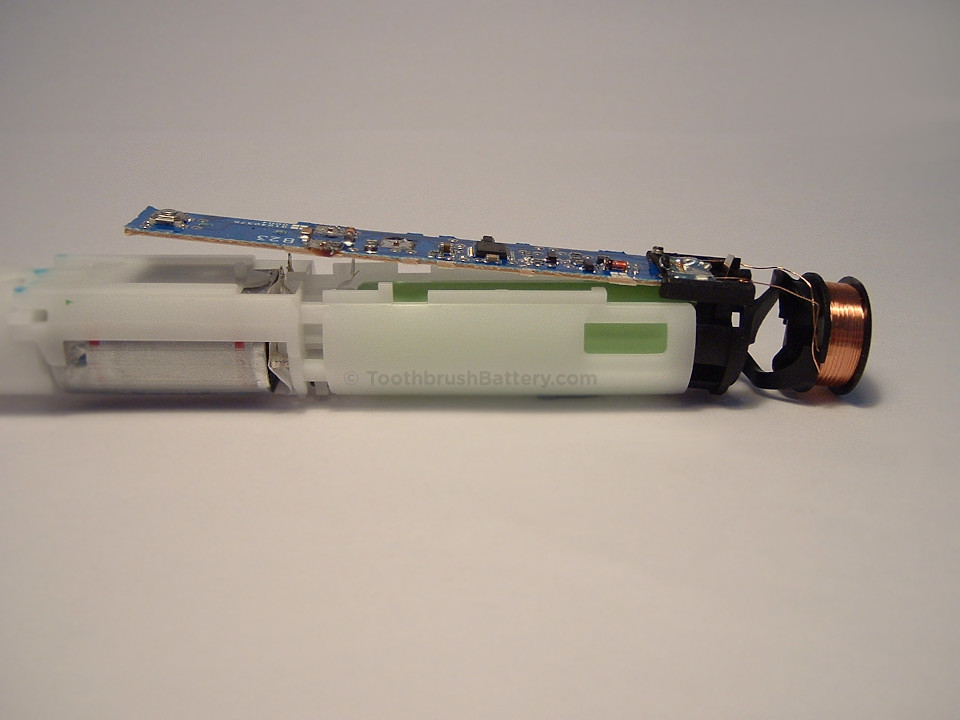
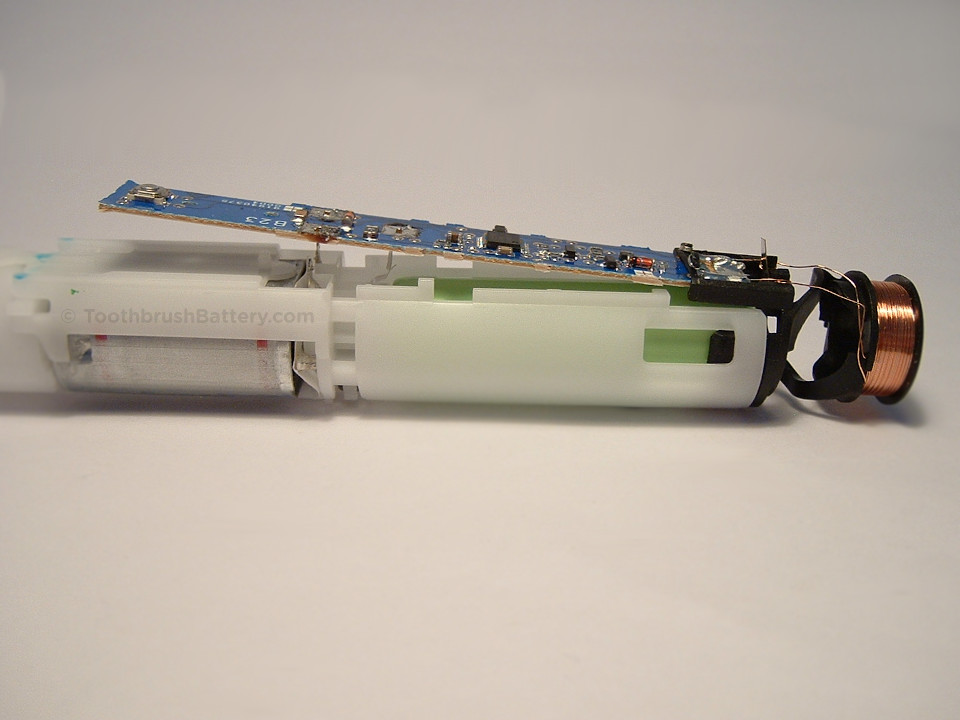
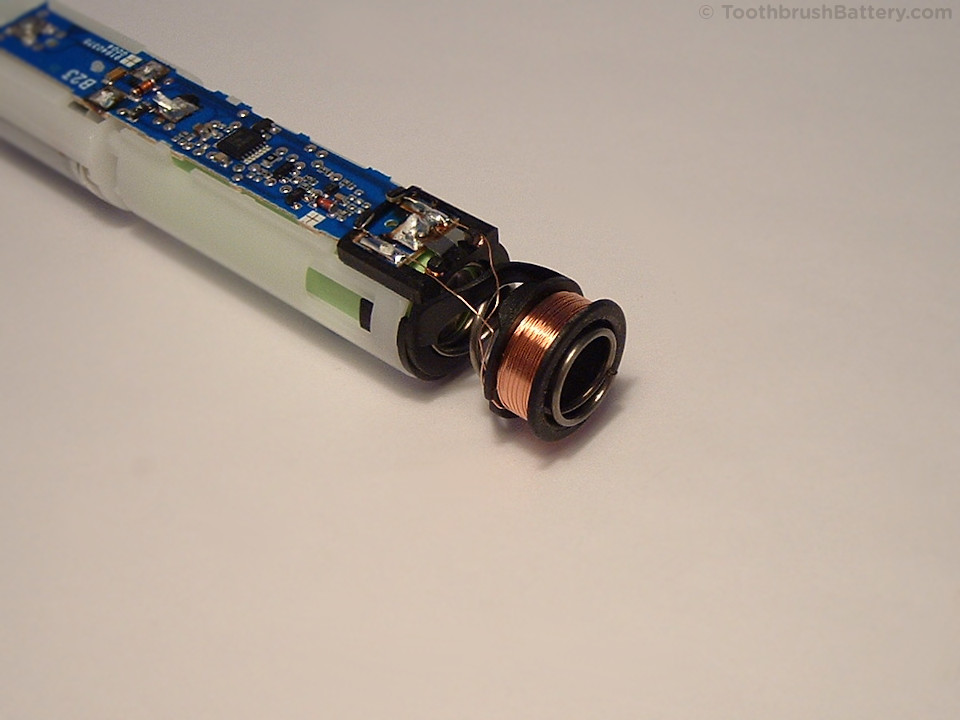
Once you are happy that the solder connections are free we will move on to unclipping the coil carrier. The black plastic coil carrier is clipped in at each side, indicated below.
Use a small screwdriver to release both clips and slide the coil carrier together with the PCB out of the white plastic frame.

You can see that the PCB is single-sided i.e. there are no tracks or components on the bottom so there was no risk of damaging it by prying or catching anything on the underside when removing it.
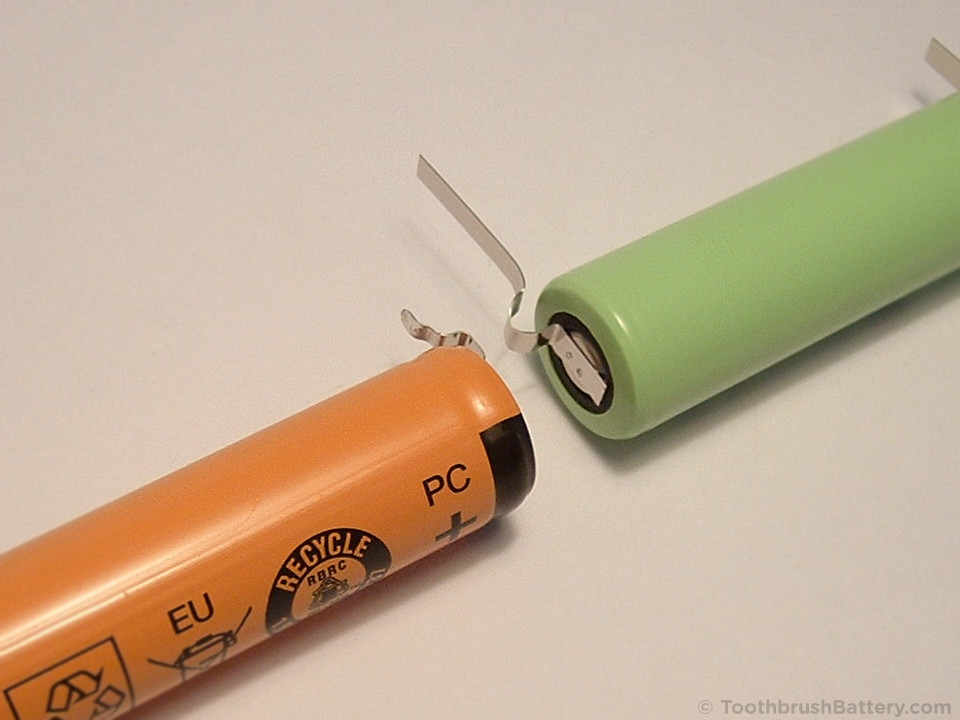
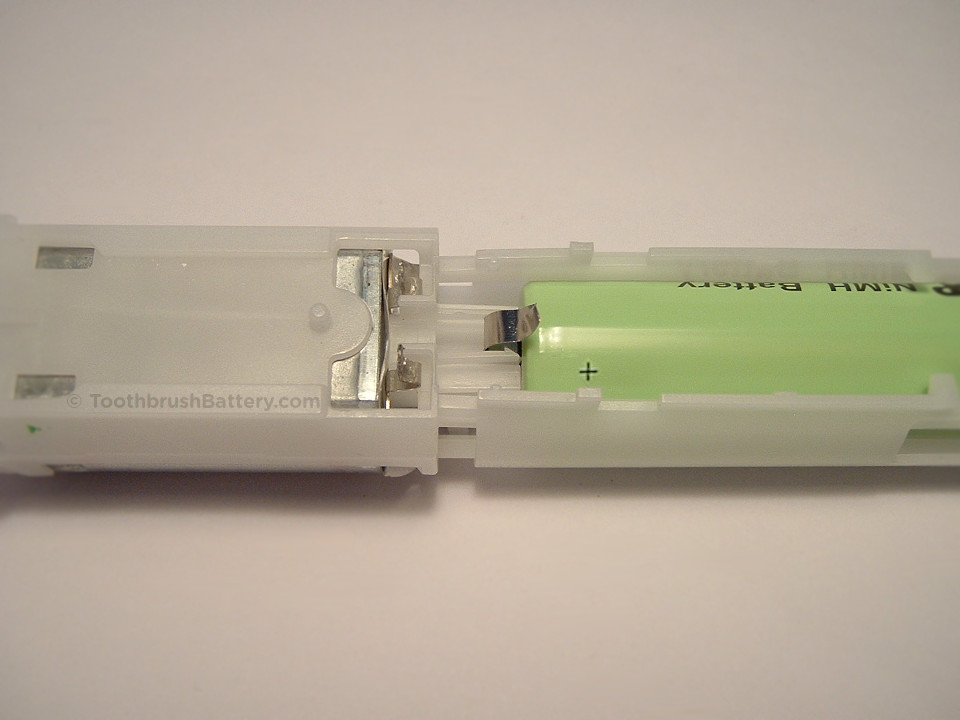
Note that the metal tag on the positive end of the battery is shaped so it clips into the white plastic battery holder.

Release the metal tag from its clips and slide the battery out of its holder.

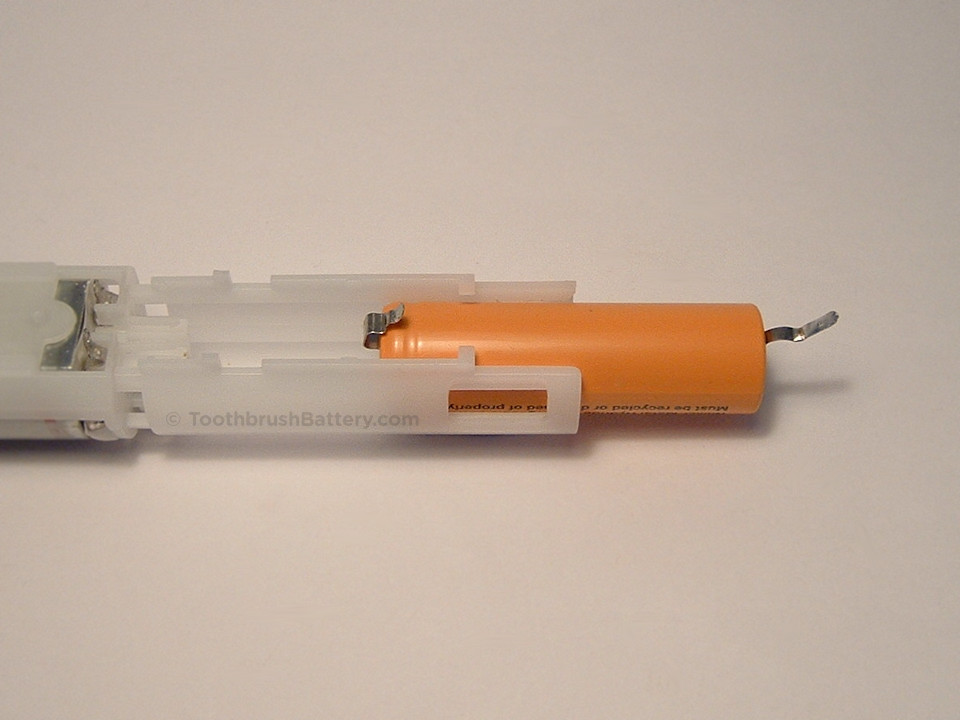
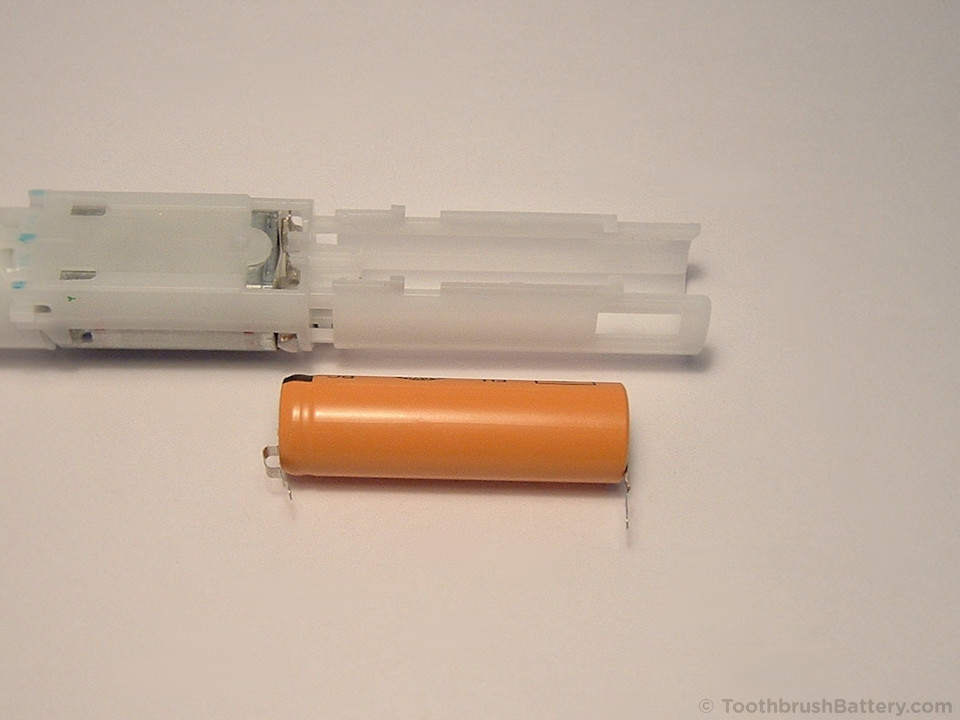
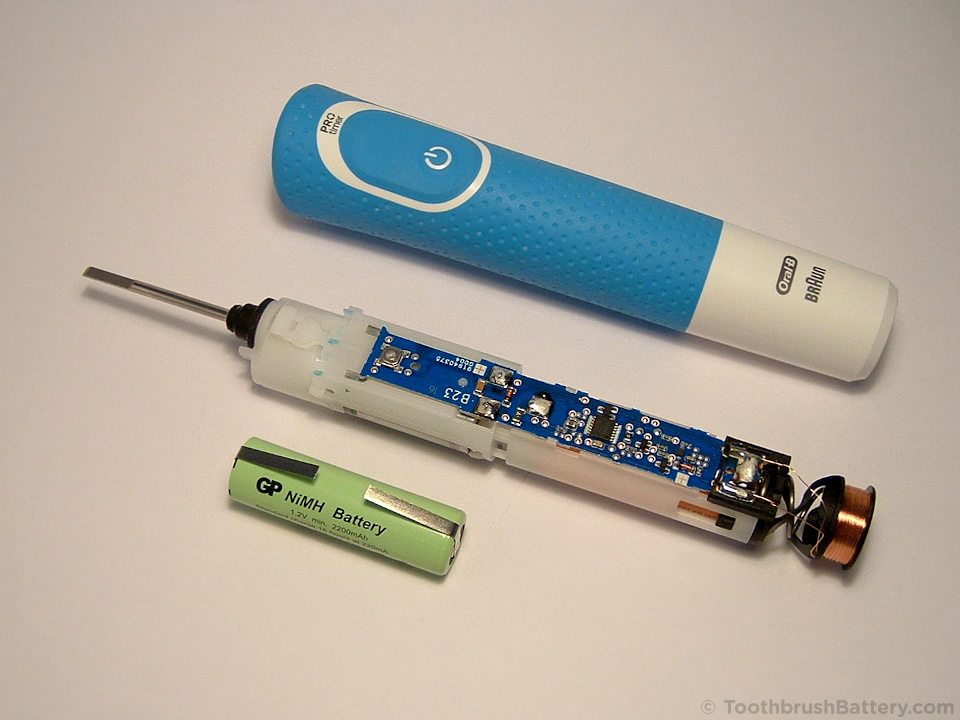
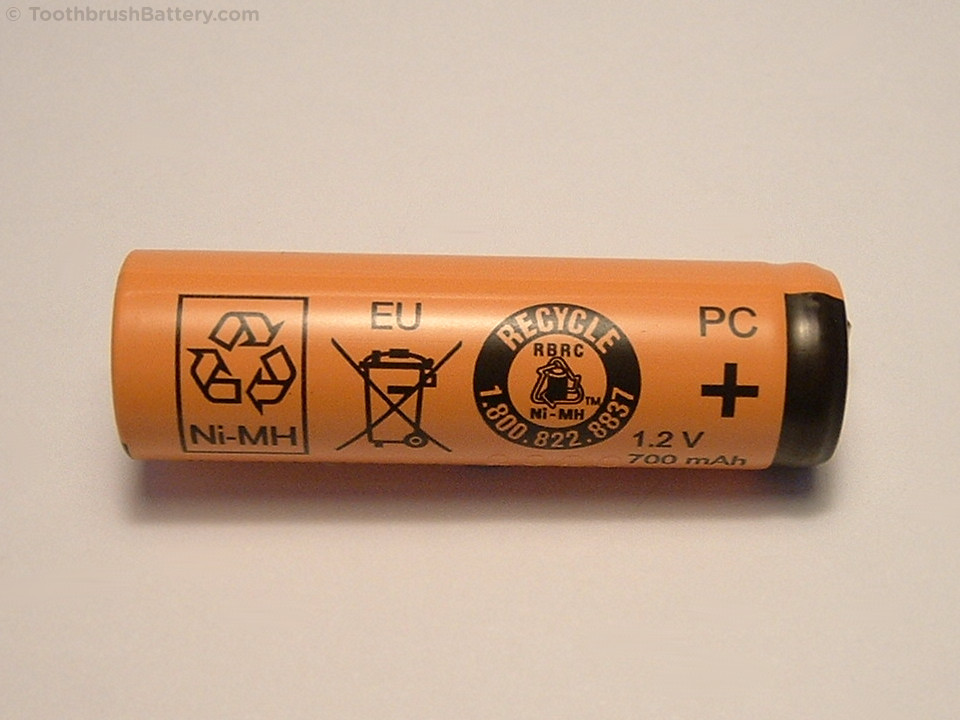
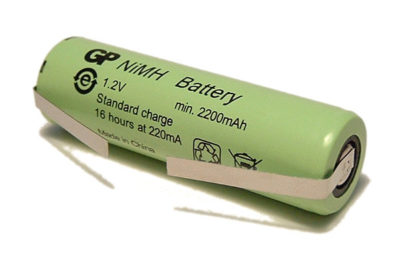
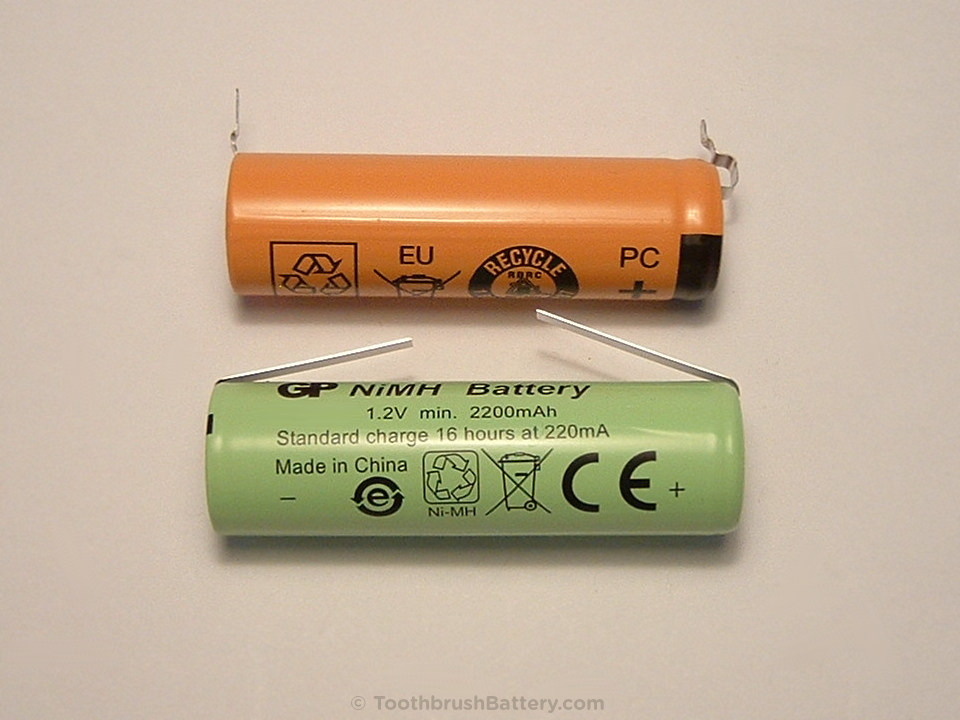
This is a 49mm long, 14mm diameter 1.2V Ni-MH rechargeable battery with 700mAh capacity. In this guide we upgrade the battery to one of our industrial-grade GP replacements, part number 131114466661. With a genuine 2200mAh capacity this battery will give you a much longer running time between recharges.
Genuine GP brand replacement toothbrush batteries are available from us at ToothbrushBattery.com here and are fitted with long metal solder tags of the correct width to suit these Vitality toothbrushes. Please support us in writing these repair guides by buying your new battery from us! Use this link or click the picture below to order yours.
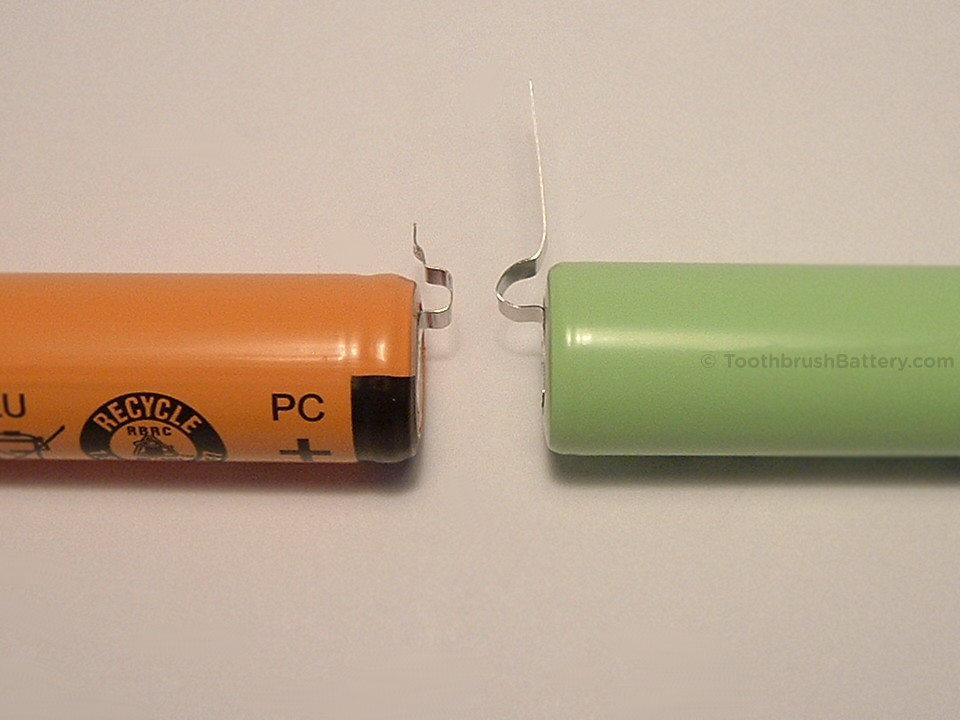
Compare the battery to its replacement.
We will now bend the tags on the new battery to match the shape of the tags on the original battery. You can fold the tags over the tip of a screwdriver or other tool to get neat bends.
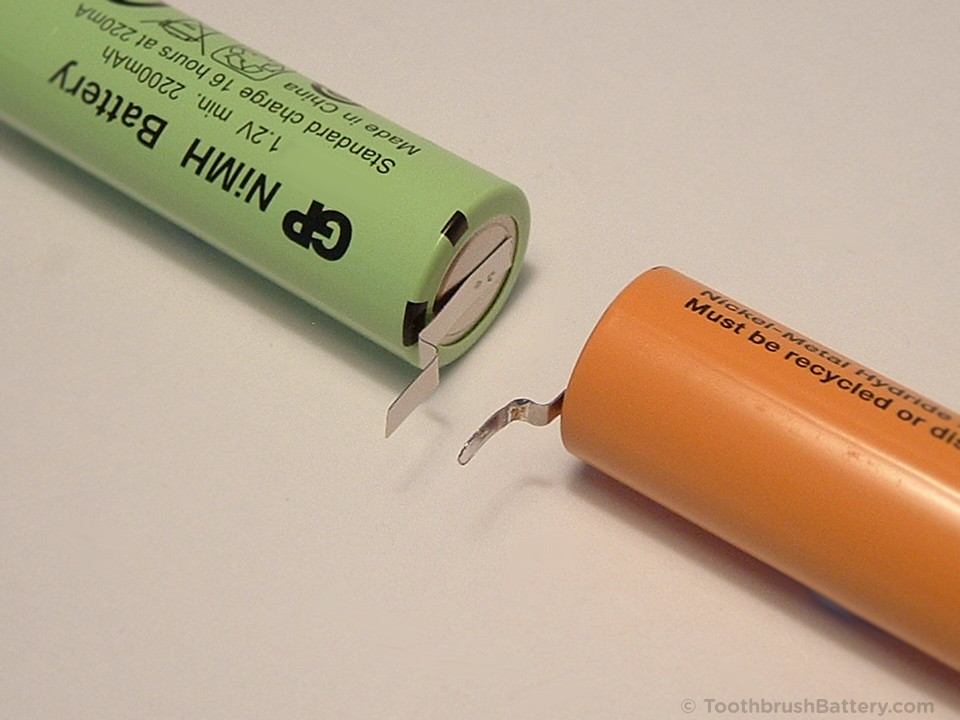
Shape the tag on the negative end of the new battery to match the shape of the negative tag on the old battery and cut it to length with sharp scissors.
Negative tags:
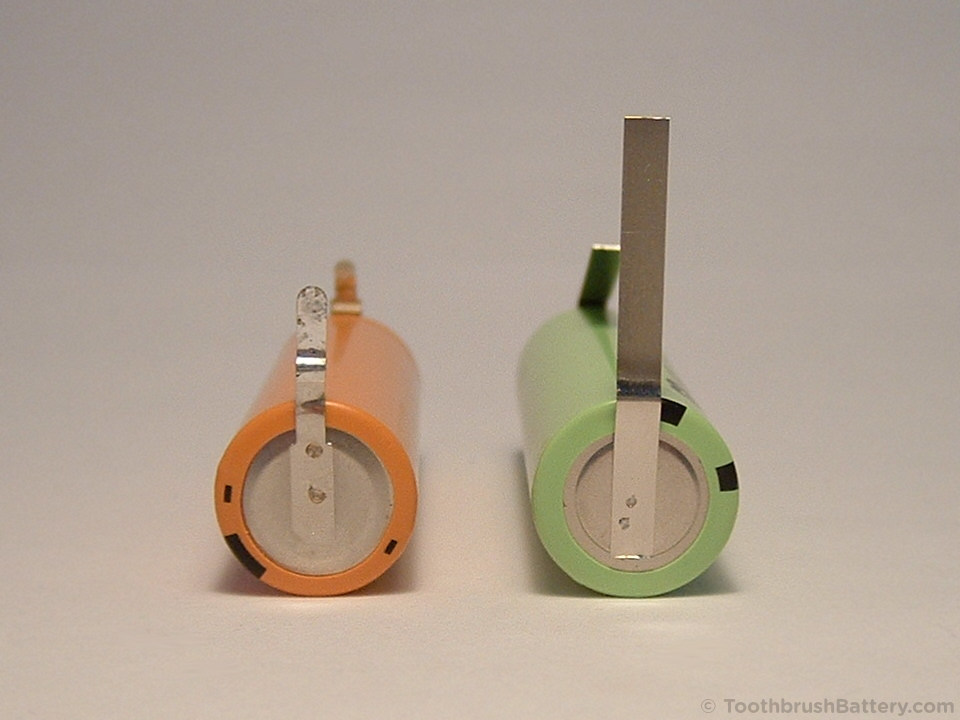
Shape the tag on the positive end of the new battery to match the shape of the positive tag on the old battery. Then cut it to the correct length with sharp scissors.
Positive tags:
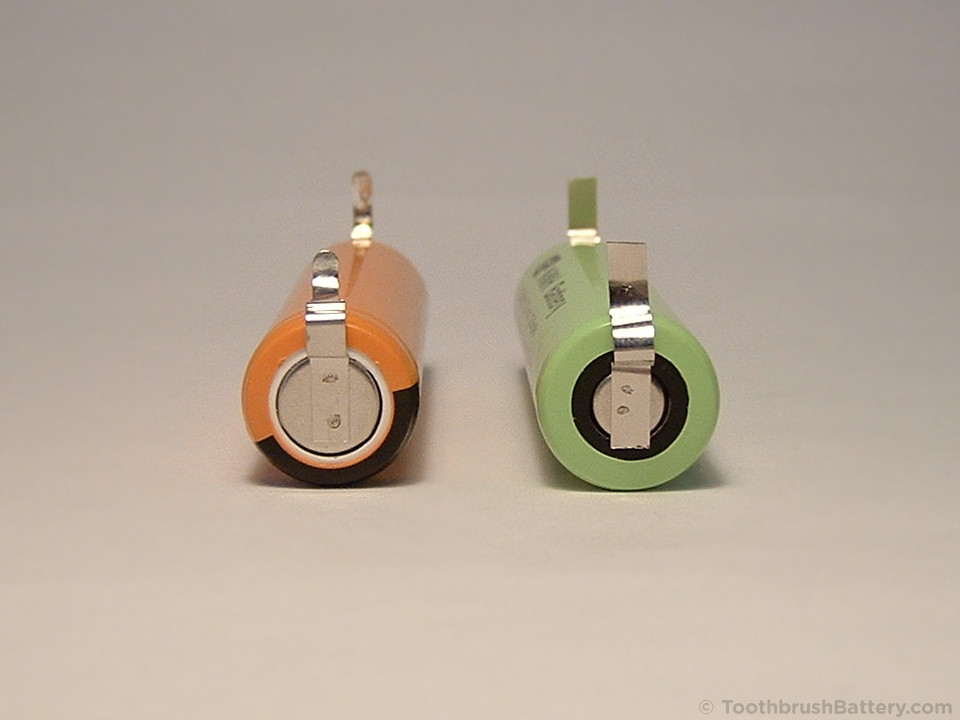
Very carefully start to narrow down the width of the positive terminal solder tag by first snipping into the tag from the left-hand side with the tip of the scissors as shown in the photo below. Don’t try to cut into it half way in one go, just try to cut a quarter of the way in from the side and it will tear to half way. Careful not to cut right through! Then cut down from the top end to remove the piece. This is easier than trying to trim it from both sides.

The negative tag does not need narrowing down.
Slide the new battery into the battery holder with the positive end first.
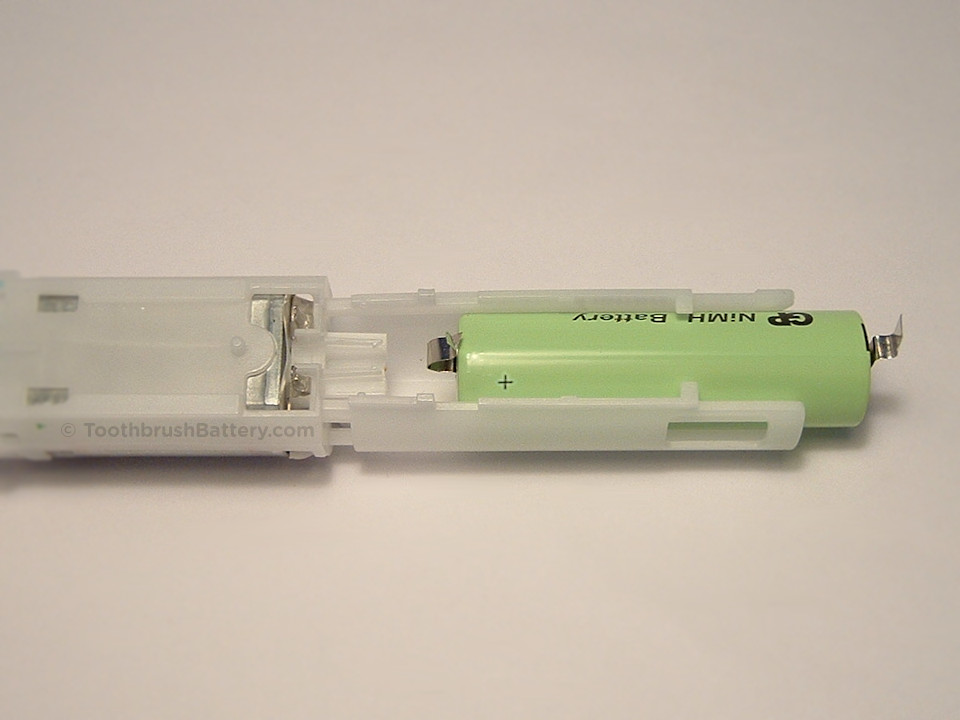
Ensure that the positive tag clips into the white plastic clips.
Keep the negative tag folded back away from the battery a little.

Lower the PCB onto the the frame of the toothbrush so that the negative tag of the battery goes through the gap between the PCB and the black coil holder.

Clip the coil holder back into the white plastic frame.
Position the positive tag of the battery under its hole in the PCB then lower the PCB down so that the positive battery tag and the motor tags all go through their solder holes.

Make sure the PCB is pushed down onto its plastic locating peg.
Check that the negative battery tag is still away from the PCB, then fold down and solder the positive battery tag to the PCB, followed by soldering the motor connections.

Fold down the negative battery tag onto the PCB and solder it in place.

If the toothbrush motor powers itself on and won’t switch off, desolder the negative battery connection. Check that battery was installed with the correct polarity and for any stray whiskers of solder on the PCB causing a short circuit.
You can now test that the toothbrush is operational by firmly holding the whole assembly with your fingers away from the gears. Press the switch arrowed below once to turn on the brush, and then again to turn it off.
If the toothbrush won’t switch on you might need to reset its circuitry by holding the bare assembly on the powered-up charger for 5 seconds. Remove the assembly and try switching it on again.
Once you have verified that the toothbrush is working you can reassemble the handle.
Install the spring in the centre of the charging coil.
Slide the internals back inside the handle casing making sure that the spring doesn’t fall out.
Fit the top cap over the metal drive shaft. Note that the shaft is closer to the front face of the handle with the writing on so fit the cap accordingly.
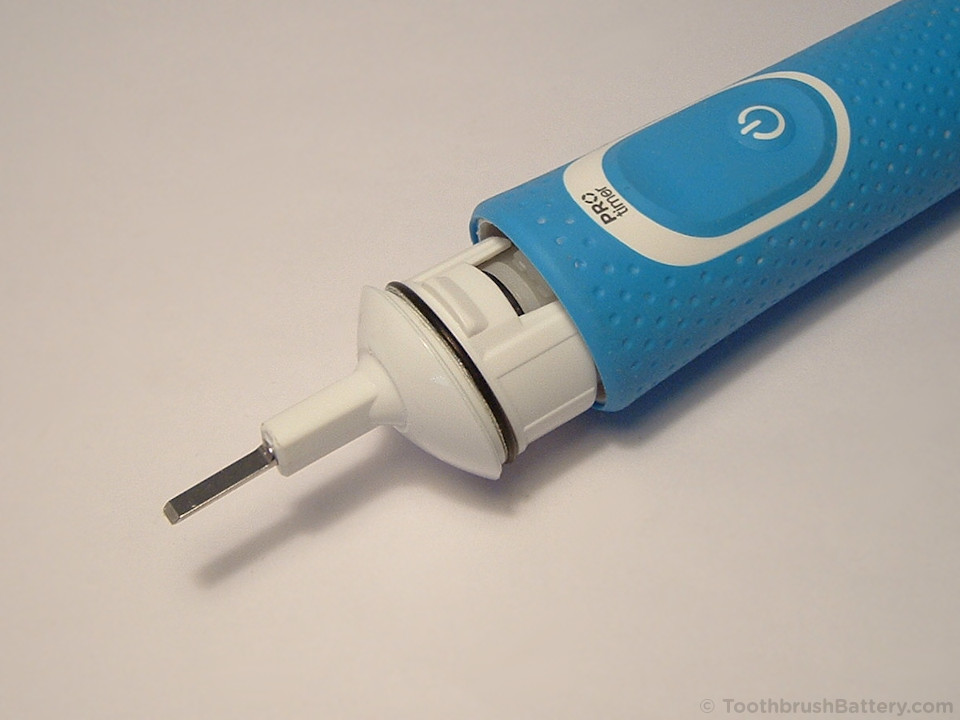
Push the cap in to place and clip it home.
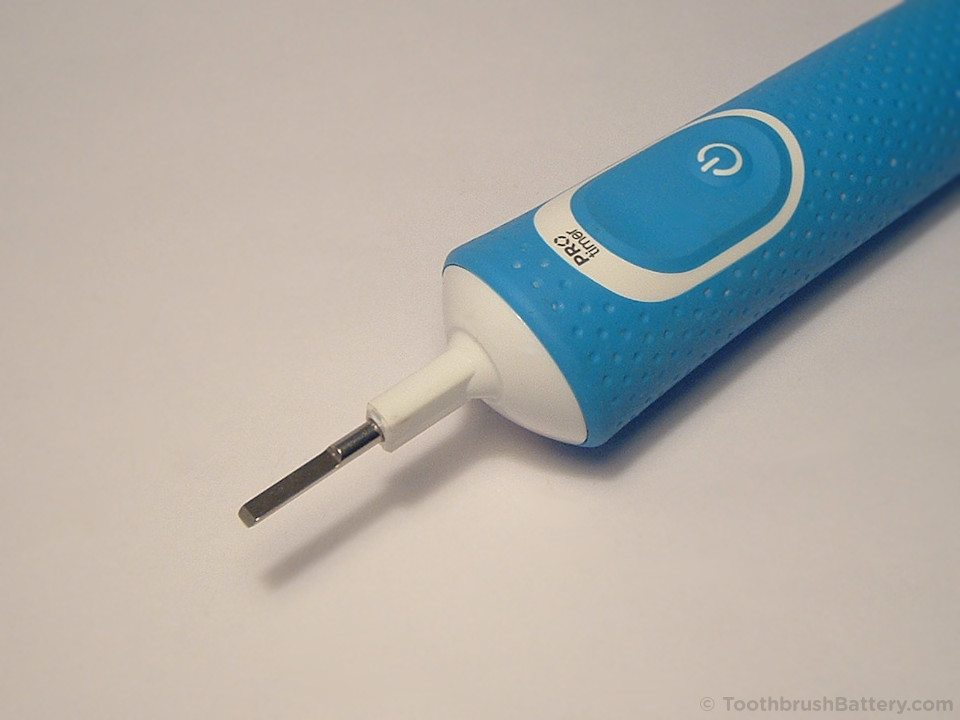
You now have a fully repaired Vitality toothbrush! Our Ni-MH batteries come with a high level of charge in them so you can start using your toothbrush immediately with no further charging required. Once the motor starts to run noticeably slower put the toothbrush on for a full charge for about 16-24 hours. You can interrupt the charging part-way through to use the toothbrush if you need to.
To maximise the lifespan of your new battery do not store the toothbrush on permanent charge between uses. Lie the toothbrush flat on its back with the head removed when not in use to prevent water from seeping past the top shaft seal and damaging the electrics.
Please recycle your old battery. It is safest to put sticky tape over at least one end to avoid short-circuits. You can then take it to your local supermarket battery collection point or civic recycling facility.
Please leave any comments, questions or suggestions about this Braun Oral-B Vitality Type 3708 and 3710 toothbrush battery replacement guide below. Happy brushing!
Yes you can replace the battery in all Oral-B Vitality toothbrushes. Follow our guide above to see how to open up your Vitality toothbrush handle and replace its internal rechargeable battery.
The Braun Oral-B Vitality toothbrush uses a Ni-MH battery, part number 131114466661. Full details of the battery are listed in the Tools, Parts and Equipment section of our guide above.
Yes take a look at our list of battery replacement guides to see how to replace the battery in various models of toothbrush from Braun Oral-B, Philips Sonicare and other manufacturers.
I received the battery and replaced it thanks to your guide.
Works flawlessly! It’s slightly chubbier than the old orange one, but works flawlessly. Also, the orange one is 700 mAh and the new one 2200 mAh, so longer lasting!
As a hobbist-repairer with a newfound passion for fixing abandoned stuff, I thank you for your contribution to reduce waste!
I’ve just done two 3710 brushes. The biggest problem was getting the body apart right at the beginning. The first took almost all afternoon, the second I sat in hot water for about 30mins which seemed to help. The worst part was splitting the front. After that, the battery replacement was plain sailing. I did have to do the 5sec reset on the charger base to both.
The other issue was getting the two body parts back together. In the end, I found a plastic box spanner ( which may have been kept from washing machine drum mount ) which fitted over the too of the brush shaft on to the top part of the body. Clamped in an Irwin quick grip clamp and tightened until it clicked!
Seemed a bit more awkward than the 3756 types I’ve done where the bottom of the body comes apart.
Thanks for the tips Bill! Good to hear that you got your Vitality 3710 toothbrushes back up and running.
Just had a message from the family. One that I did just started to switch itself on and off on it’s own! Or it won’t switch off. Any suggestions, we’re going down next weekend. Thanks.
That sounds like water ingress. If you open up the handle and let the internals dry out for 24 hours this might stop the symptoms. To prevent future water ingress always store the brush lying flat on its back with the head removed between uses.
Thanks for the advice.
We’re actually visiting at the moment for the weekend. I’m going to take it back with us.
I havent checked, but apparently at the moment it’s dead. My daughter and eldest granddaughter said “dodgy repair man”!!🤣
I’ve just had a look, presuming water ingress as you say. Have cleaned everything but the damage has probably been done. Only 0.68v across the charging coil and battery on charge. Dead?!
0.68V DC at the battery terminals shows that the Ni-MH battery is very discharged. The voltage across the coil is high-frequency AC so is hard to measure without an oscilloscope. See if the battery voltage rises after charging for a few hours.
Good instructions. Worked for me, tx. Except that there was no way the cap was coming out using pliers. I’d have given up but the battery was almost dead and so I had nothing much to lose. I ended up using an instrument screwdriver to lever the cap out by working around the joint. Of course it significantly damaged the mating faces but it did finally come free. Replaced battery, reset with a 5 sec charge and tested and all good. I’ll clean up and refit the damaged cap with a bead of silicone sealant just to ensure it does not leak – if it lasts me another year or so, I’ll be happy enough.
Thanks for the great instriuction, just finished to repair two 3710 tooth brushes.
Biggest step was to get the top off. You need to squeeze hard the body and support the lifting with a wide screwdriver. But watch out, don’t damage the plastic body.
Before reassembly clean the sealings, the metal axis and the plastic cover.
I was a bit clueless when the toothbrush didn’t start after the battery replacement until I read again the instruction and resetted the unit. Now both brushes work great again!