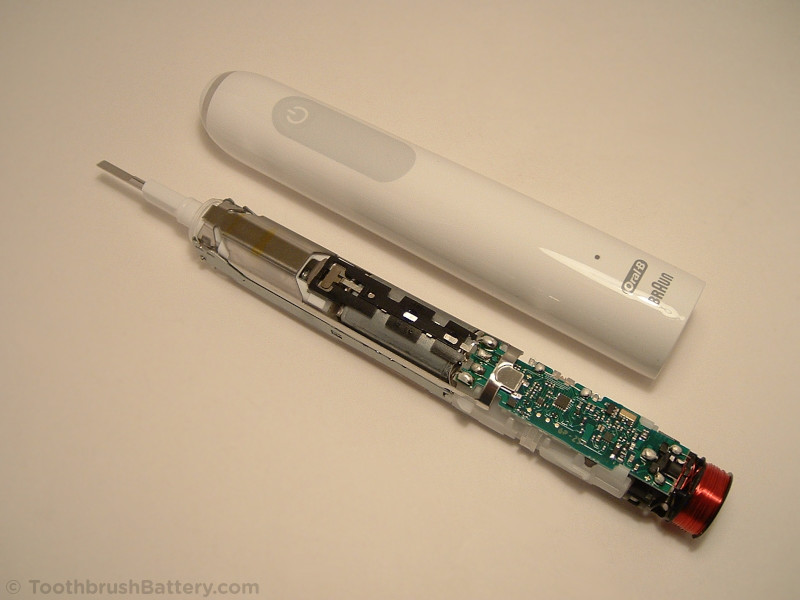
This guide will show you how to open and dismantle the Braun Oral-B Type 3772 electric toothbrush and repair it by fitting a replacement Li-ion battery. These are excellent toothbrushes so they are well worth fitting with a new rechargeable battery when the original battery stops holding a charge.
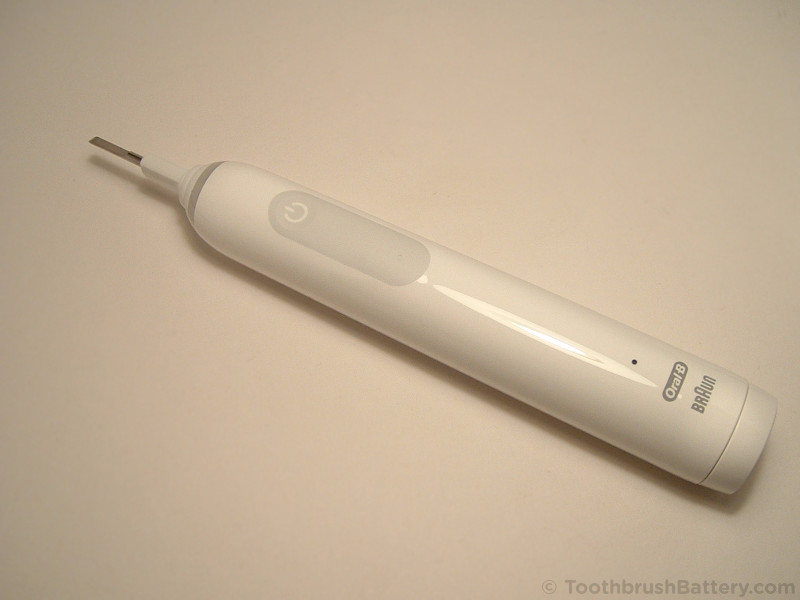
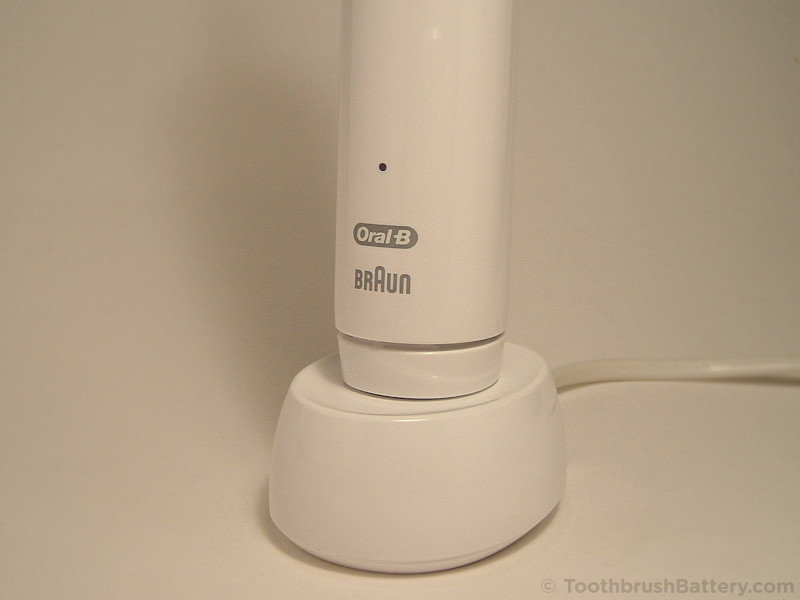
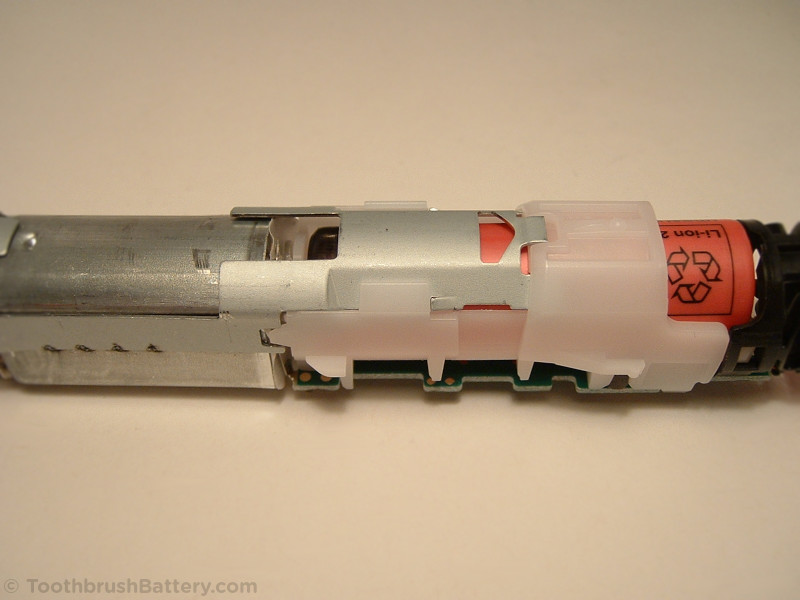
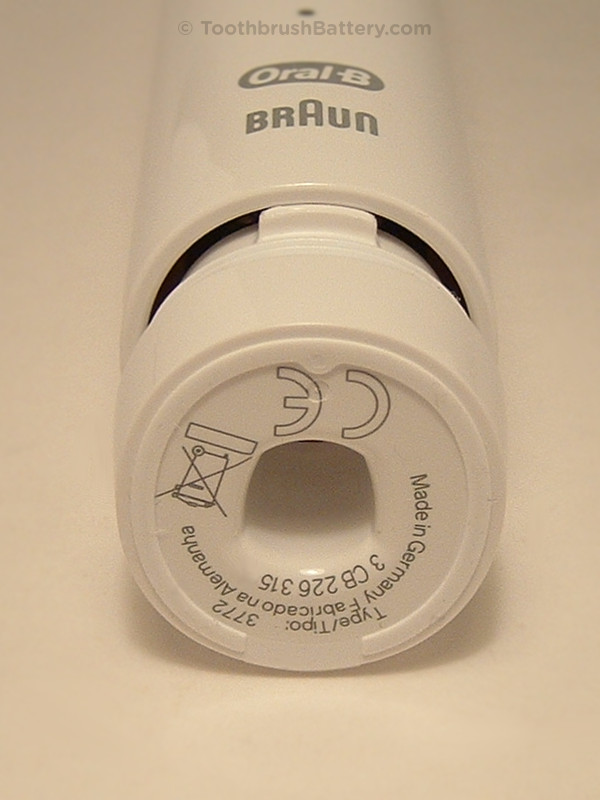
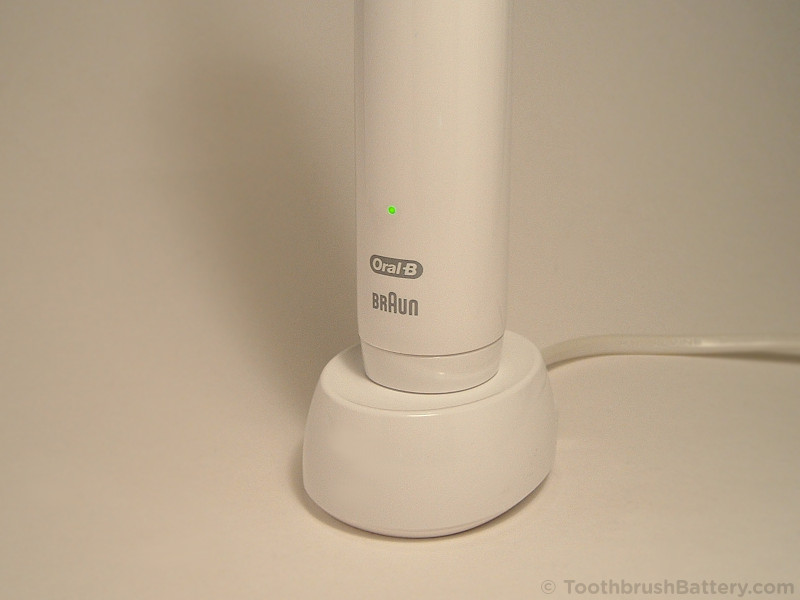
This battery replacement guide is only for Oral-B toothbrushes marked with Type number 3772 on the bottom of the handle, or the similar Type 3792. Click the photo below to enlarge it and compare the 4-digit ‘Type/Tipo’ number marking to the one on your toothbrush:

Also note the ‘Li-ion’ marking under the triangular recycle symbol in the bottom of the hole, which refers to the chemistry of the internal rechargeable battery used in these toothbrushes.
For other type numbers, makes and models the toothbrush opening procedure, battery replacement procedure and battery specification is different so please see our other guides to toothbrush battery replacement for these toothbrushes.
The Type 3772 toothbrushes from Oral-B are available in various colours such as white, black, pink and blue, and go by many different names on their packaging including the Pro 3, and the Pro or Smart 1500, 2000, 2500, 3000, 3500 and 3900 models. These marketing names are also used for other types of toothbrush with different internals so do not pay too much attention to the packaging name. The only reliable way to tell which model you actually have, and therefore the best guide to use for replacing the battery, is to check the 4-digit Type number marked on the handle as shown in the photo above.
The basic method is:
- Open up and dismantle the toothbrush handle
- Desolder PCB connections
- Remove the original battery
- Fit the new replacement toothbrush battery
- Resolder the PCB connections
- Reassemble the handle
The Type 3772 toothbrush battery replacement process is documented in detail below along with lots of photos. Click on any photo to enlarge it:
Disclaimer
Any damage or injury to yourself, your toothbrush or anything else is entirely your responsibility. This guide is for professional, educational usage only and is offered without guarantee or liability. Lithium-ion (Li-ion) batteries are dangerous if short-circuited or mis-handled and can go into thermal runaway and self-ignite if you do not observe all handling and safety precautions. Always wear safety glasses when soldering and cutting.
Tools, Parts & Equipment
- Braun Oral-B type 3772 electric toothbrush
- Original charger
- Soldering iron with fine tip: Electronics grade (about 18-25 watt)
- Solder: Lead-free silver solder with a flux core is recommended
- Solder sucker (also known as a desoldering pump) and/or desoldering braid/wick
- Craft knife e.g. scalpel, snap-off, retractable or Stanley type
- Large blunt flat-bladed screwdriver: 5 to 7mm wide
- Small sharp scissors
- Adhesive putty such as Blu Tack to hold the toothbrush to the work surface
- Replacement 3.6V Li-ion battery. Support us by buying yours from ToothbrushBattery.com here
How-To
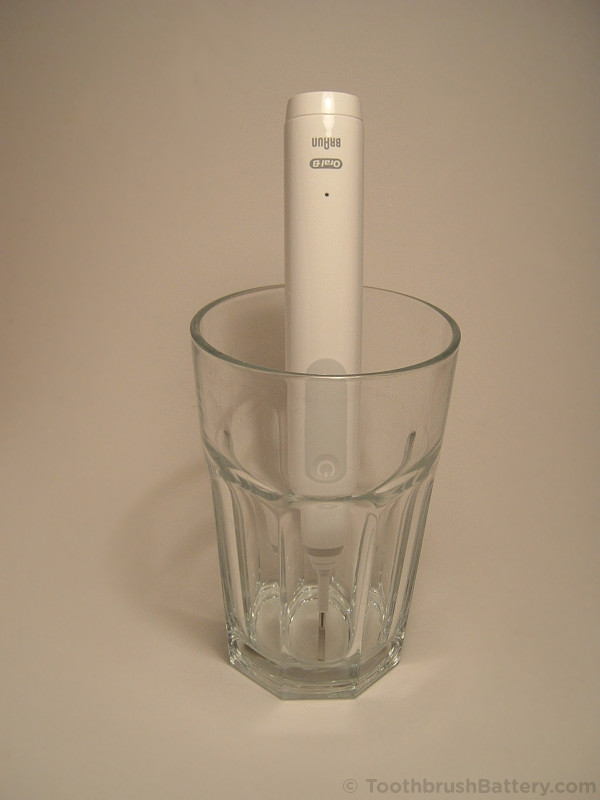
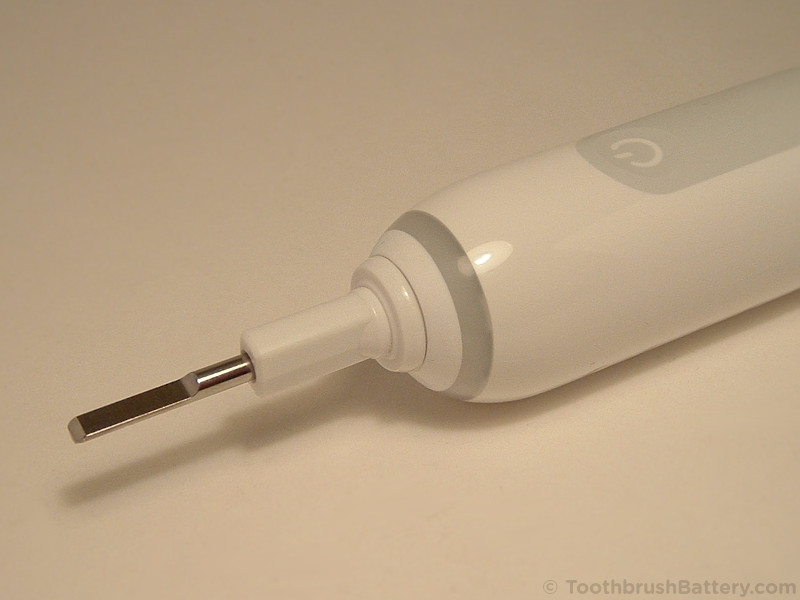
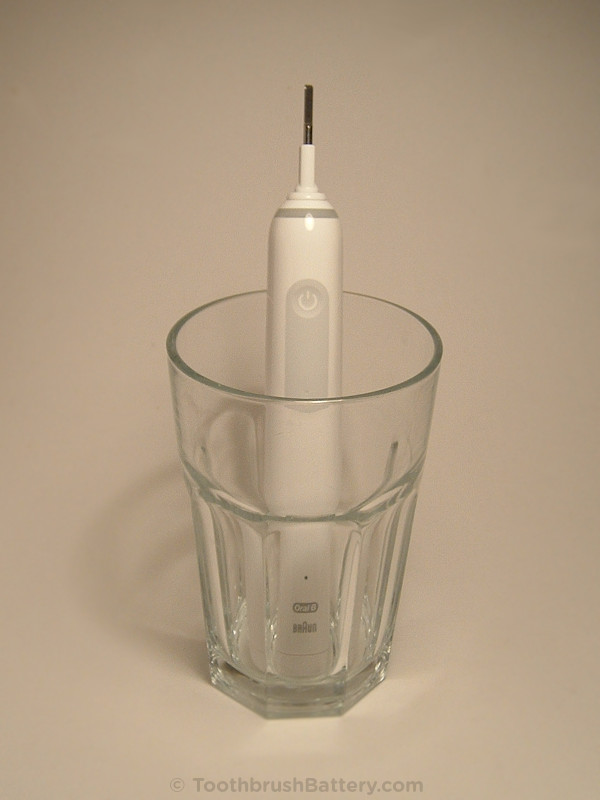
To start with, remove the brush head from the top of the handle and stand the toothbrush, tip downwards, in hot tap water for 5 minutes to soften the plastic ring.
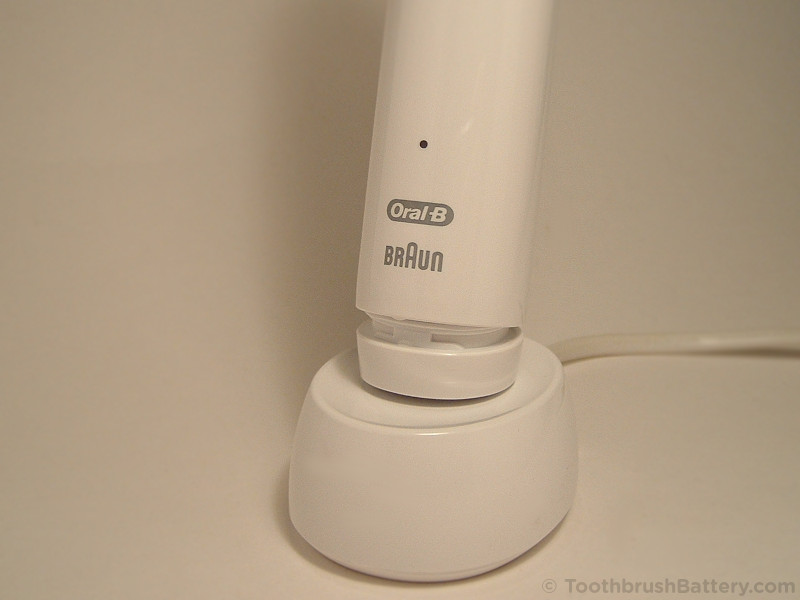
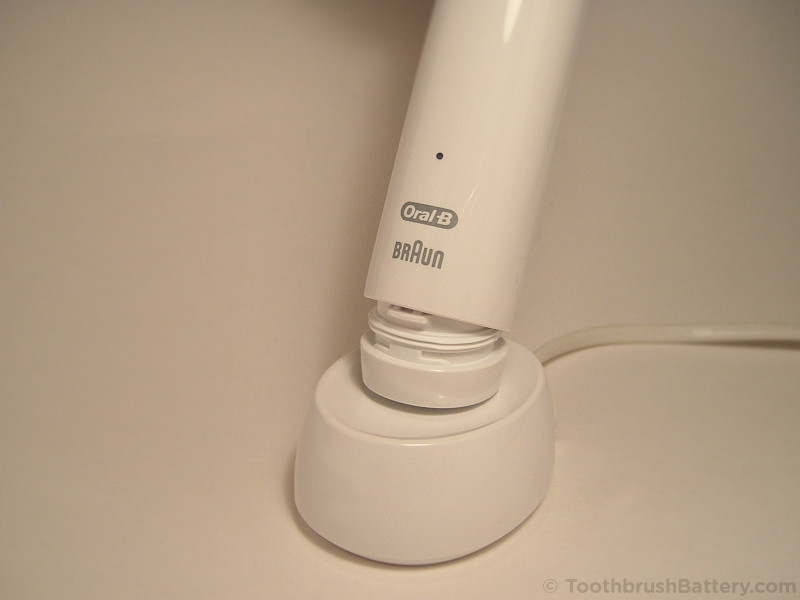
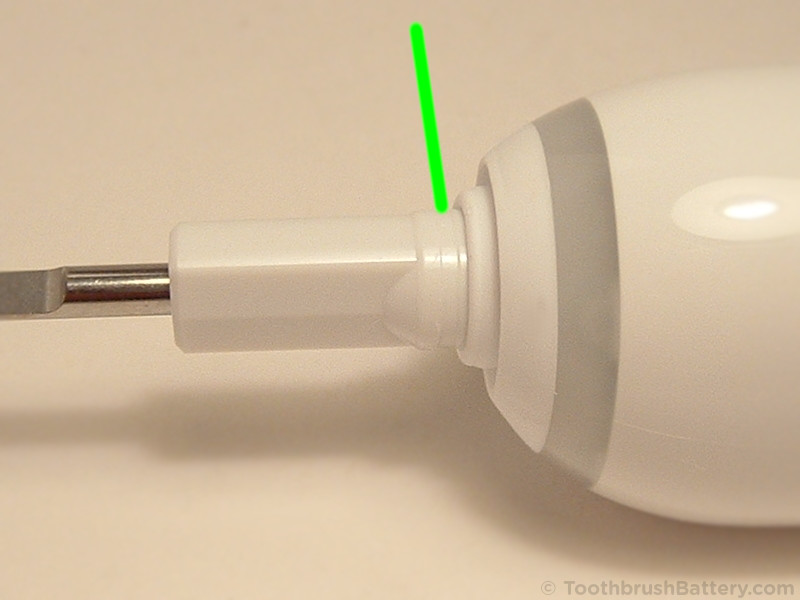
Using the large flat-head screwdriver start to pry off the plastic ring from around the shaft. The ring is stepped so press down into the soft casing to get under its lower edge. A screwdriver with blunted edges is less likely to mark the toothbrush, and prying from the back side of the handle will hide any marks.

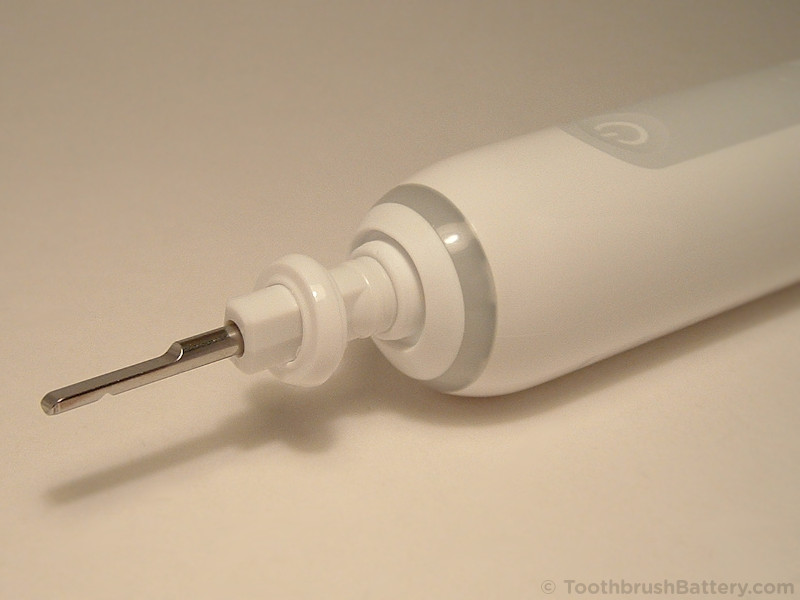
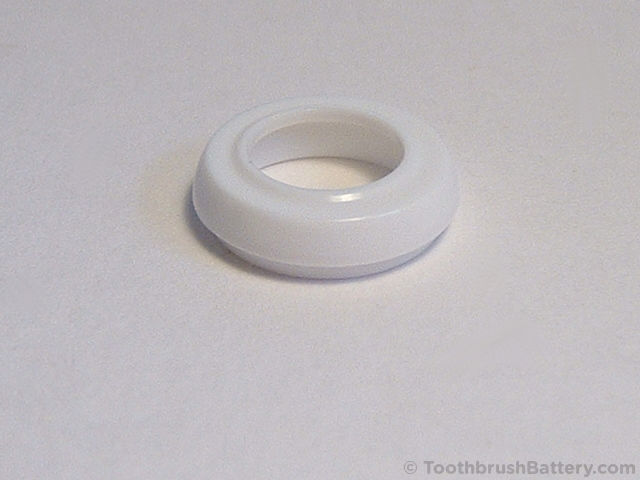
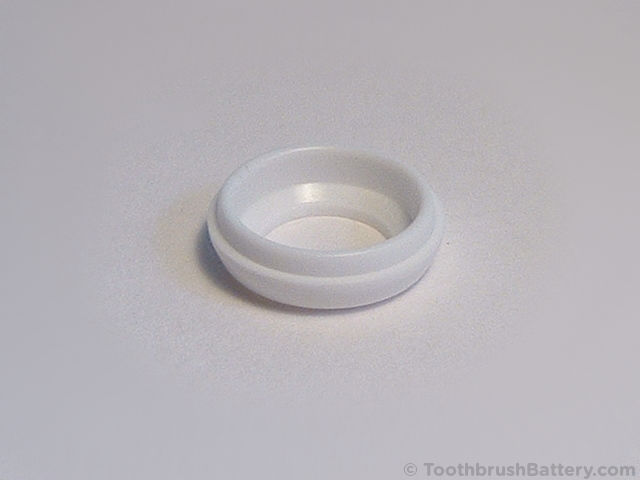
Store the removed ring safely. See below for close-up photos showing the step under the ring.
Stand the toothbrush in hot water again, tip upwards this time, for another 5 minutes to soften the seal around the base cap and the cap’s internal plastic clip.
Dry off the handle with a towel then stand it on its unplugged charger.

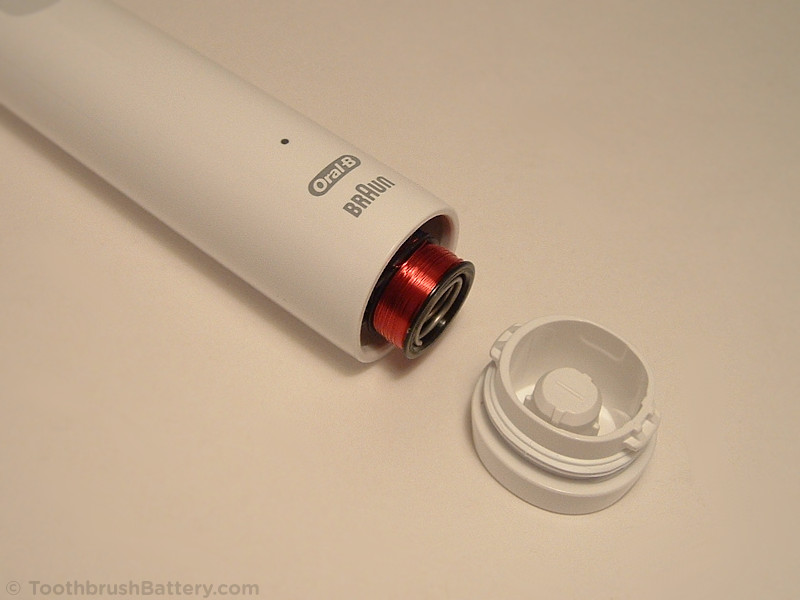
Carefully bend the toothbrush backwards while holding the charger steady so the base cap is levered open at the front.
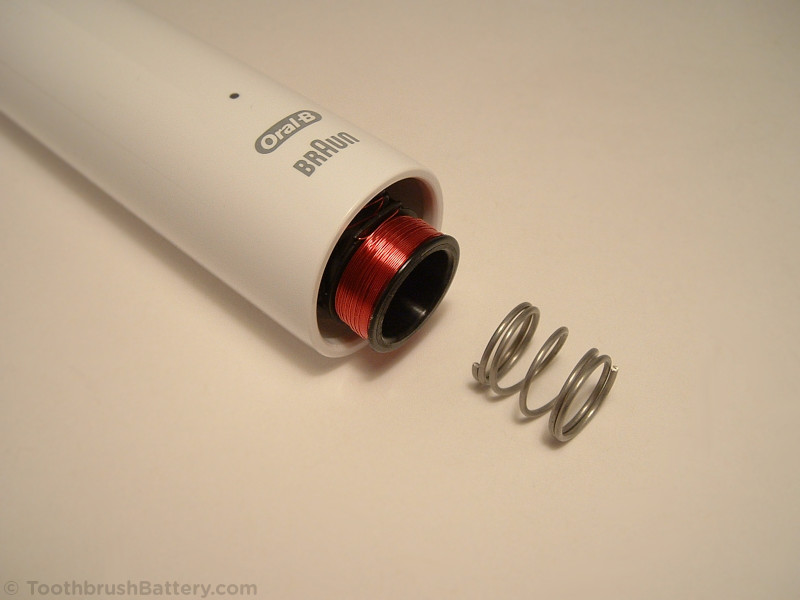
Lift the toothbrush off its charger and remove the base cap. The spring might fall out and roll away so don’t lose it!
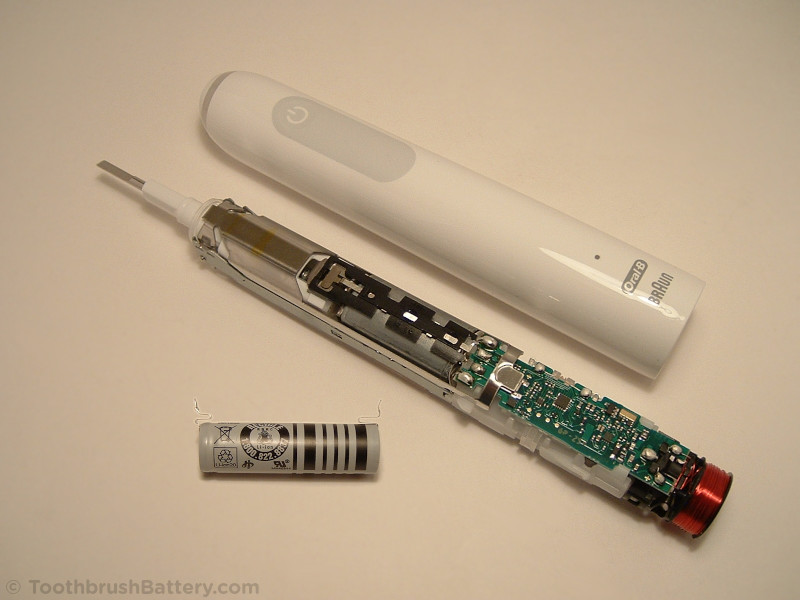
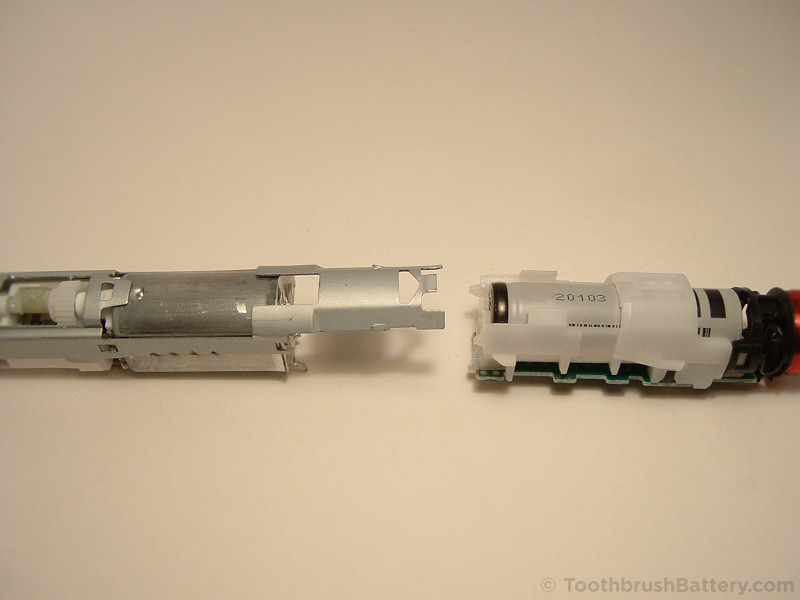
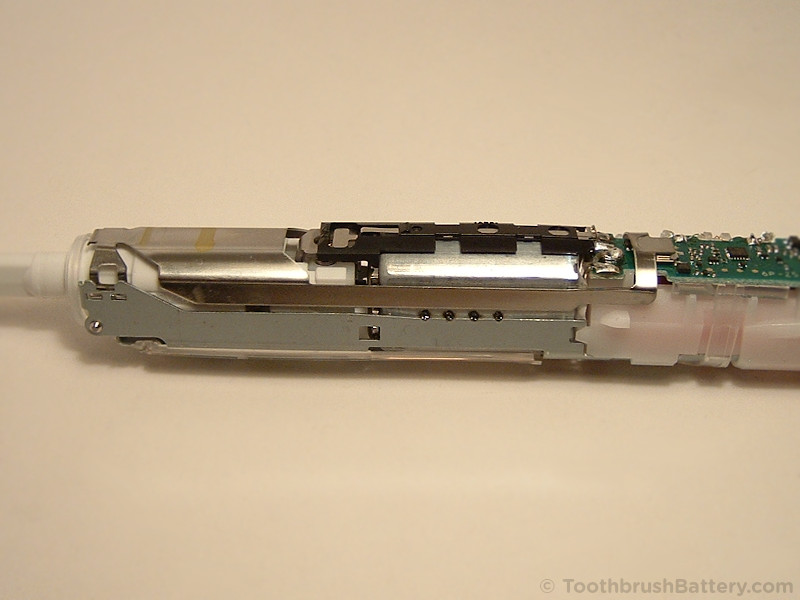
Push the top metal and plastic shaft down into the main body of the toothbrush handle so that the toothbrush innards start to slide out.

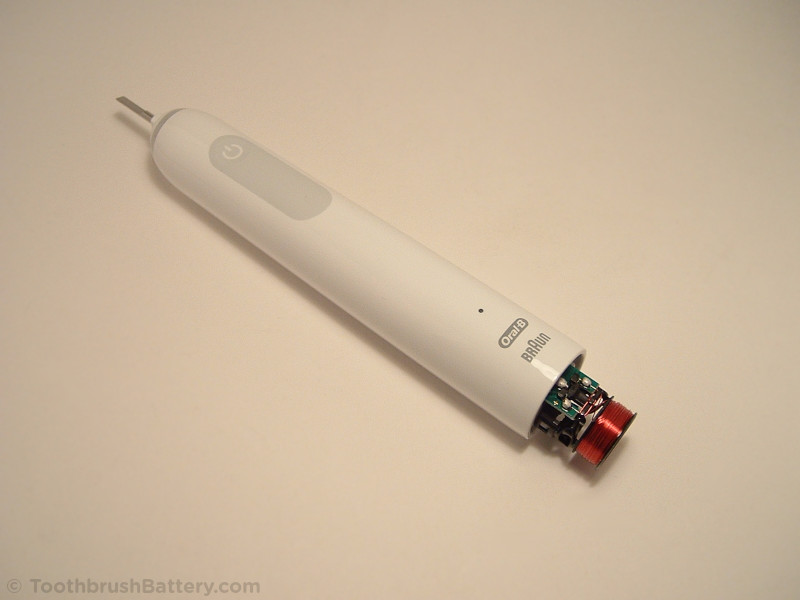
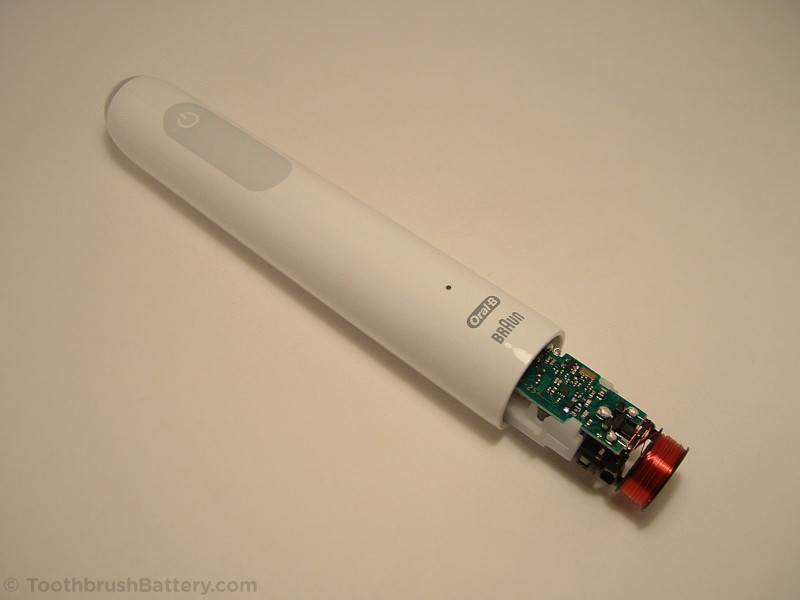
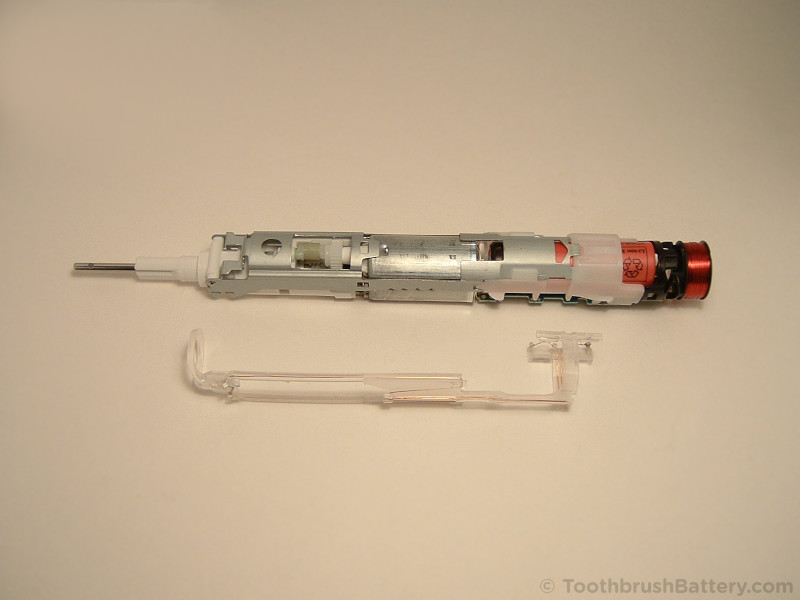
Fully remove the inner workings of the toothbrush from its handle casing.
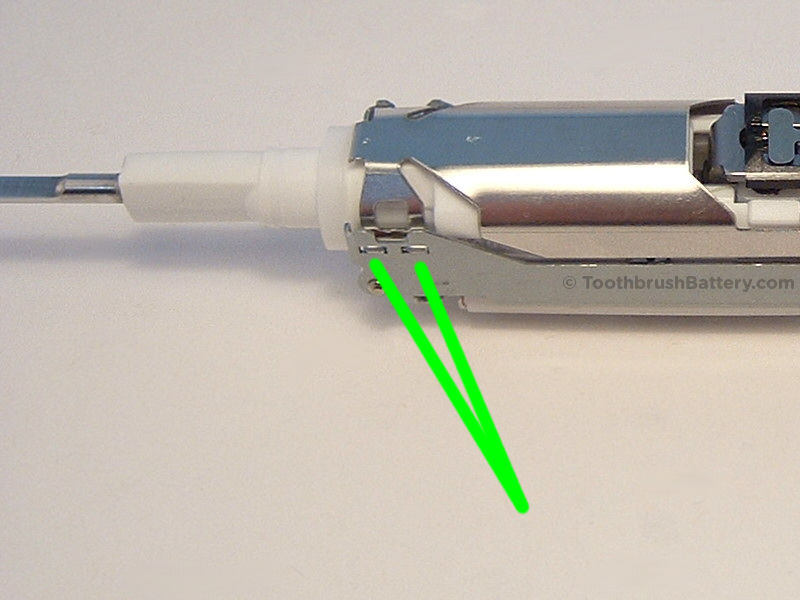
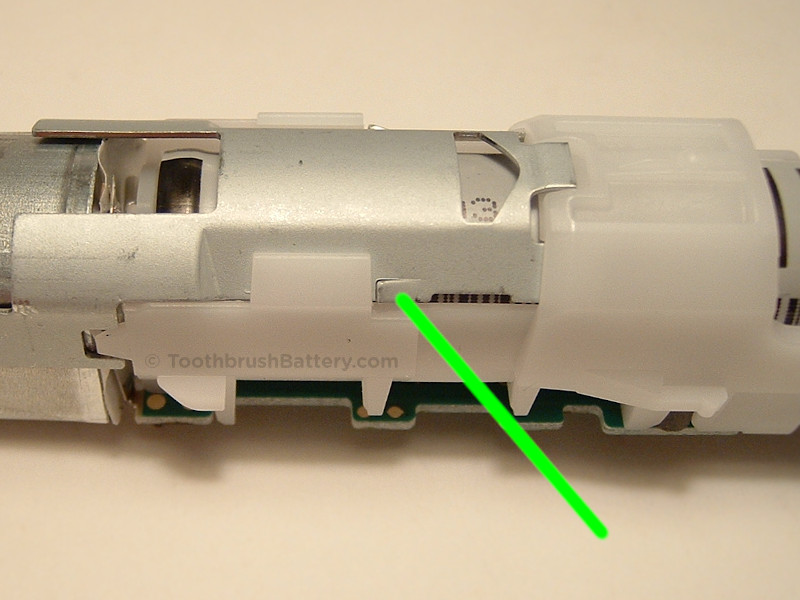
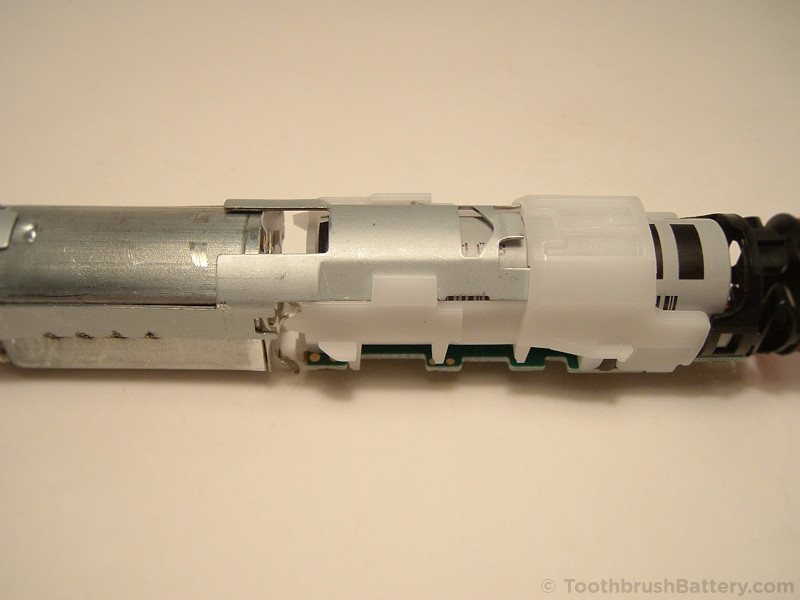
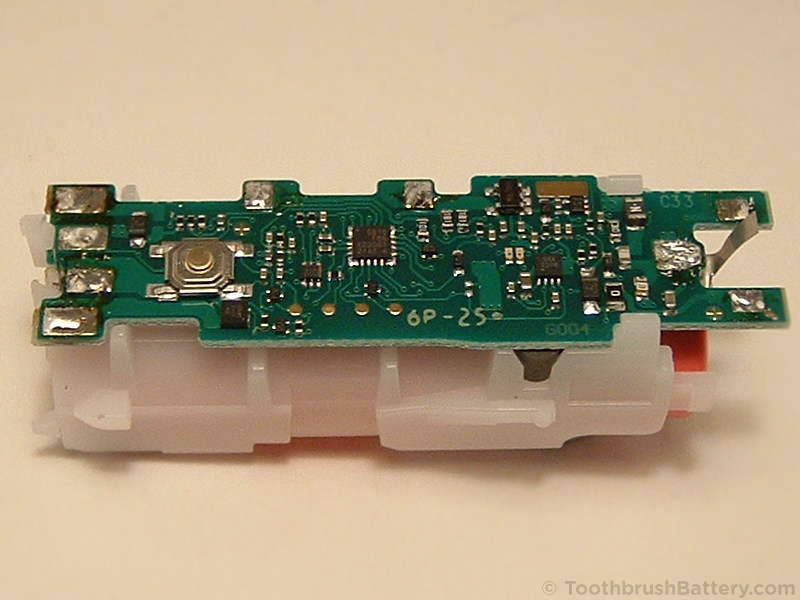
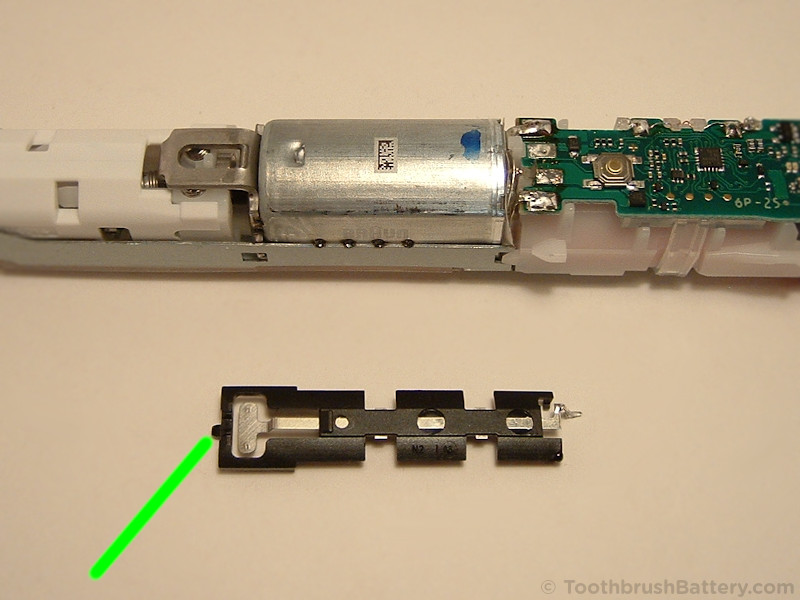
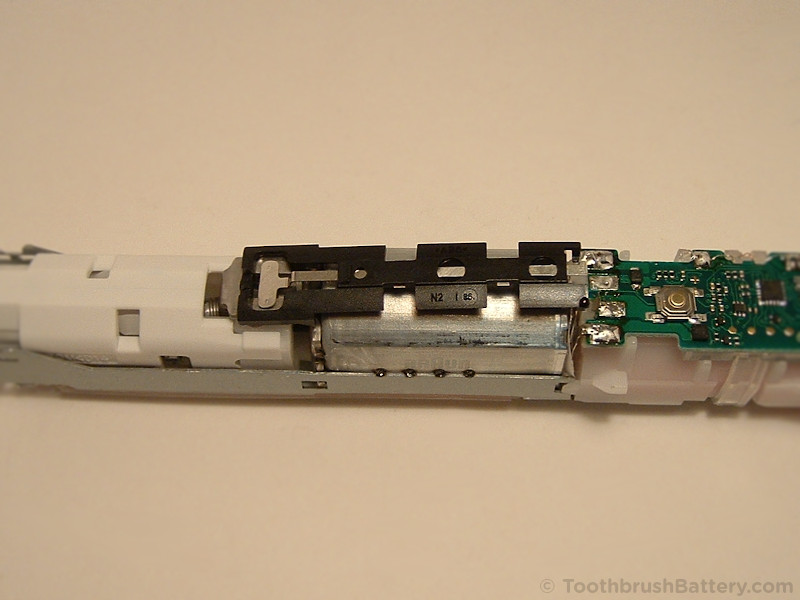
The power switch cover plate needs removing. It clips into two holes on each side, indicated below. Unclip the plate from its holes on one side first, then lift it out to remove it.
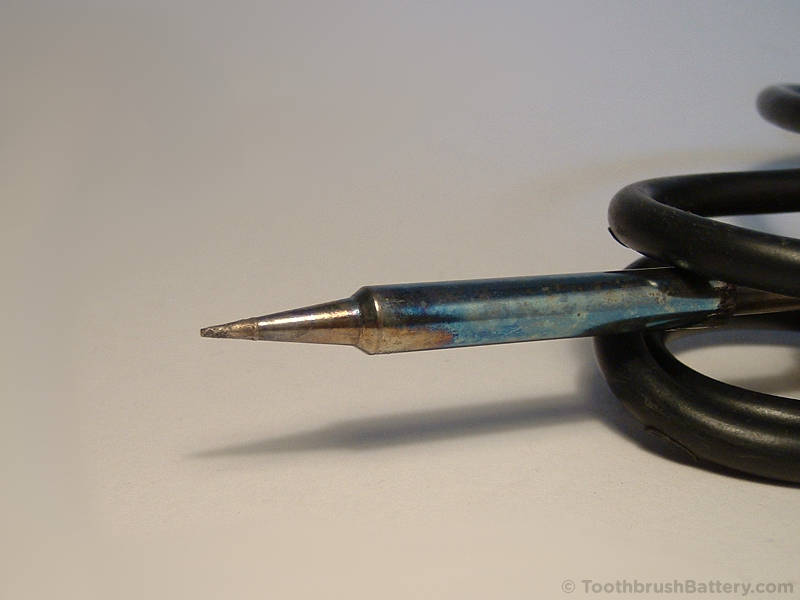
Now’s the time to warm up your soldering iron! A soldering iron with a fine needle/cone tip is recommended for working on these toothbrushes.
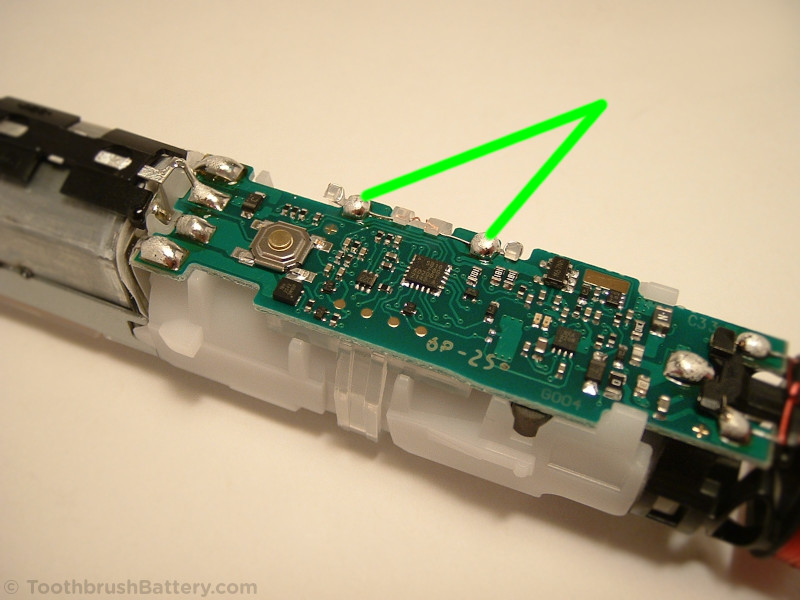
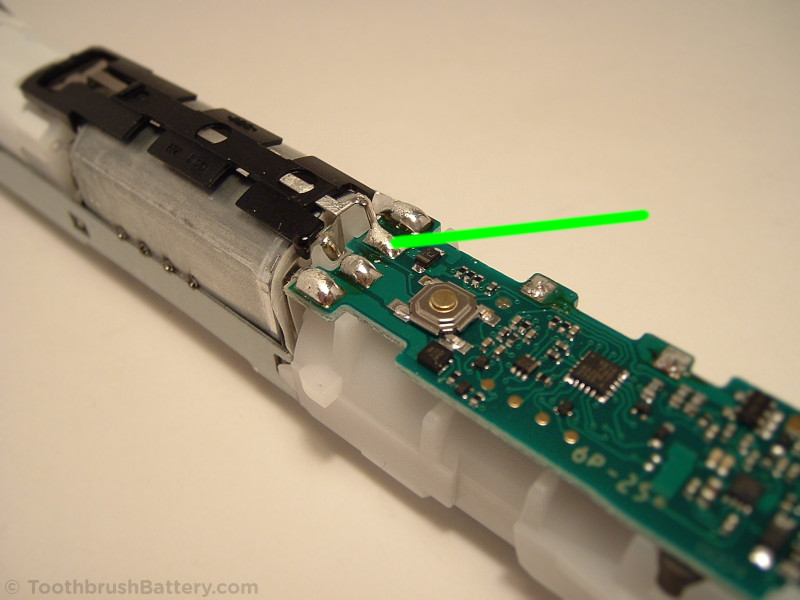
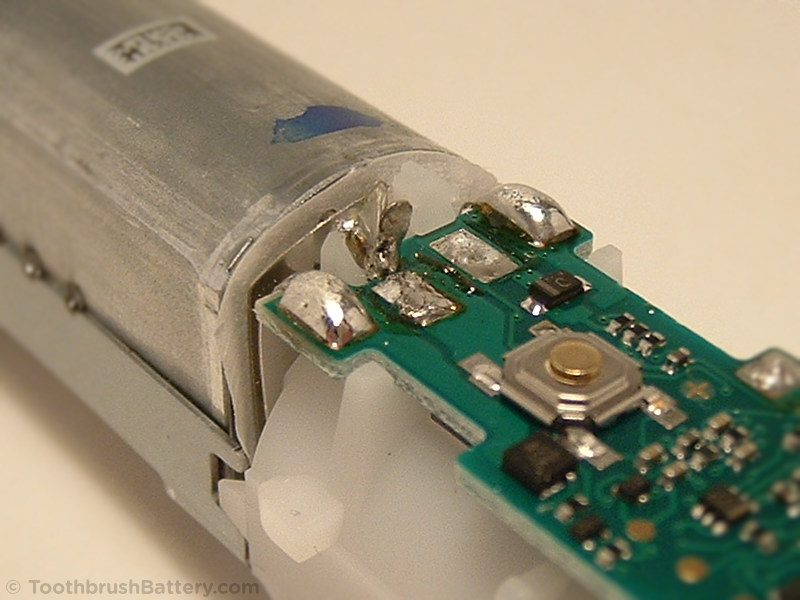
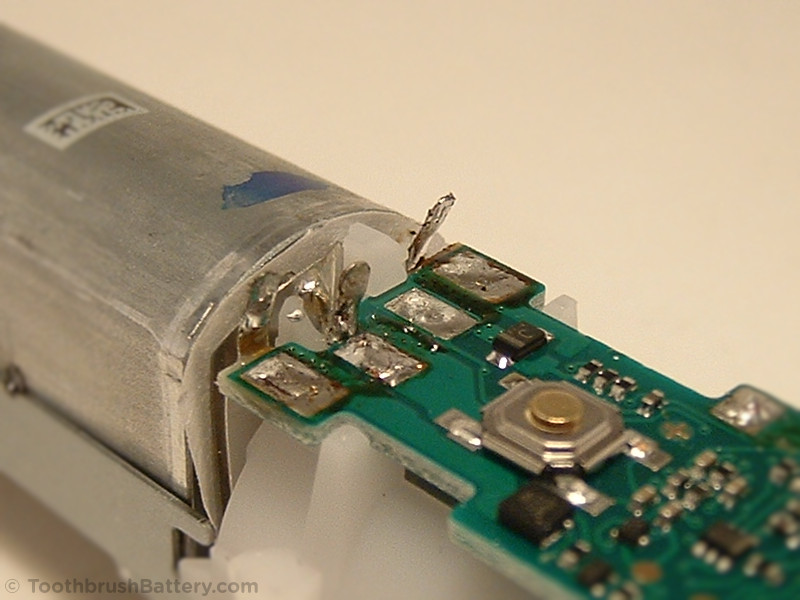
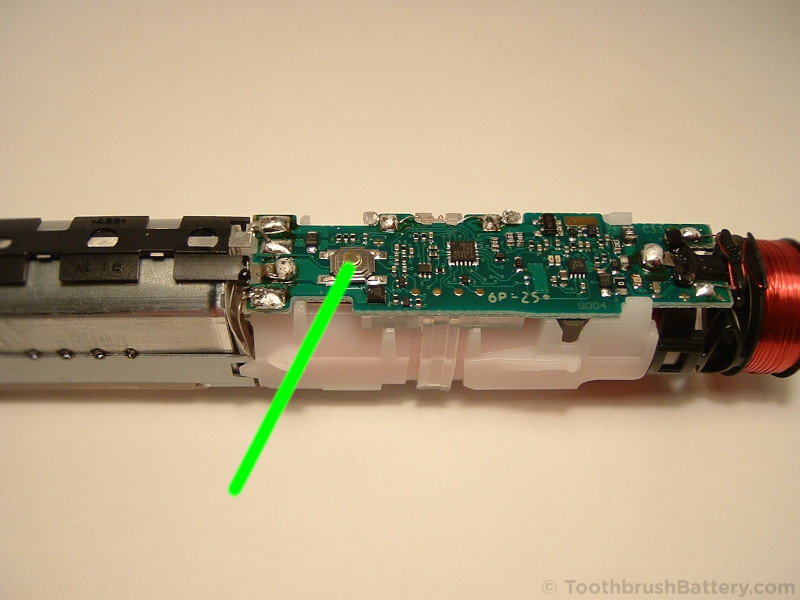
Indicated below is the battery’s negative terminal connection. Ignore the + symbol shown on the PCB which refers to something else. This is the negative (-) battery terminal.

Remove most of the solder from the connection using the soldering iron and a solder sucker or braid. Then reheat the solder joint and using a knife blade lift and bend the solder tag away from the PCB so it is vertical.
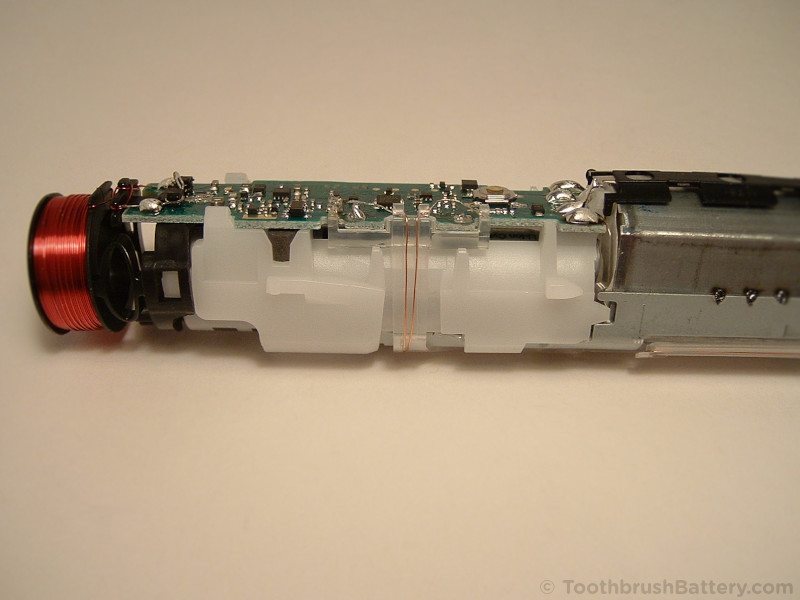
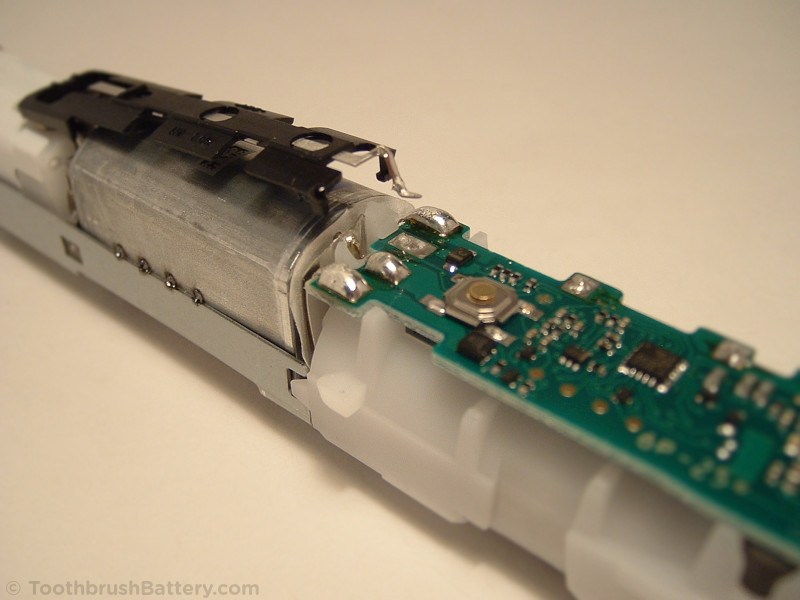
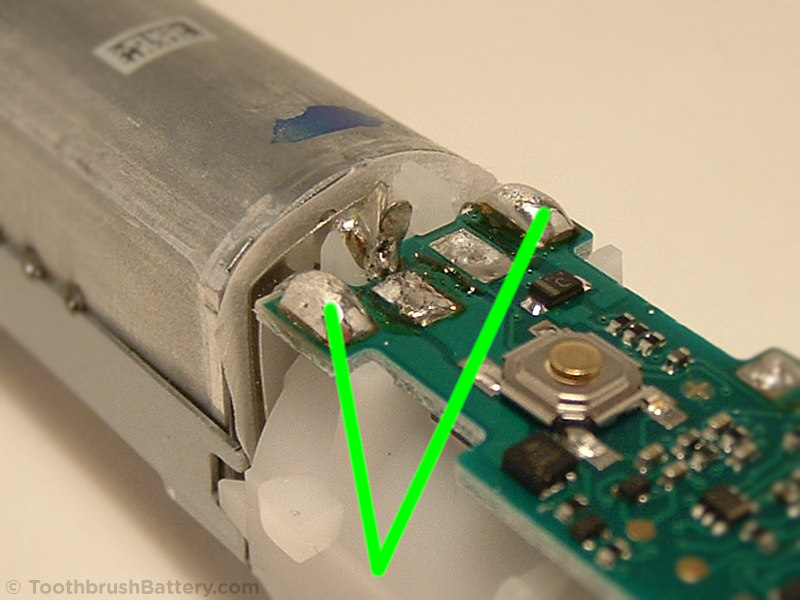
Desolder the two connections for the wires from the pressure warning light, indicated below, and lift them away from the solder pads. Take care not to melt the plastic wire carrier.
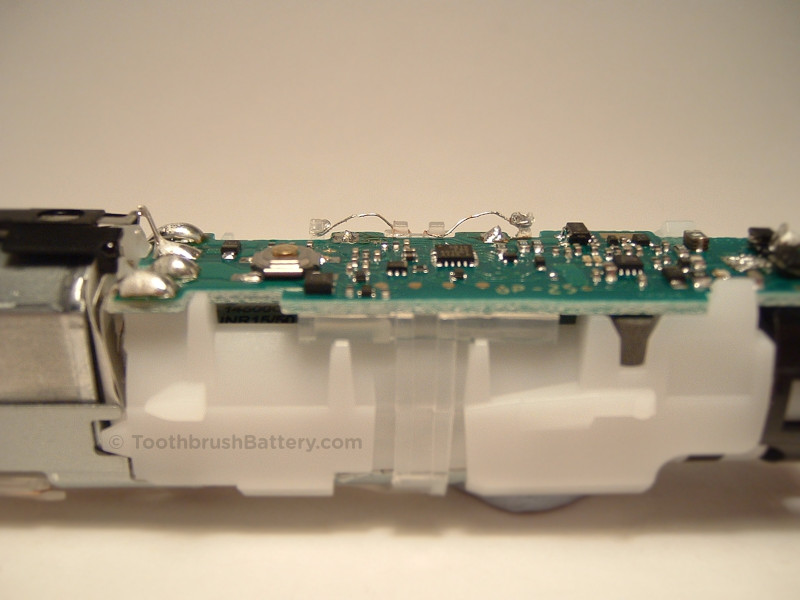
Unclip the clear carrier from this side where it is attached between the white battery holder and the PCB.
Unclip the other side:
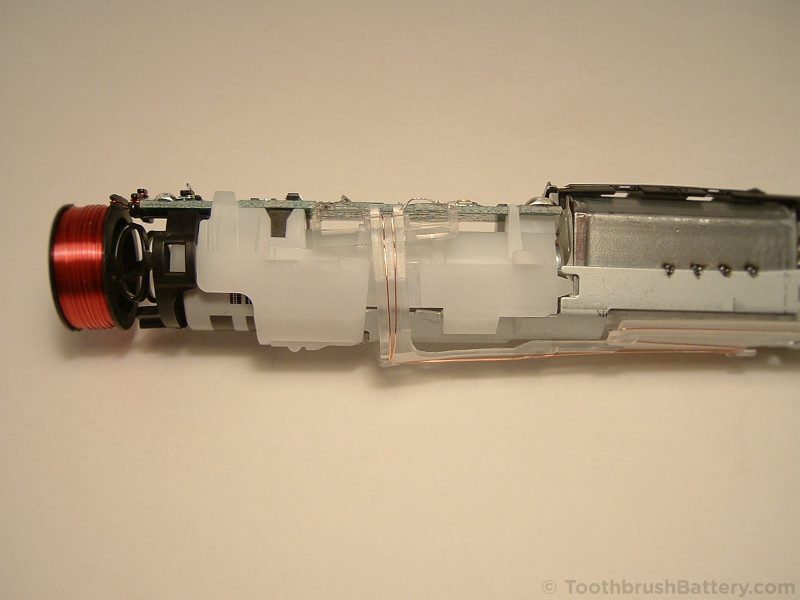
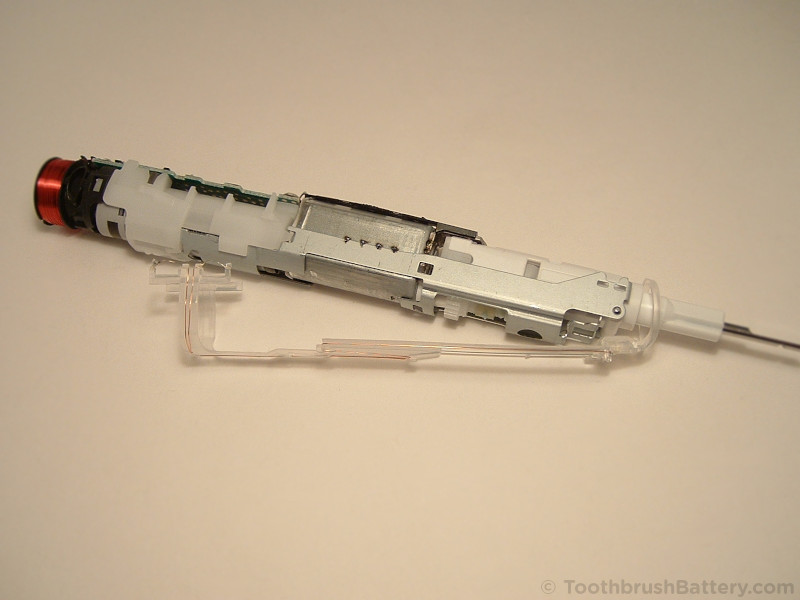
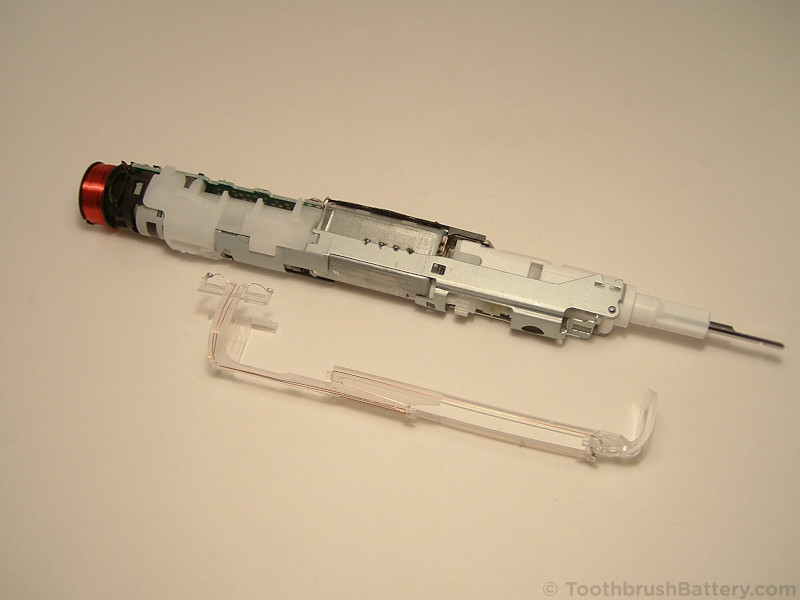
Fold the carrier away from the main mechanism and slide it off the top of the toothbrush.
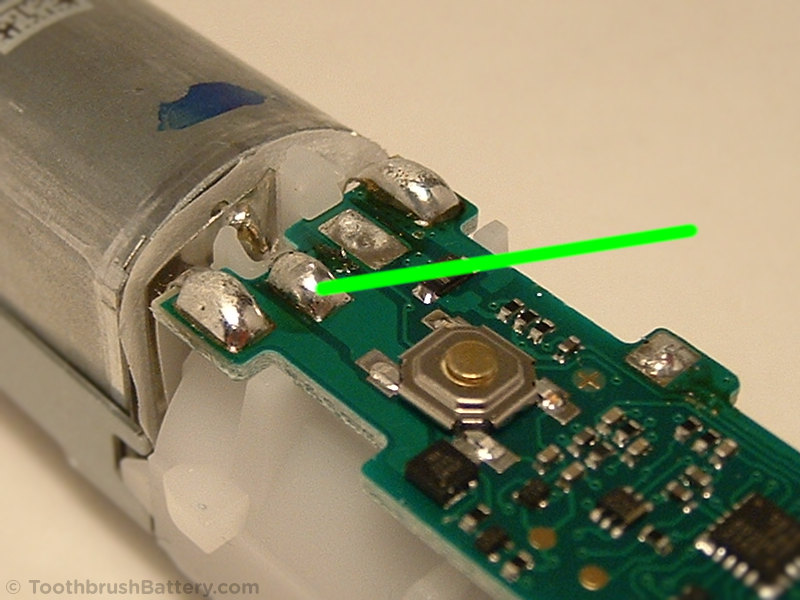
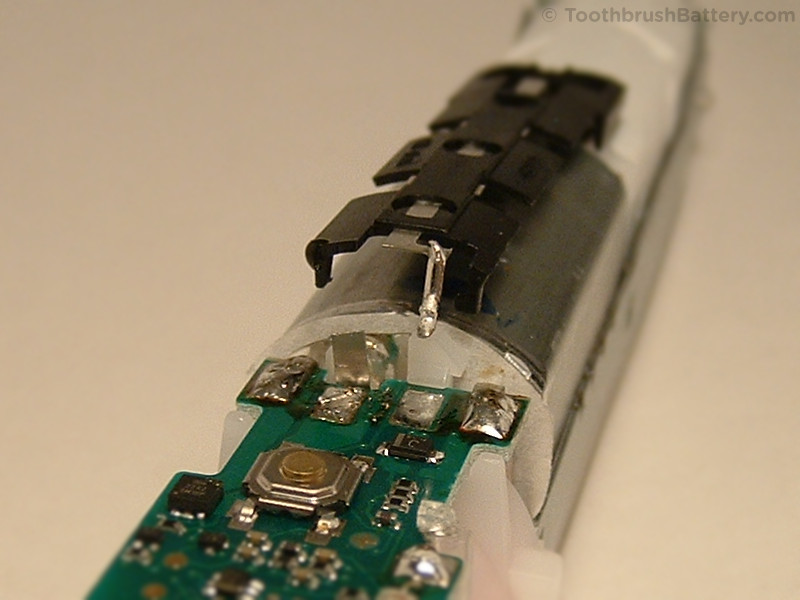
Desolder the connection for the pressure switch from the PCB as indicated below.
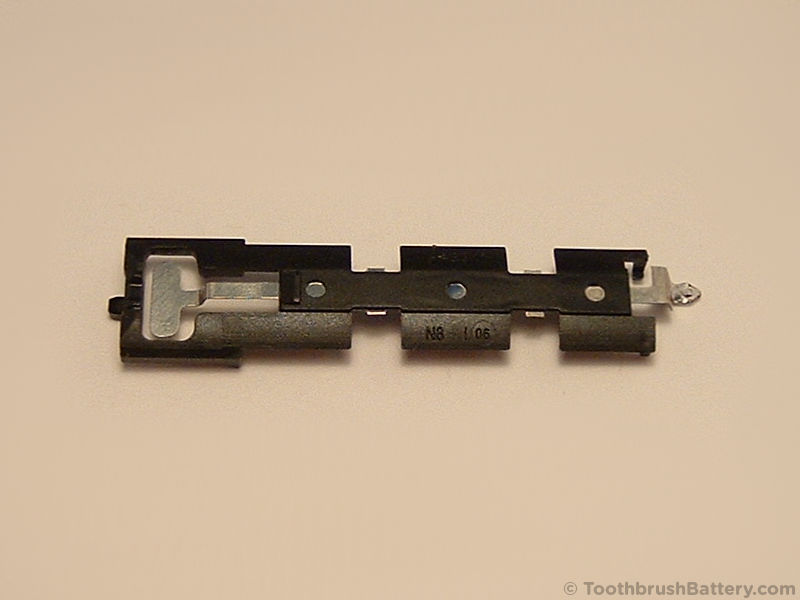
Unclip the pressure switch from near the solder connection end then gently lift it up and out. It is hooked in at the other end.
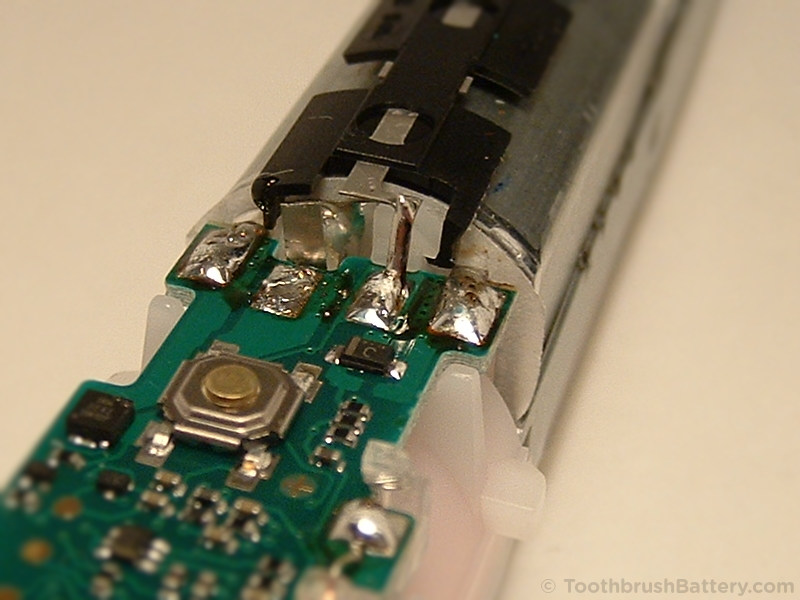
Desolder the positive battery terminal, indicated below, and fold it upwards away from the PCB.
Desolder the two motor connections, indicated below, and fold them up and away from the PCB.
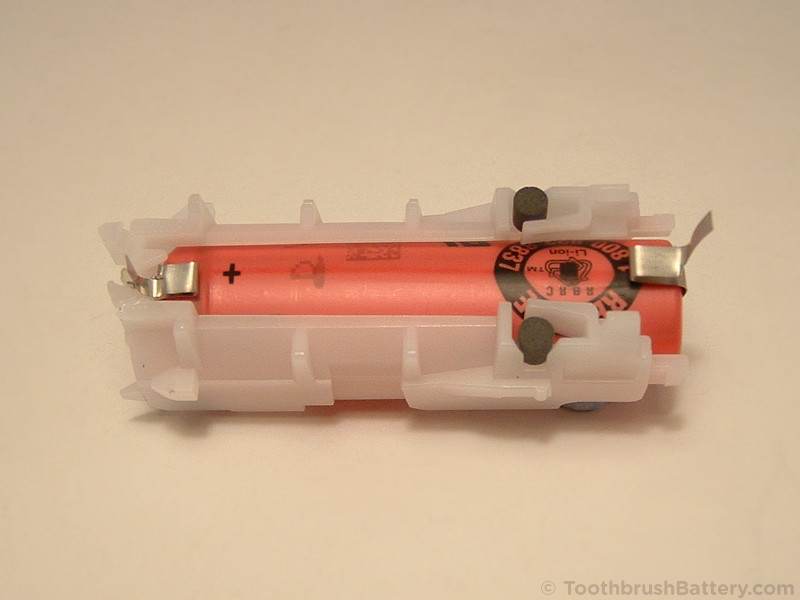
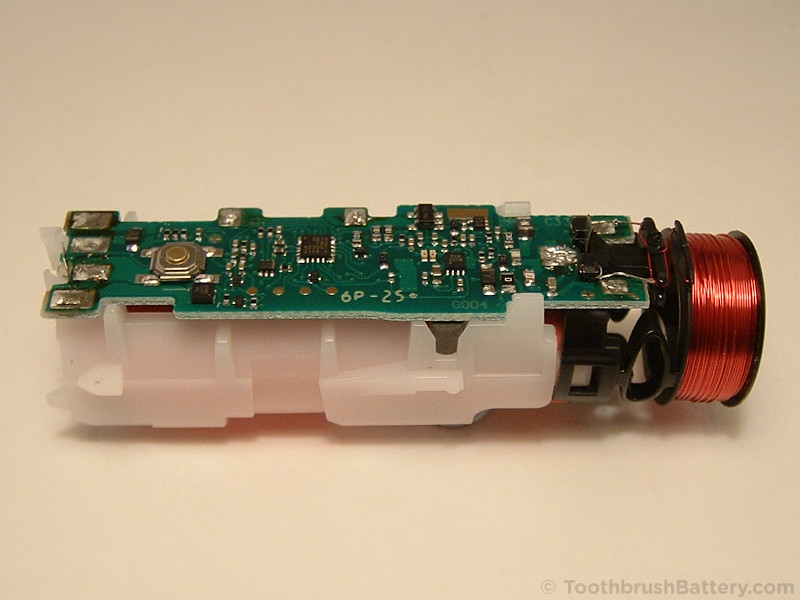
Turn the toothbrush over and inspect the white plastic battery carrier. It is held in place by two tabs in the metal frame.
Gently pull the plastic battery carrier along the metal frame while using a screwdriver to pry the plastic up and over the metal tabs, one side at a time.
Slide the battery carrier off the metal frame.
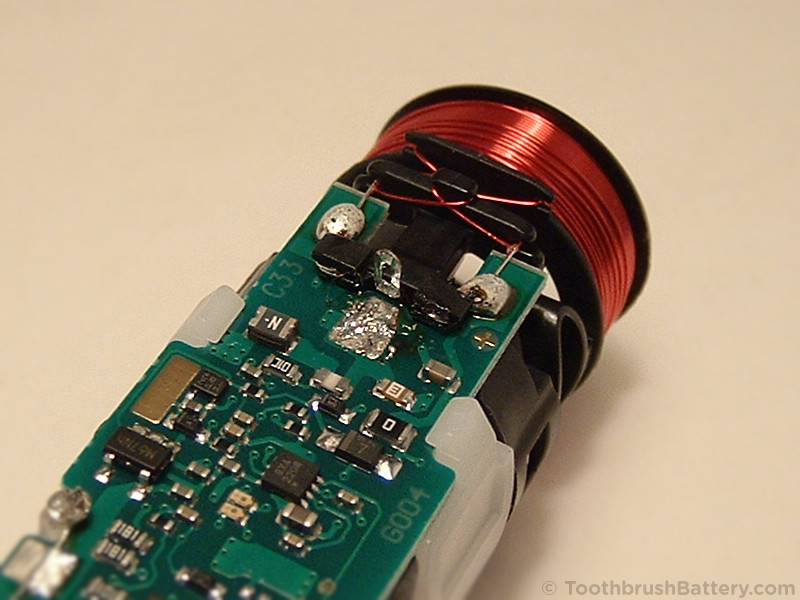
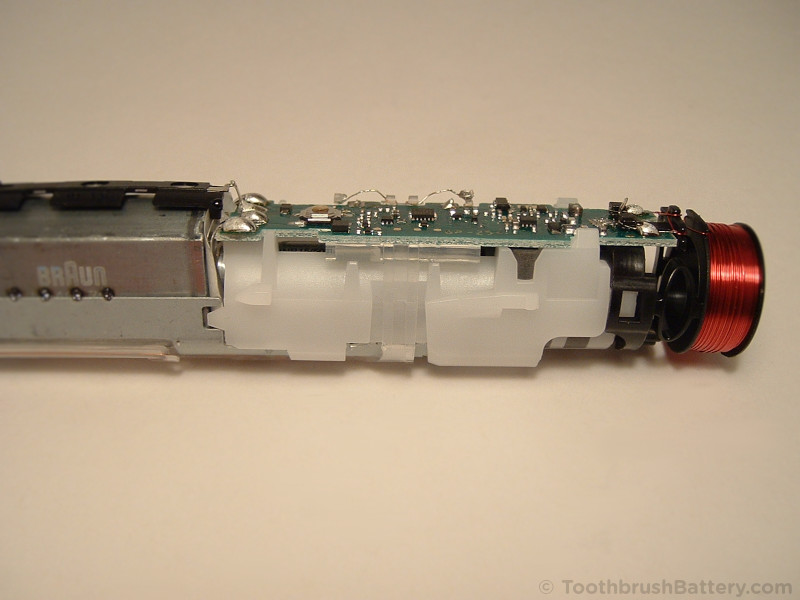
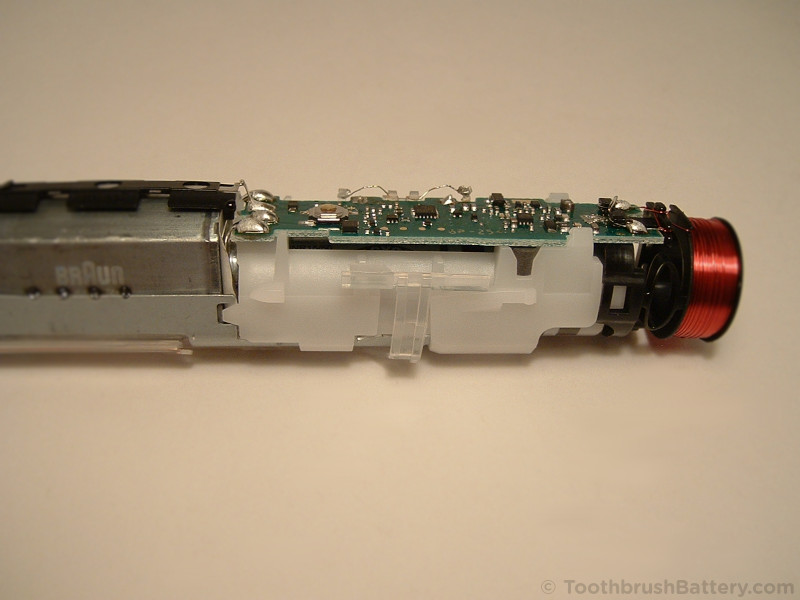
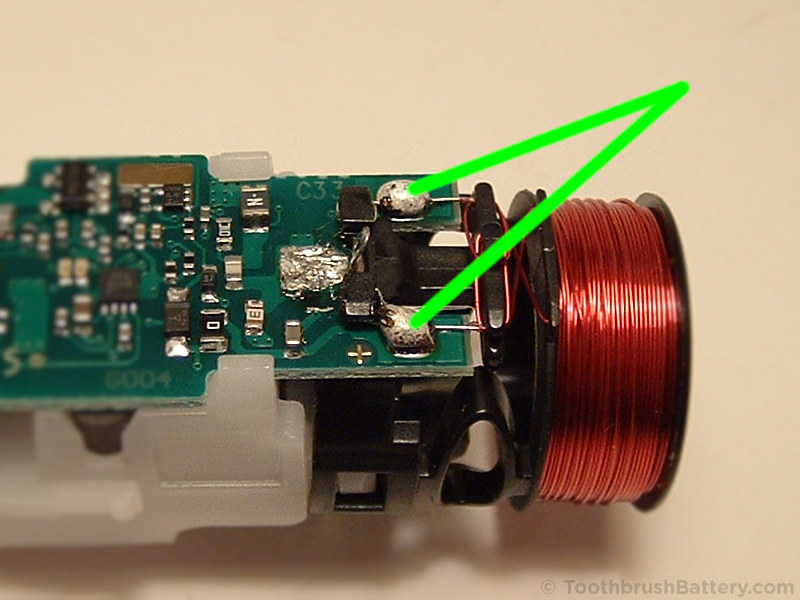
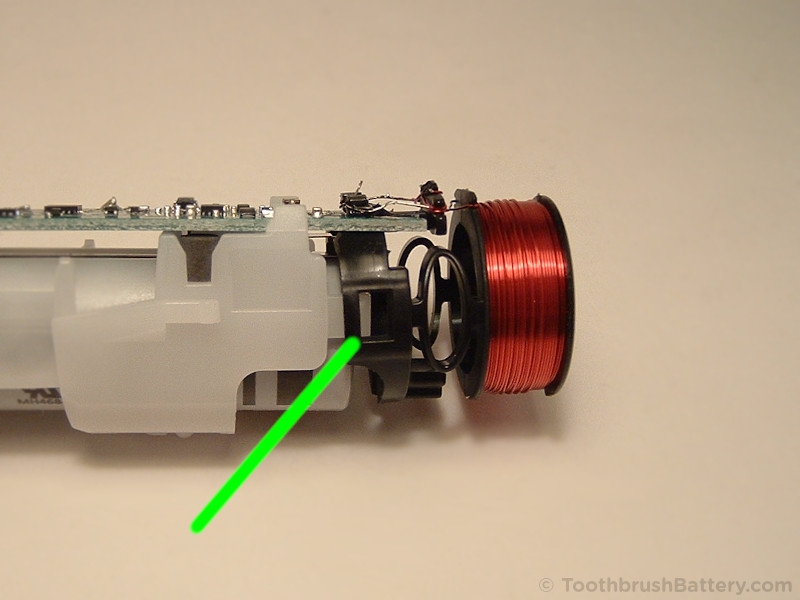
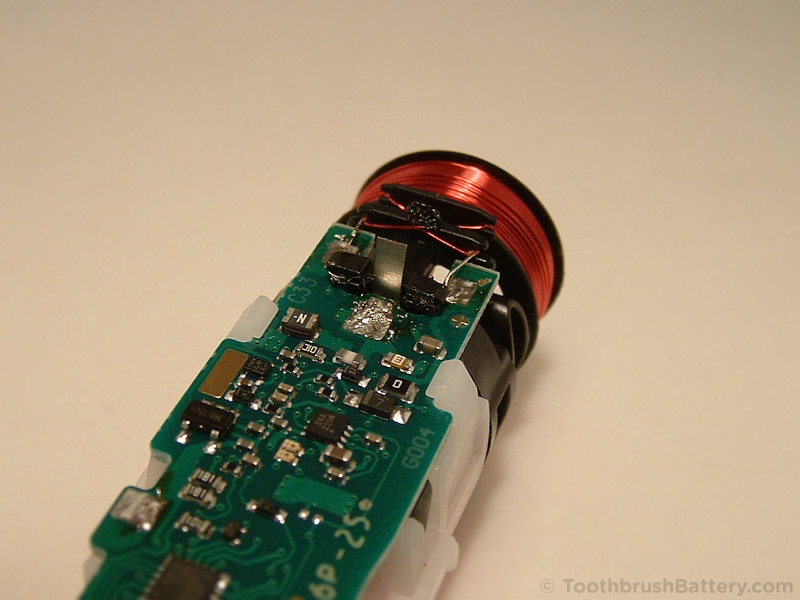
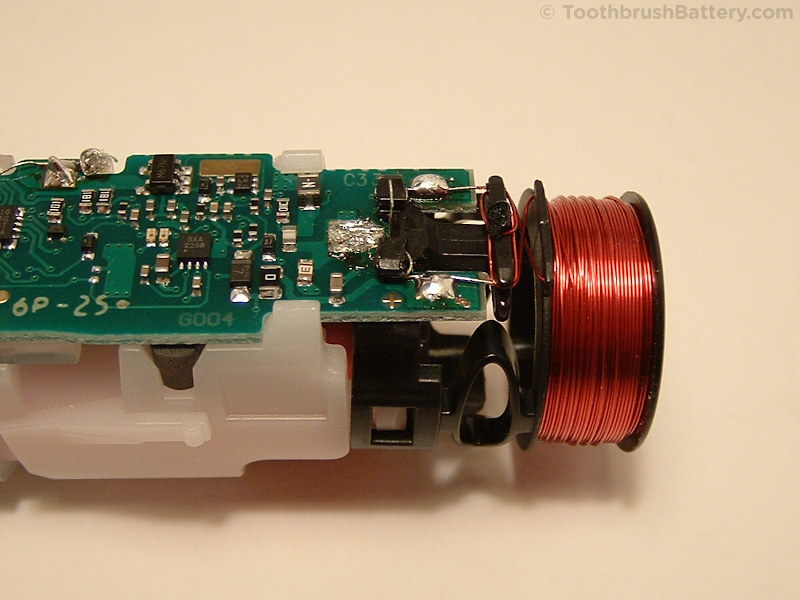
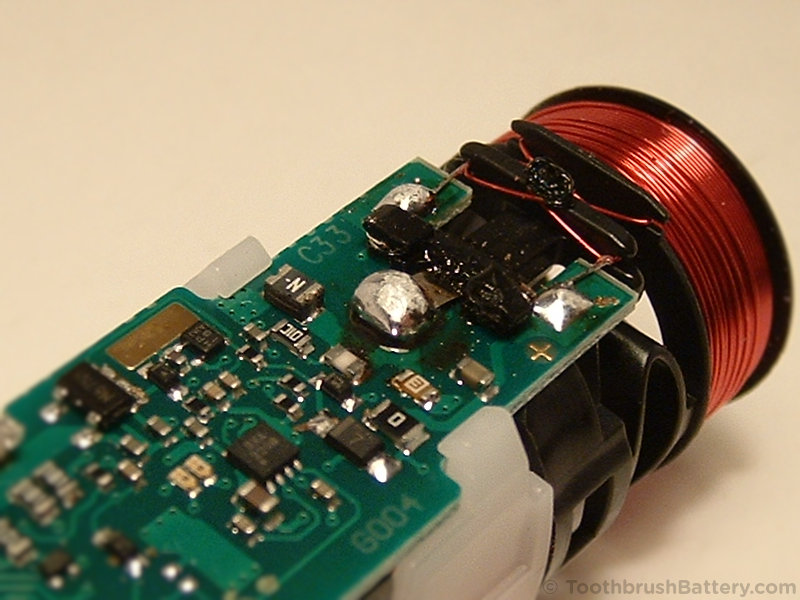
Desolder the two coil-wire connections from the PCB, indicated below, and lift the wires clear of the PCB.
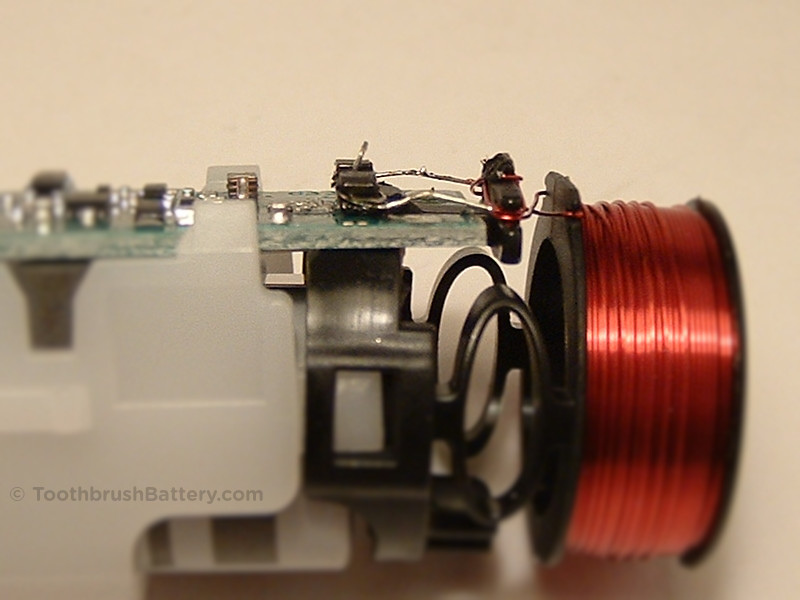
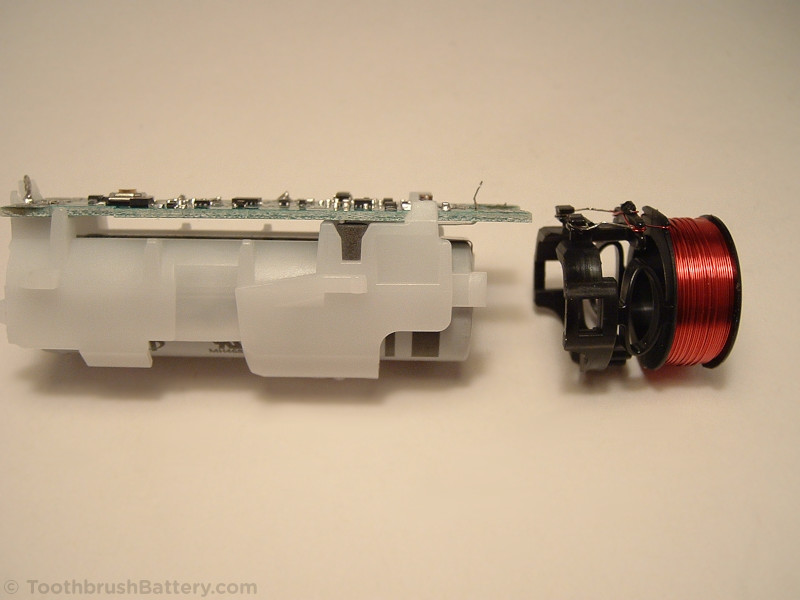
Release the clips holding the black coil carrier to the white battery carrier and slide the coil carrier off the PCB.
Release the two clips holding either side of the PCB to the battery carrier.
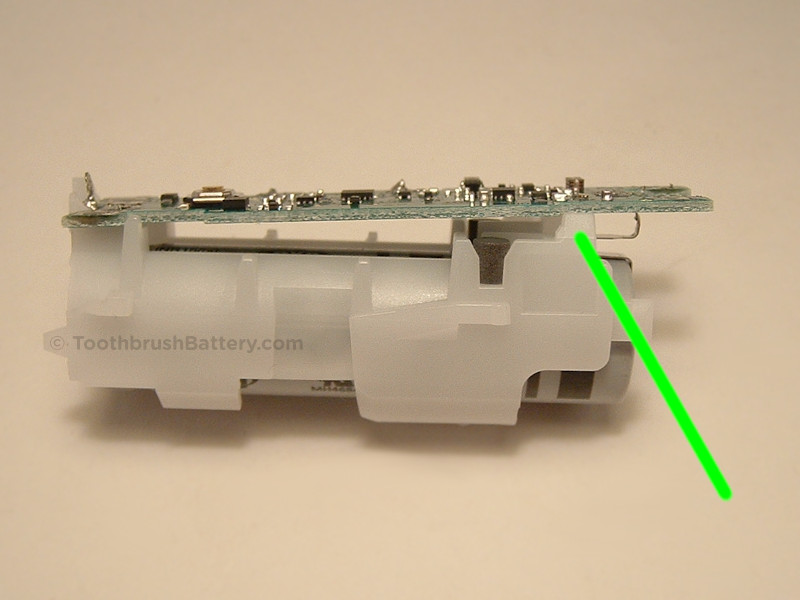
Lift the PCB off the battery carrier.
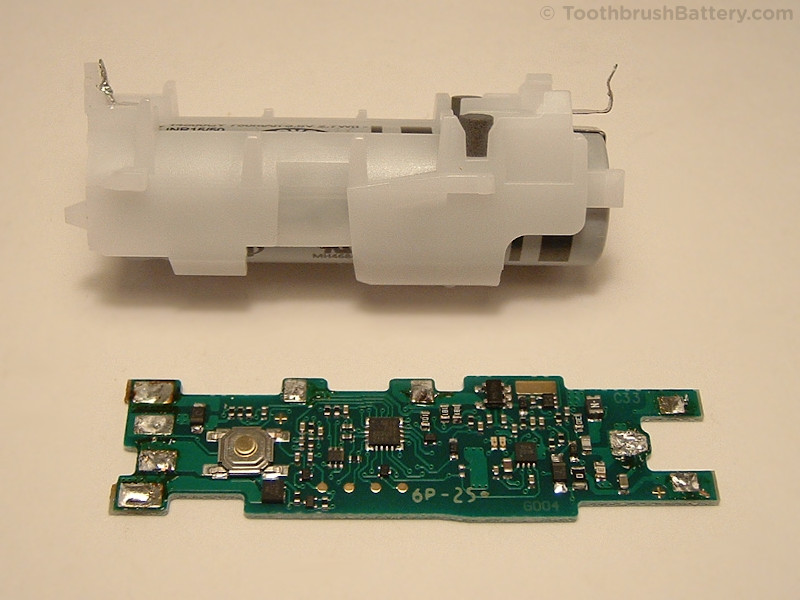
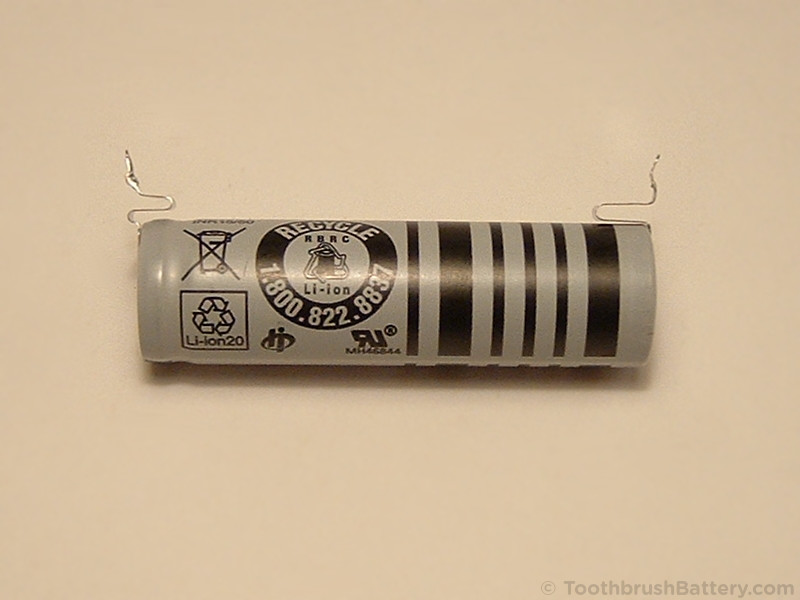
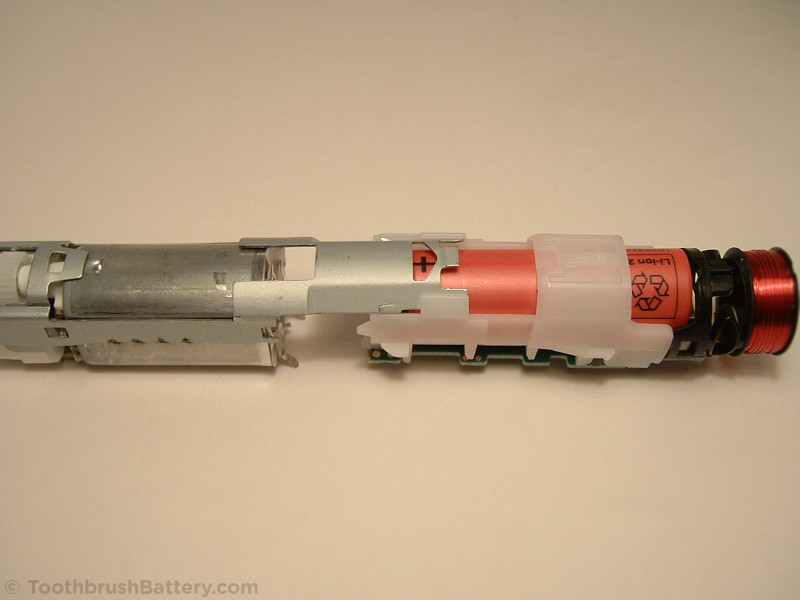
You can now slide the battery out of its carrier. Be careful not to short-circuit the two terminals on anything metal. Note that the positive (+) end of the battery is on the left.
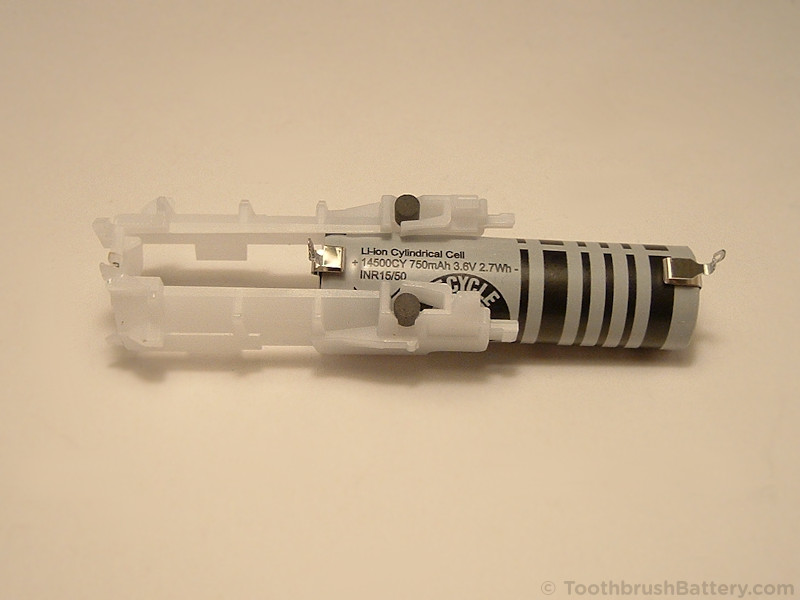
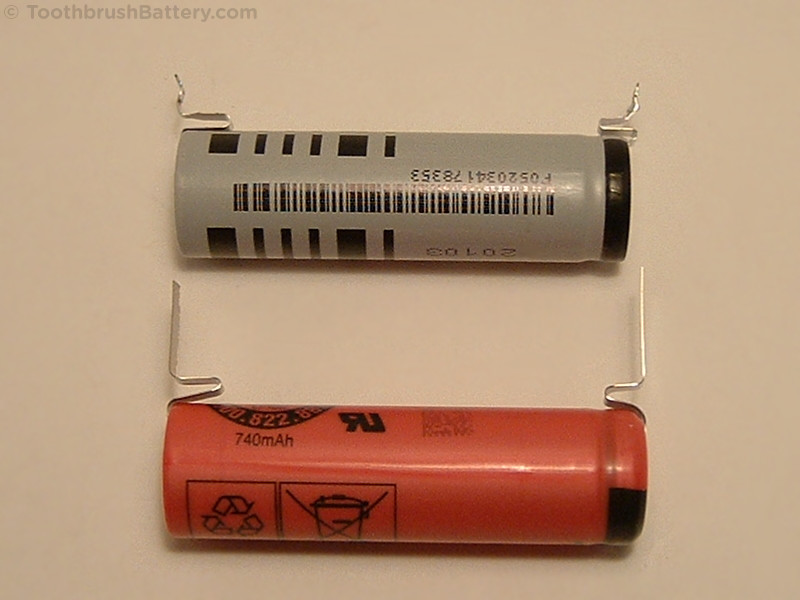
The Type 3772 toothbrush takes these 49mm long, 14mm diameter 3.6V Li-ion batteries. In this guide we replace the grey Braun OE battery with one of our red Sanyo Li-ion toothbrush batteries with flat metal tags on the ends. We also now have the higher capacity grey Braun OE batteries available! Please support us in writing these repair guides by buying your new battery from us.
Genuine Braun OE and Sanyo 3.6V Li-ion batteries with flat metal solder tags are available from us at ToothbrushBattery.com here, or click on the picture below.
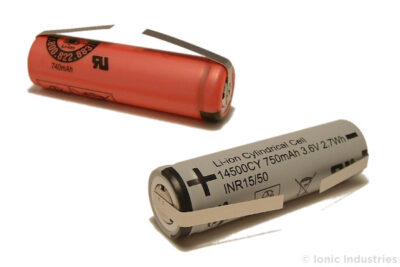
Compare the original battery to its replacement as shown below.
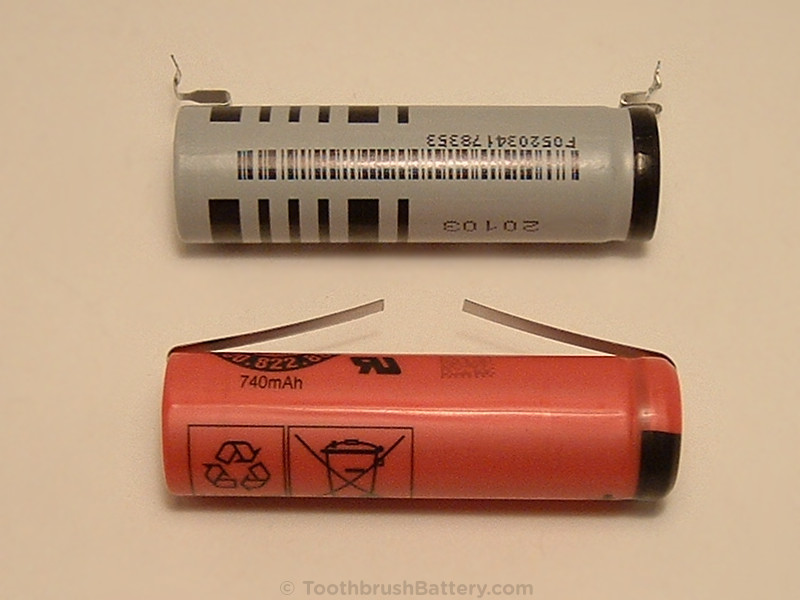
Fold each metal tag to match the pattern of the tags on the original battery. You can fold the tag over the tip of a screwdriver to get a neat bend. Be careful not to short the tags against the other battery when comparing.
Trim both tags to just over the same length as the originals using sharp scissors.

Very carefully start to narrow down the width of the positive terminal solder tag by first snipping into the tag from the left-hand side with the tip of the scissors as shown in the photo below. Don’t try to cut into it half way in one go, just try to cut a quarter of the way in from the side and it will tear to half way. Careful not to cut right through! Then cut down from the top end to remove the piece. This is easier than trying to trim it from both sides.
Positive tags:

Trim the negative solder tag to match the original in the same way.

Slide the new battery into the battery carrier, positive (+) end first, so the positive tag aligns as shown below.
Fit the PCB between the vertical battery tags and onto the battery carrier, tucking it into place under the notches at the positive end first, then clipping it in at the negative end.
Slide the coil carrier onto the PCB, ensuring that the negative battery tag is located as shown below.
Clip the coil carrier into the white battery carrier.
Slide the battery carrier onto the metal frame of the toothbrush and check it latches into place.
Fit the pressure warning light carrier to the top of the brush and clip it into place.

Solder its two wires to the PCB. Be quick to try to avoid melting the plastic wire carrier.

Push down then solder the two coil wires to the PCB.
Fold down and solder the two motor terminals to the PCB.

Clip the front notch of the pressure warning switch into place.
Clip the rear of the pressure warning switch under its latch.

Solder the tag of the pressure warning switch to the PCB.
Fold down and solder the positive battery tag to the PCB.

After visually checking the PCB and all your solder connections for any stray blobs or whiskers of solder you can now make the final battery connection.
Fold down and solder the negative battery tag to the PCB.

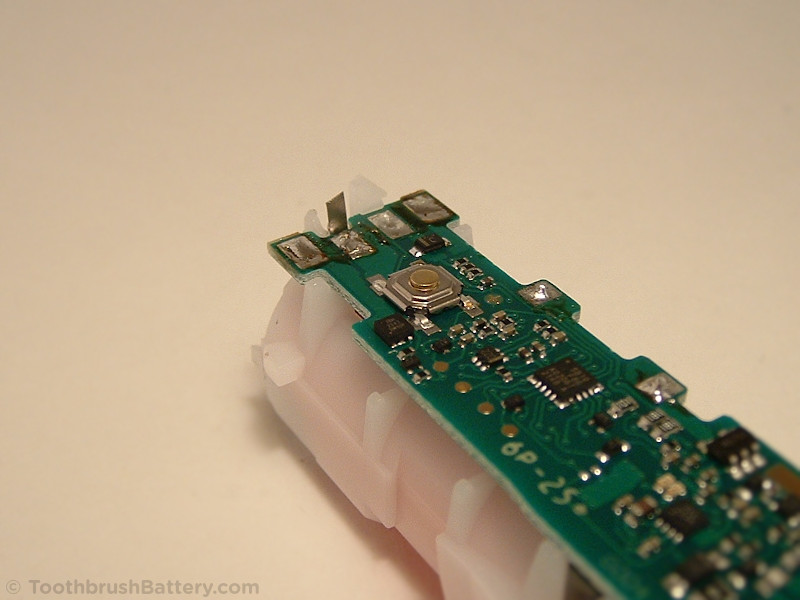
The PCB is now ‘live’ and you can test the new battery by switching on the toothbrush. Hold the brush firmly on either side of the motor then press the switch (indicated below) to turn on the brush for a few seconds.
If the toothbrush appears to be dead you might need to reset its circuitry by standing the assembly on the charger for 5 seconds. It should light up and start charging. Then you can remove it and try the switch again.
Once you are happy that the toothbrush is working clip the switch plate back in place, one side at a time.
Slide the innards of the toothbrush back inside the handle.
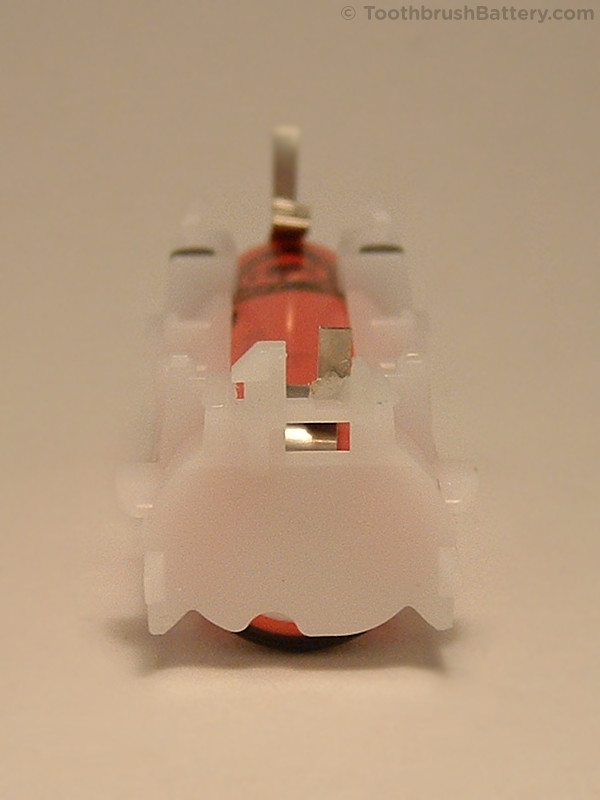
Make sure the innards are pushed in fully so you can see the groove for the ring at the top of the handle as indicated below.
Put the spring back inside the coil at the bottom of the handle.
Clip the base cap back into the handle, hooking it in at the back first.
Put the toothbrush back on the charger to press the base into place.
Heat up the ring in some hot water for 30 seconds, dry it, then push it back into place. You can use a 10 or 11mm ring spanner, or an old brush head to force it on if necessary. Make sure it is fully clipped into place.
You now have a fully repaired Braun Oral-B Pro or Smart Type 3772 toothbrush!
Give the toothbrush a full charge then it’s ready to use.
Please recycle your old battery. It is safest to cut or pull the tags off it with pliers then put sticky tape over at least one end to avoid short-circuits. You can then take it to your local supermarket battery collection point or civic recycling facility.
Please leave any comments, questions or suggestions about this Braun Oral-B Type 3772 battery replacement guide below. Happy brushing!
Frequently Asked Questions
Yes you can replace the battery in the Type 3772 Oral-B Pro/Smart toothbrushes. Follow our guide above to see how to open up your toothbrush handle and replace its internal rechargeable battery.
Details of the replacement Li-ion battery required for the Type 3772 toothbrush are listed in the Tools, Parts and Equipment section of our guide above.
Yes take a look at our list of battery replacement guides to see how to replace the battery in various models of toothbrush from Braun Oral-B, Philips Sonicare and other manufacturers.
These are amazingly detailed and awesome instructions!
Too bad Braun has made their toothbrushes defacto throw away by virtue of the steps and complexity of same.
I will definitely rethink my next electric tooth brush purchase.
Thank you. Just replaced the battery of my toothbrush after going thru ur tutorial. Thanks again!
Thank you for this guide.
The only thing I’m facing right now is turning off if I press the brush down a little. Everything is fine in the second mode.I thought it was because the battery is a little more powerful.
Check the solder connections on the PCB for the pressure switch and for the warning light because you might be generating a short when these are activated.
i liked it, but the water seals are broken now. that defeats the purpose of the toothbrush because of motherboard corrosion by water.
The rubber seals should still seal the handle correctly after reassembly, unless they have been cut. Always store the toothbrush lying flat on its back with the head removed between uses to prevent water ingress and mould growth.
I have a type 3772. I followed the instructions (very good instructions) but the toothbrush just runs for about a second each time the button is pushed. If I connect the motor to the positive terminal it runs fine. What have I done wrong?
As well as inspecting for stray whiskers/blobs of solder, and for short circuits, give the brush a 10-second charge to reset the circuitry. If it is still behaving the same then give it a full overnight charge.
Just done 2 brushes, the first one didn’t work at all after the change the second one works ok but the red light is on constantly. Any ideas.
The continuous red light is often the pressure switch either not connected, or a short on the solder connection.
If the other brush is still dead after 10 seconds on charge to reset the circuitry carry out all the checks on our troubleshooting page.